Virtual Open House - Winter Wonderland Card
The Snowfall Acetate creates a beautiful winter-y feel to pair with any of the Paper Cuts dies from Creative Expressions. This card creates an elegant display with a few simple elements.
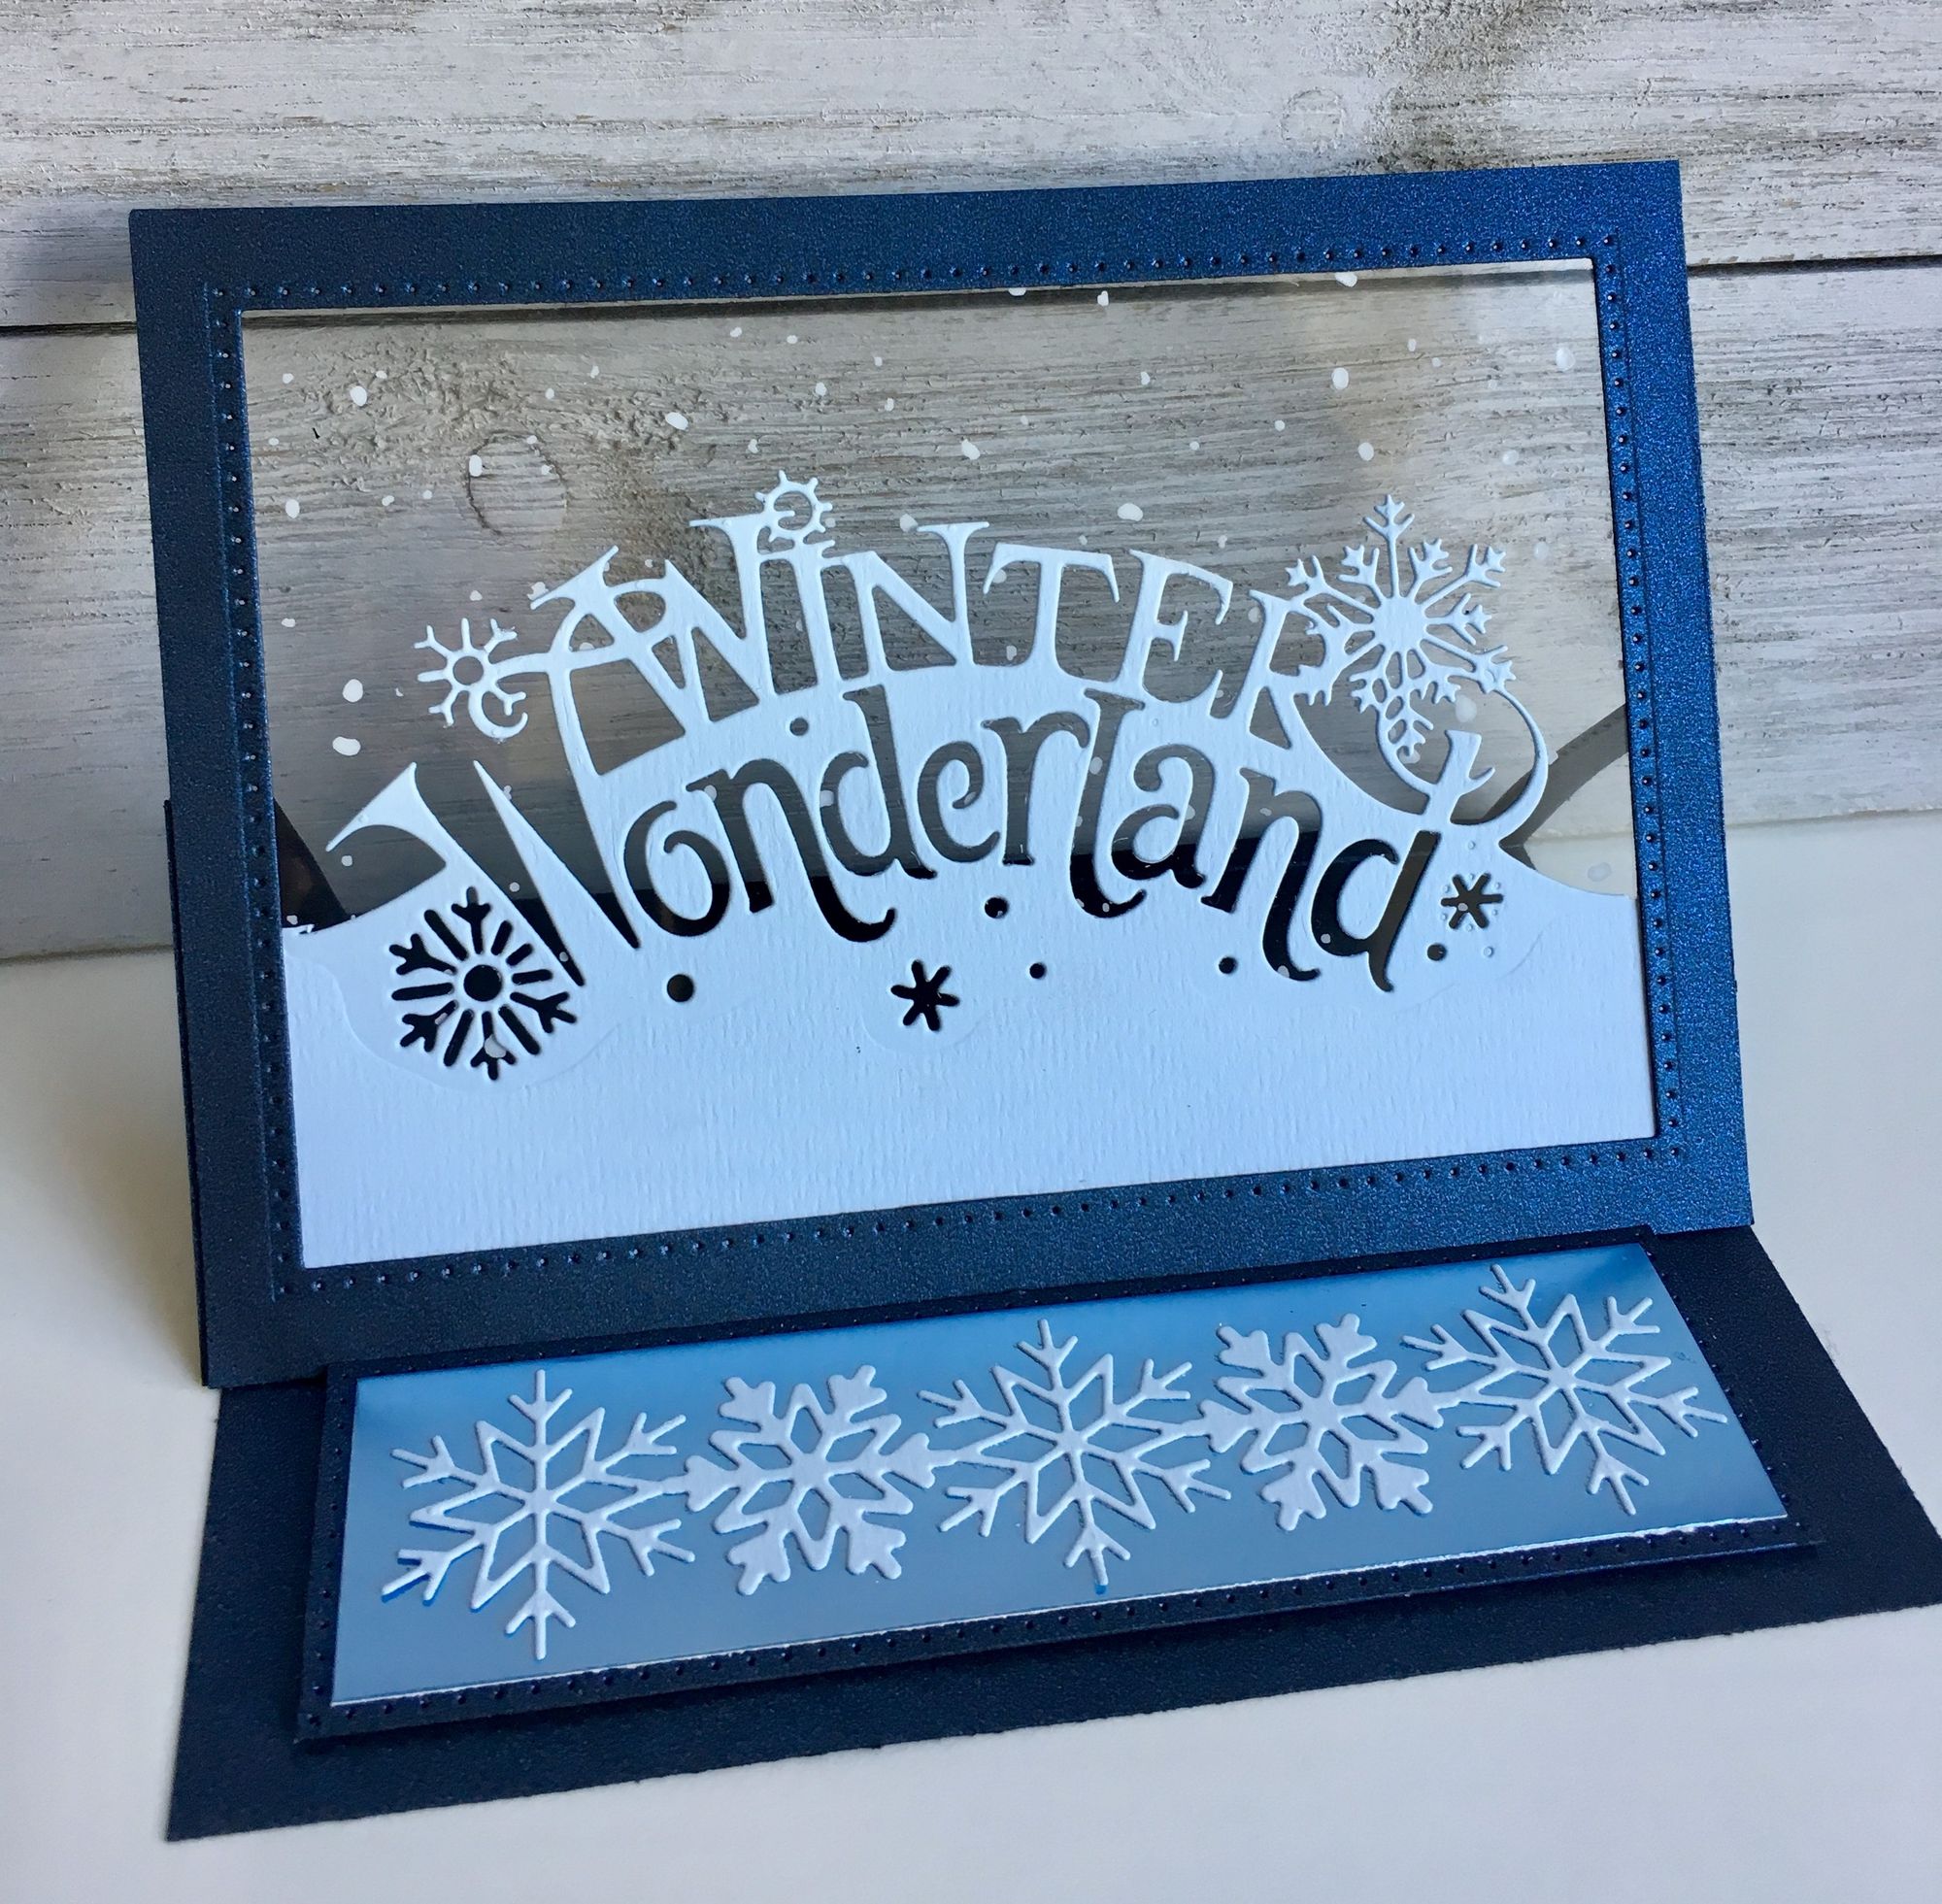
The Snowfall Acetate creates a beautiful winter-y feel to pair with any of the Paper Cuts dies from Creative Expressions. This card creates an elegant display with a few simple elements.
Follow along with the video as we assemble the Christmas Virtual Open House Kit. or you can skip to the instructions at the bottom of this post to create the card from scratch!
Assembly of Virtual Open House Kit
If you purchased a Virtual Open House Kit, follow along with these instruction to assemble your card.
- Score the Midnight Blue card base horizontally down the middle at 5". On the front frame panel, score horizontally down the middle at 2.5".
- Trim the Aqua Cardstock sentiment die cut so that it fits within the 5" x 7" front panel frame.
- Using double sided tape, attach the sentiment to the bottom of the 5”x7” frame.
- Using double sided tape, attach the Snowfall Acetate to the back of the 5”x7” frame.
- Using double sided tape, attach the bottom of the 5”x7” frame, sentiment and acetate to the bottom 2.5” of the front of the card base. The front of the card should hinge at the line you scored at 2.5”.
- To create the ledge for the front of your card to rest on, place the snowflake die cut onto the Sticky Specks sheet to add sticky dots to the back. Place the snowflake die cut on the Silver Mirror Cardstock strip.
- Using double sided tape, attach the Silver Mirror Cardstock strip to the Midnight Blue Cardstock strip.
- Add several Foam Pads to the back of the Midnight Blue Cardstock strip and attach to the interior of the card to create the ledge.
- Add pearls to embellish, if desired.
Your card is complete!

From Scratch
To make this card from scratch, follow along with these instructions:
- Cut the card base out of Midnight Blue Cardstock at 10” x 7”. Score down the middle at 5” on the 10” side and at 2.5” on the 10” side.
- Cut an additional 5” x 7” rectangle out of the Midnight Blue Cardstock.
- Using a 6 ⅛” x 4 ⅛” Rectangle Die, cut out the front frame of the card base on the side that is scored at 2.5”.
- Using the same Rectangle Die, cut out the frame on the 5” x 7” Midnight Blue Cardstock.
- Cut the Snowfall Acetate to 5” x 7”.
- With your Aqua Cardstock horizontal, cut out the Winter Wonderland die at the top of the sheet. Trim the cut out so the die cutout is 3.5” from the tip of the top snowflake to the bottom of the die cutout, and 6 ¾” wide.
- Using double sided tape, attach the sentiment to the bottom of the 5”x7” frame.
- Using double sided tape, attach the Snowfall Acetate to the back of the 5”x7” frame.
- Using double sided tape, attach the bottom of the 5”x7” frame, sentiment and acetate to the bottom 2.5” of the front of the card base. The front of the card should hinge at the line you scored at 2.5”.
- To create the ledge for the front of your card to rest on, cut a strip of Midnight Blue Cardstock to 6” x 1 ¾”. Cut a strip of Silver Mirror Cardstock to 5 ¾” x 1 ½”.
- Cut the snowflakes from the Aqua Cardstock using the snowflake die. Place the snowflake die cut onto the Sticky Specks sheet to add sticky dots to the back. Place the snowflake die cut on the Silver Mirror Cardstock strip.
- Using double sided tape, attach the Silver Mirror Cardstock strip to the Midnight Blue Cardstock strip.
- Add several Foam Pads to the back of the Midnight Blue Cardstock strip and attach to the interior of the card to create the ledge.
- Add pearls to embellish if desired.
Your card is complete!
We hope you enjoyed making this card with Ecstasy Crafts!

Supplies:
- Creative Expressions Paper Cuts Edger - Winter Wonderland (CEDPC1137)
- Frantic Stamper Precision Die - Snowflake Border (FRA10335)
- Creative Expressions Noble Double Pierced Rectangle Die (CED5512)
- Hunkydory Crafts Snowfall Acetate (LFA110)
- Creative Expressions Midnight Blue A4 Pearl Cardstock (PC007)
- Joy! Crafts Aqua Cardstock (80990008)
- Joy! Crafts Silver Mirror Cardstock (80110104)
- Nellie's Choice Adhesive Pearl Stones (APS407)
- Ecstasy Crafts Sticky Specks (ECSSA5)
- Be Creative Double Sided Tape
- 3D Foam Pads