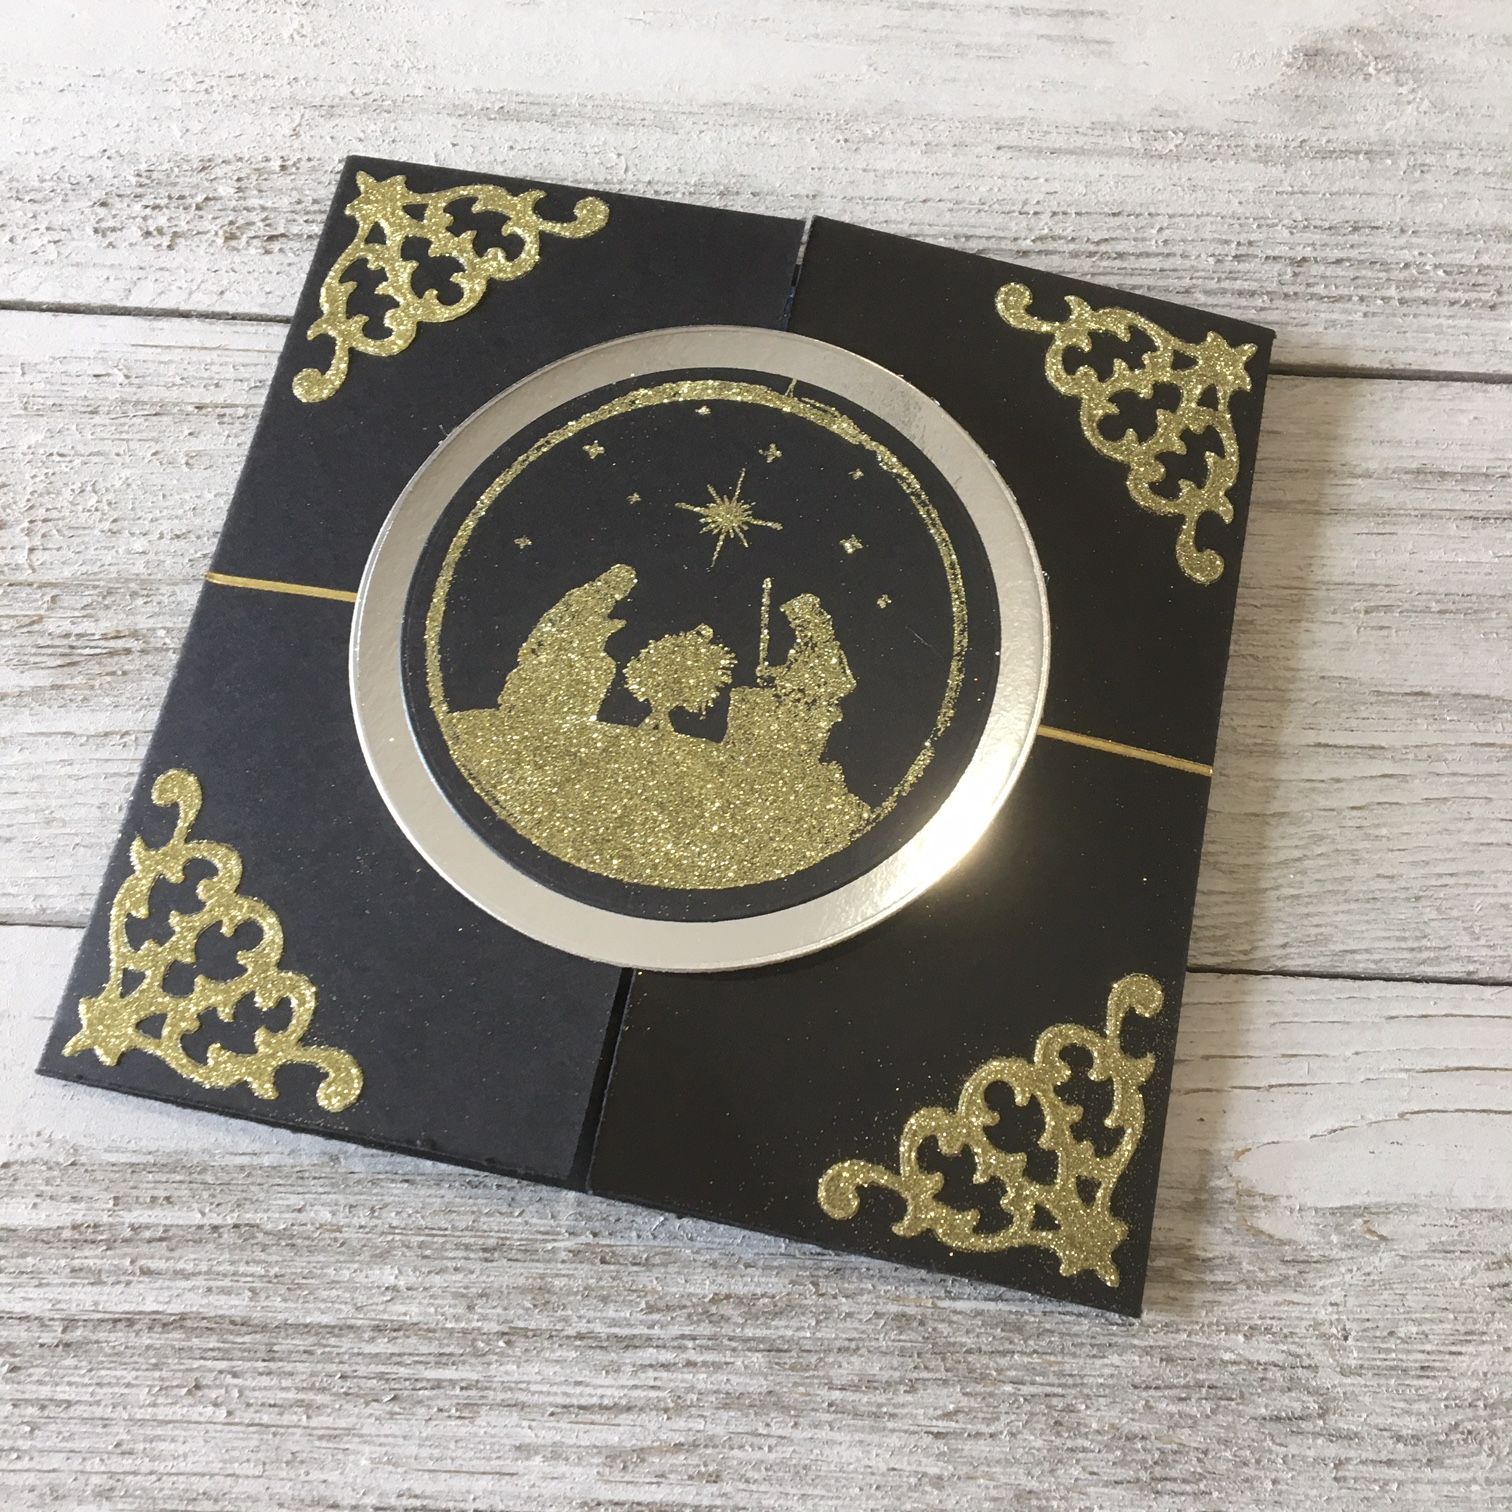
Virtual Open House Nativity Card
Use glitter with a clear stamp and double-sided stickers for a beautifully coordinated effect.

Use glitter with a clear stamp and double-sided stickers for a beautifully coordinated effect.
If you purchased a Christmas Virtual Open House Kit, you can skip to the Assembly portion of these instructions.
Full instructions
To make this card from scratch, follow along with these instructions. If you purchased a Virtual Open House Kit, some of these steps are already completed for you. Scroll down for Virtual Open House Kit Instructions.
- Cut the card base out of black cardstock to 10x5 inches. Score along the long side of the cardstock at 2.5 inches from each end.
- Use a round multiframe die to cut one 2.8inch circle from black card stock, and one 3.3 inch circle from silver mirror carstock.
- Mount your Nativity stamp onto a clear acrylic block or other stamping tool. Because of the small surface area of the black circle, we find an acrylic block to be the easiest method for stamping this project.
- Squeeze a quarter-sized amount of Flake and Glitter Glue onto your craft mat. Using a small sponge, dab the glue onto your stamp until the entire design is evenly covered. Stamp onto your black circle of cardstock. Gently remove and clean your stamp with warm soapy water.
- Once your glued image has become tacky (it will have a blue hue), pour glitter liberally over the design. Dump excess glitter off stamped image onto a scrap piece of paper and return to container. Use a brush to gently clear excess glitter from stamped image. Set aside.
- Apply four corner double-sided stickers to the four front corners of your card. Apply glitter liberally to sticky surface and then dump excess onto scrap and return to container. Clean with a gentle brush.
- Add a gold border sticker to your card by measuring 2.5 inches from the top of the card and placing the sticker evenly across the left hand panel. Trim at the card opening. Repeat on the right hand side.
- Use double-sided tape or glue to attach your stamped circle onto your mirrored circle. Use foam tabs on just the left hand side of the circle, and attach it to the left side panel on the front of the card.
Your card is complete!
Virtual Open House Kit Instructions
If you purchased a Virtual Open House Kit, follow along with these instruction to assemble your card.
- Find the 10x5 black cardstock piece, and score along the long side of the cardstock at 2.5 inches from each end. This creates your card base.
- Locate the small black pre-cut circle, this will be your stamping surface.
- Mount your Nativity stamp onto a clear acrylic block or other stamping tool. Because of the small surface area of the black circle, we find an acrylic block to be the easiest method for stamping this project.
- Squeeze a quarter-sized amount of Flake and Glitter Glue onto your craft mat. Using a small sponge, dab the glue onto your stamp until the entire design is evenly covered. Stamp onto your black circle of cardstock. Gently remove and clean your stamp with warm soapy water.
- Once your glued image has become tacky (it will have a blue hue), pour glitter liberally over the design. Dump excess glitter off stamped image onto a scrap piece of paper and return to container. Use a brush to gently clear excess glitter from stamped image. Set aside.
- Apply four corner double-sided stickers to the four front corners of your card. Apply glitter liberally to sticky surface and then dump excess onto scrap and return to container. Clean with a gentle brush.
- Add a gold border sticker to your card by measuring 2.5 inches from the top of the card and placing the sticker evenly across the left hand panel. Trim at the card opening. Repeat on the right hand side.
- Use double-sided tape or glue to attach your stamped circle onto the circle of silver mirror cardstock included in your kit. Use foam tabs on just the left hand side of the circle, and attach it to the left side panel on the front of the card.
Your card is complete!
We hope you enjoyed making this card with Ecstasy Crafts.
Supplies:
- Nellie's Choice Clear Stamp Silhouette Nativity 3 (CSIL014)
- Joy! Crafts Mirror A4 Cardstock in Silver (80110104)
- Cosmic Shimmer Flake and Glitter Glue (CSF01)
- Glitter Ritz Micro Fine Glitter in Dark Gold (35MFP)
- Creative Expressions Sponge Applicator (CESPONGE)
- Jeje Produkt Double Sided Sticky Sticker - Corners Large (1852DS)
- Starform Deco Stickers - Borders in Gold (841G)
- Creative Expressions Foundation Cardstock 220gsm in Black (40071)
- Black Foam Tabs 1mm Thick (99990225)
- Double-sided tape