Virtual Open House - Christmas Belly Band Card
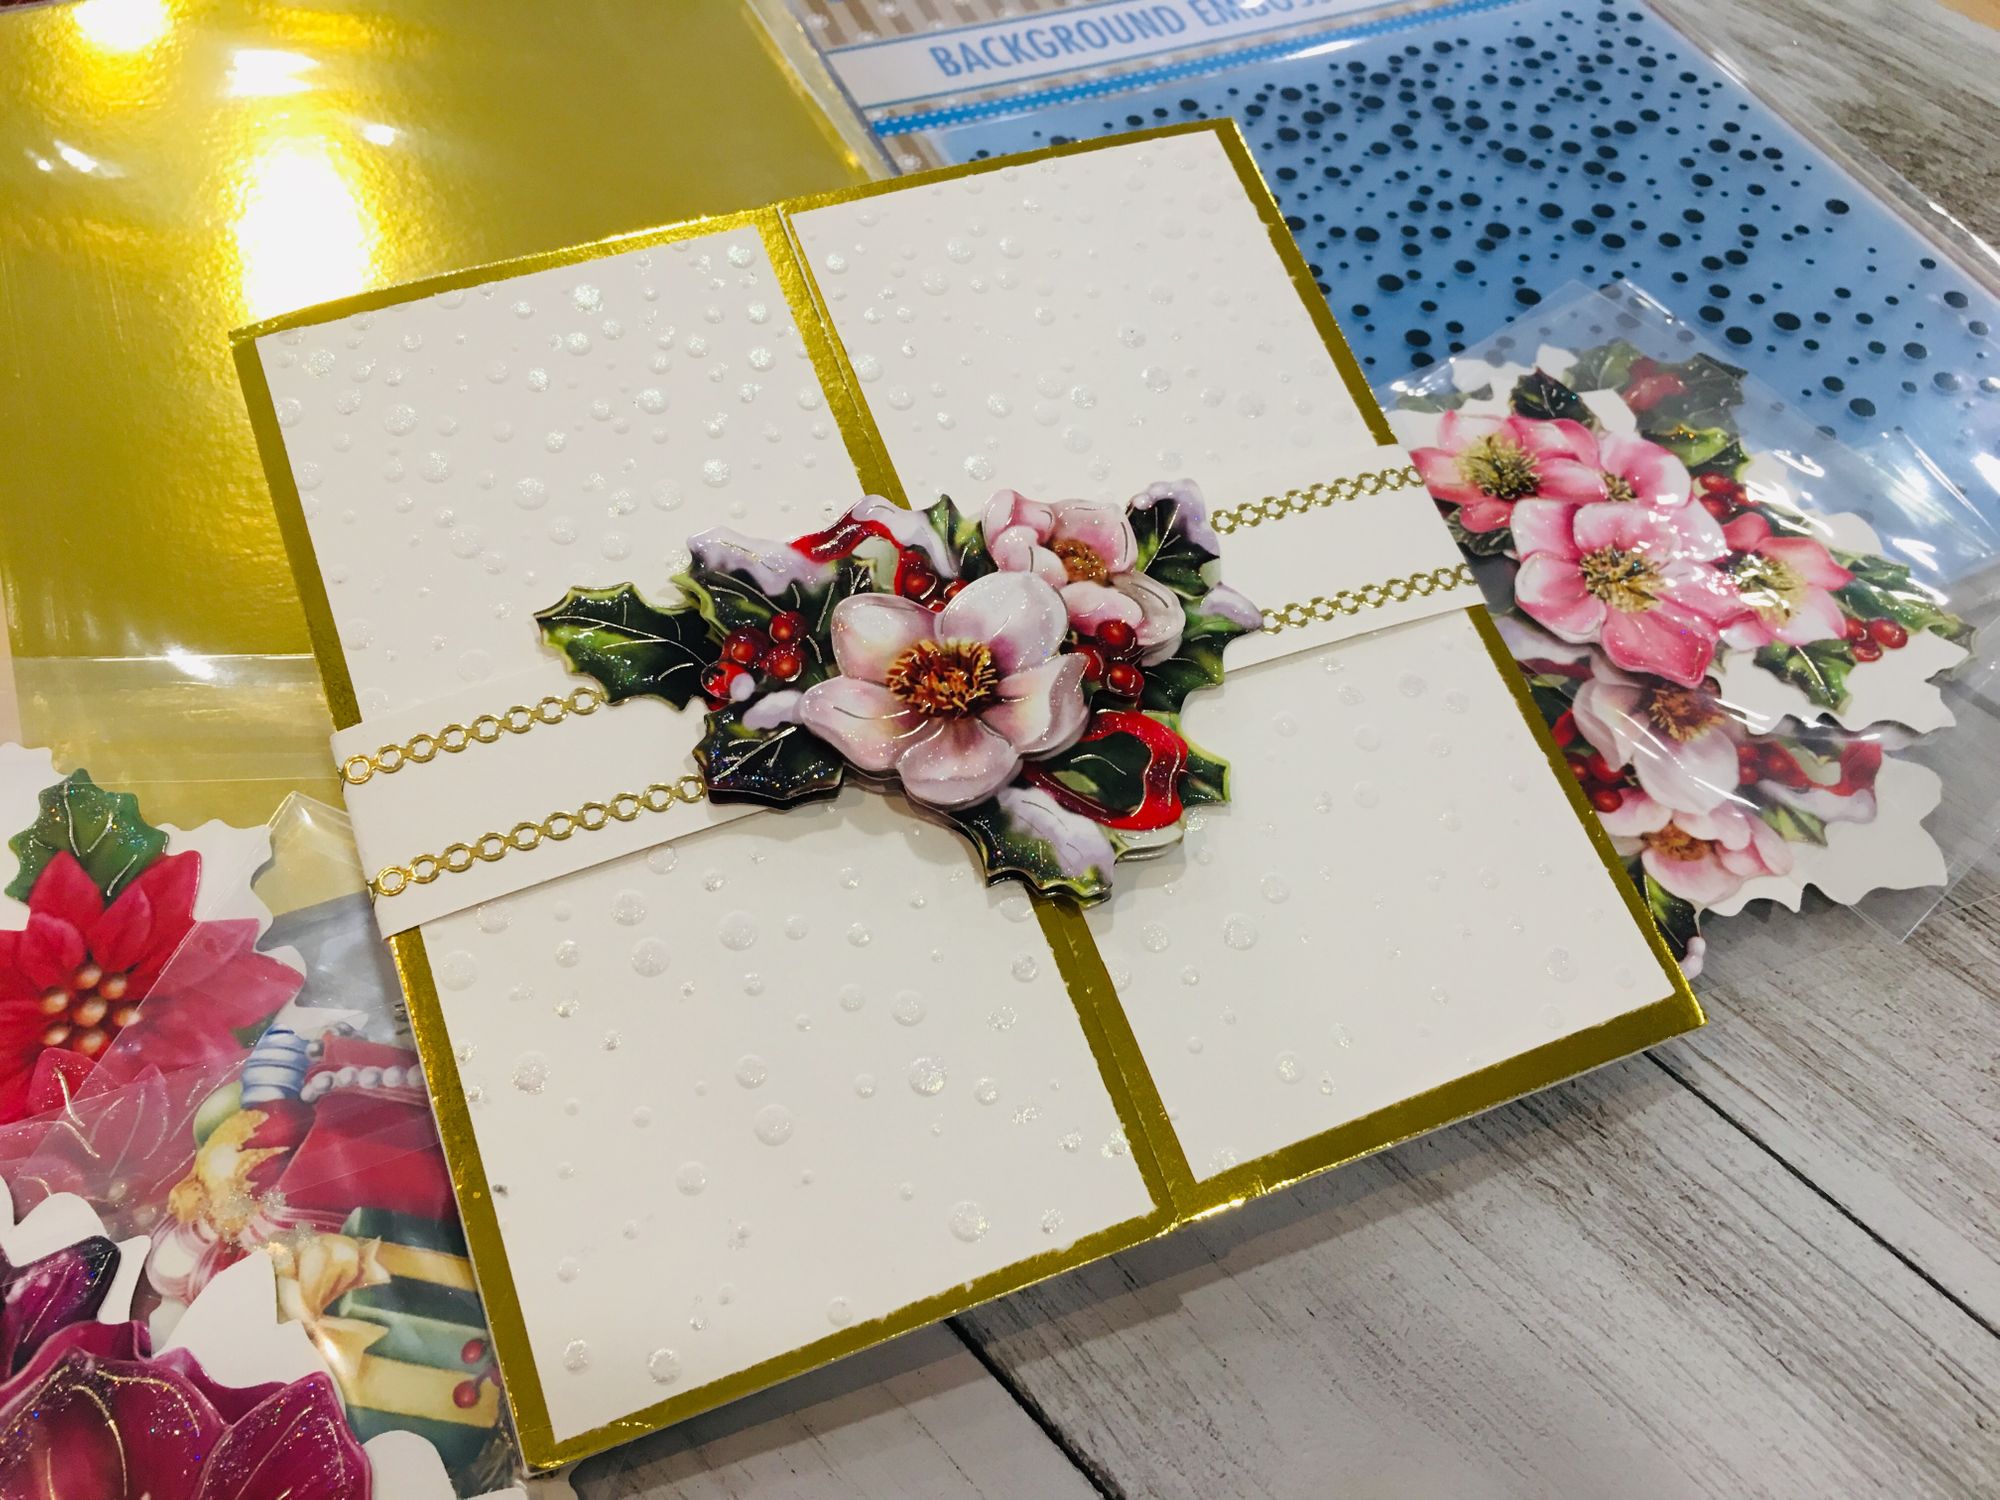
Elegant Christmas floral toppers elevate this Belly Band Card.
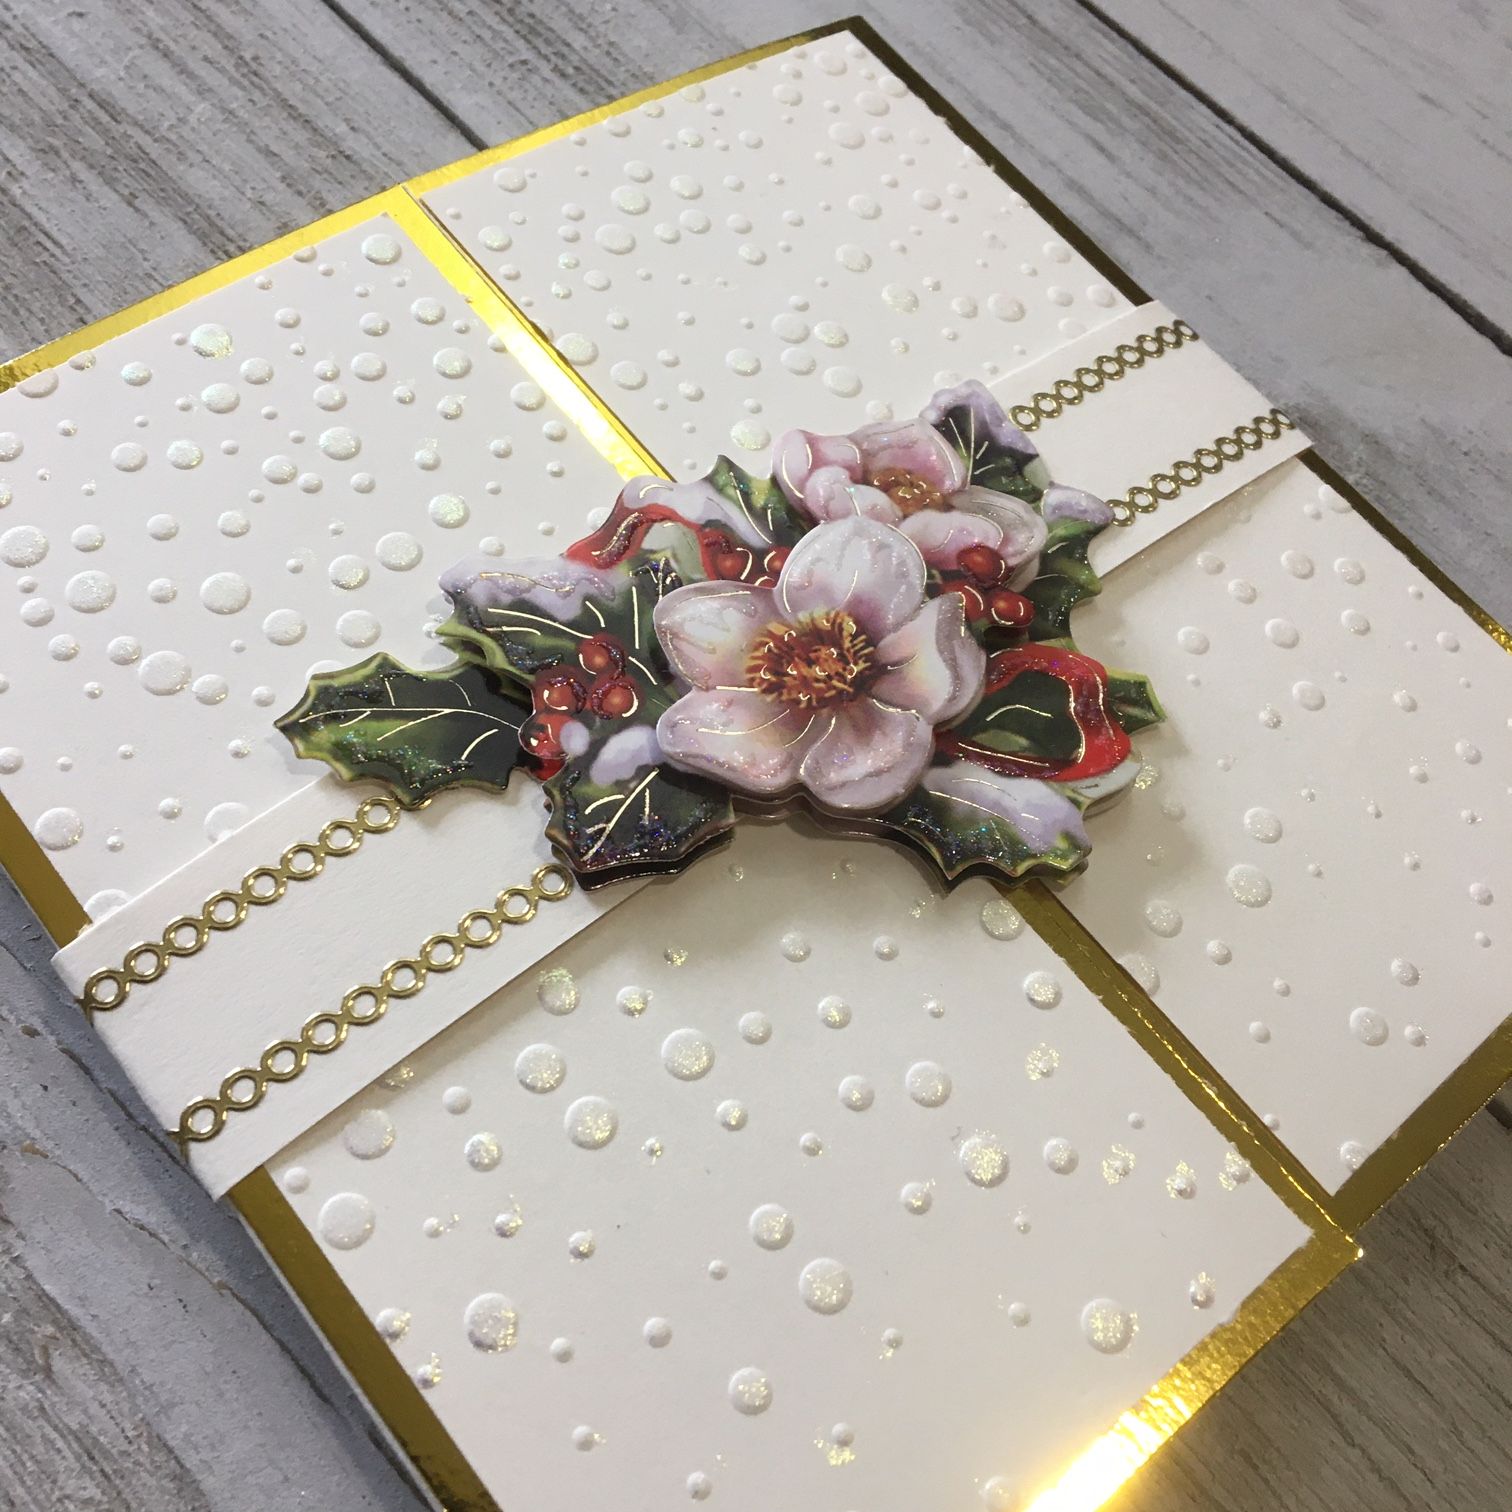
Elegant Christmas floral toppers elevate this Belly Band Card and ring in the holiday spirit.
Follow along with the video as we assemble the Christmas Virtual Open House Kit. or you can skip to the instructions at the bottom of this post to create the card from scratch!
Assembly of Virtual Open House Kit
If you purchased a Virtual Open House Kit, follow along with these instruction to assemble your card.
- Use your handy- dandy scoring tool to score your card base 2¾” from each end and fold ends in to create your card.
- Apply double sided tape or craft glue to the back of the Gold Mirror panels and attach to the front panels of the card base.
- Next, apply double sided tape or craft glue to the embossed panels, then place these embossed panels on top of the gold mirrored panels on the front of the card.
- To create the Belly Band base, wrap the Cream Cardstock strip around the card and fold so that the ends of the strip meet in the middle of the card. Attach the ends of the strip together using double sided tape or a small amount of craft glue. Do not attach the Belly Band to the card base. Be sure that the ends of the strip are secured snug enough so that it stays on the card, but loose enough that it can be easily slipped off to view the interior of the card.
- Decorate the Belly Band using a 3D topper and Gold Border stickers.
- Slip the Belly Band over the top of the card.
Your card is complete!
From Scratch Instructions
To make this card from scratch, follow along with these instructions:
- Cut the card base out of Cream Cardstock 11” x 5 ½”. Score 2 ¾” from each end and fold ends in to create your card base.
- Cut two 5 ¼” x 2 ⅝” panels out of Cream Cardstock. Emboss these panels with the Snow Embossing Folder.
- Cut two 5 ½” x 2 ¾” panels out of Gold Mirror Cardstock. Apply double sided tape or craft glue to the back of these mirror panels and attach to the front panels of the card base.
- Next, apply double sided tape or craft glue to the embossed panels, then place these embossed panels on top of the gold mirrored panels on the front of the card.
- To create the Belly Band base, cut a strip from the Cream Cardstock. Wrap the strip around the card and fold so that the ends of the strip meet in the middle of the card. Attach the ends of the strip together using double sided tape or a small amount of craft glue. Do not attach the Belly Band to the card base. Be sure that the ends of the strip are secured snug enough so that it stays on the card, but loose enough that it can be easily slipped off to view the interior of the card.
- Decorate the Belly Band using a 3D topper and Gold Border stickers.
- Slip the Belly Band over the top of the card.
Your card is complete!
We hope you enjoyed making this card with Ecstasy Crafts.
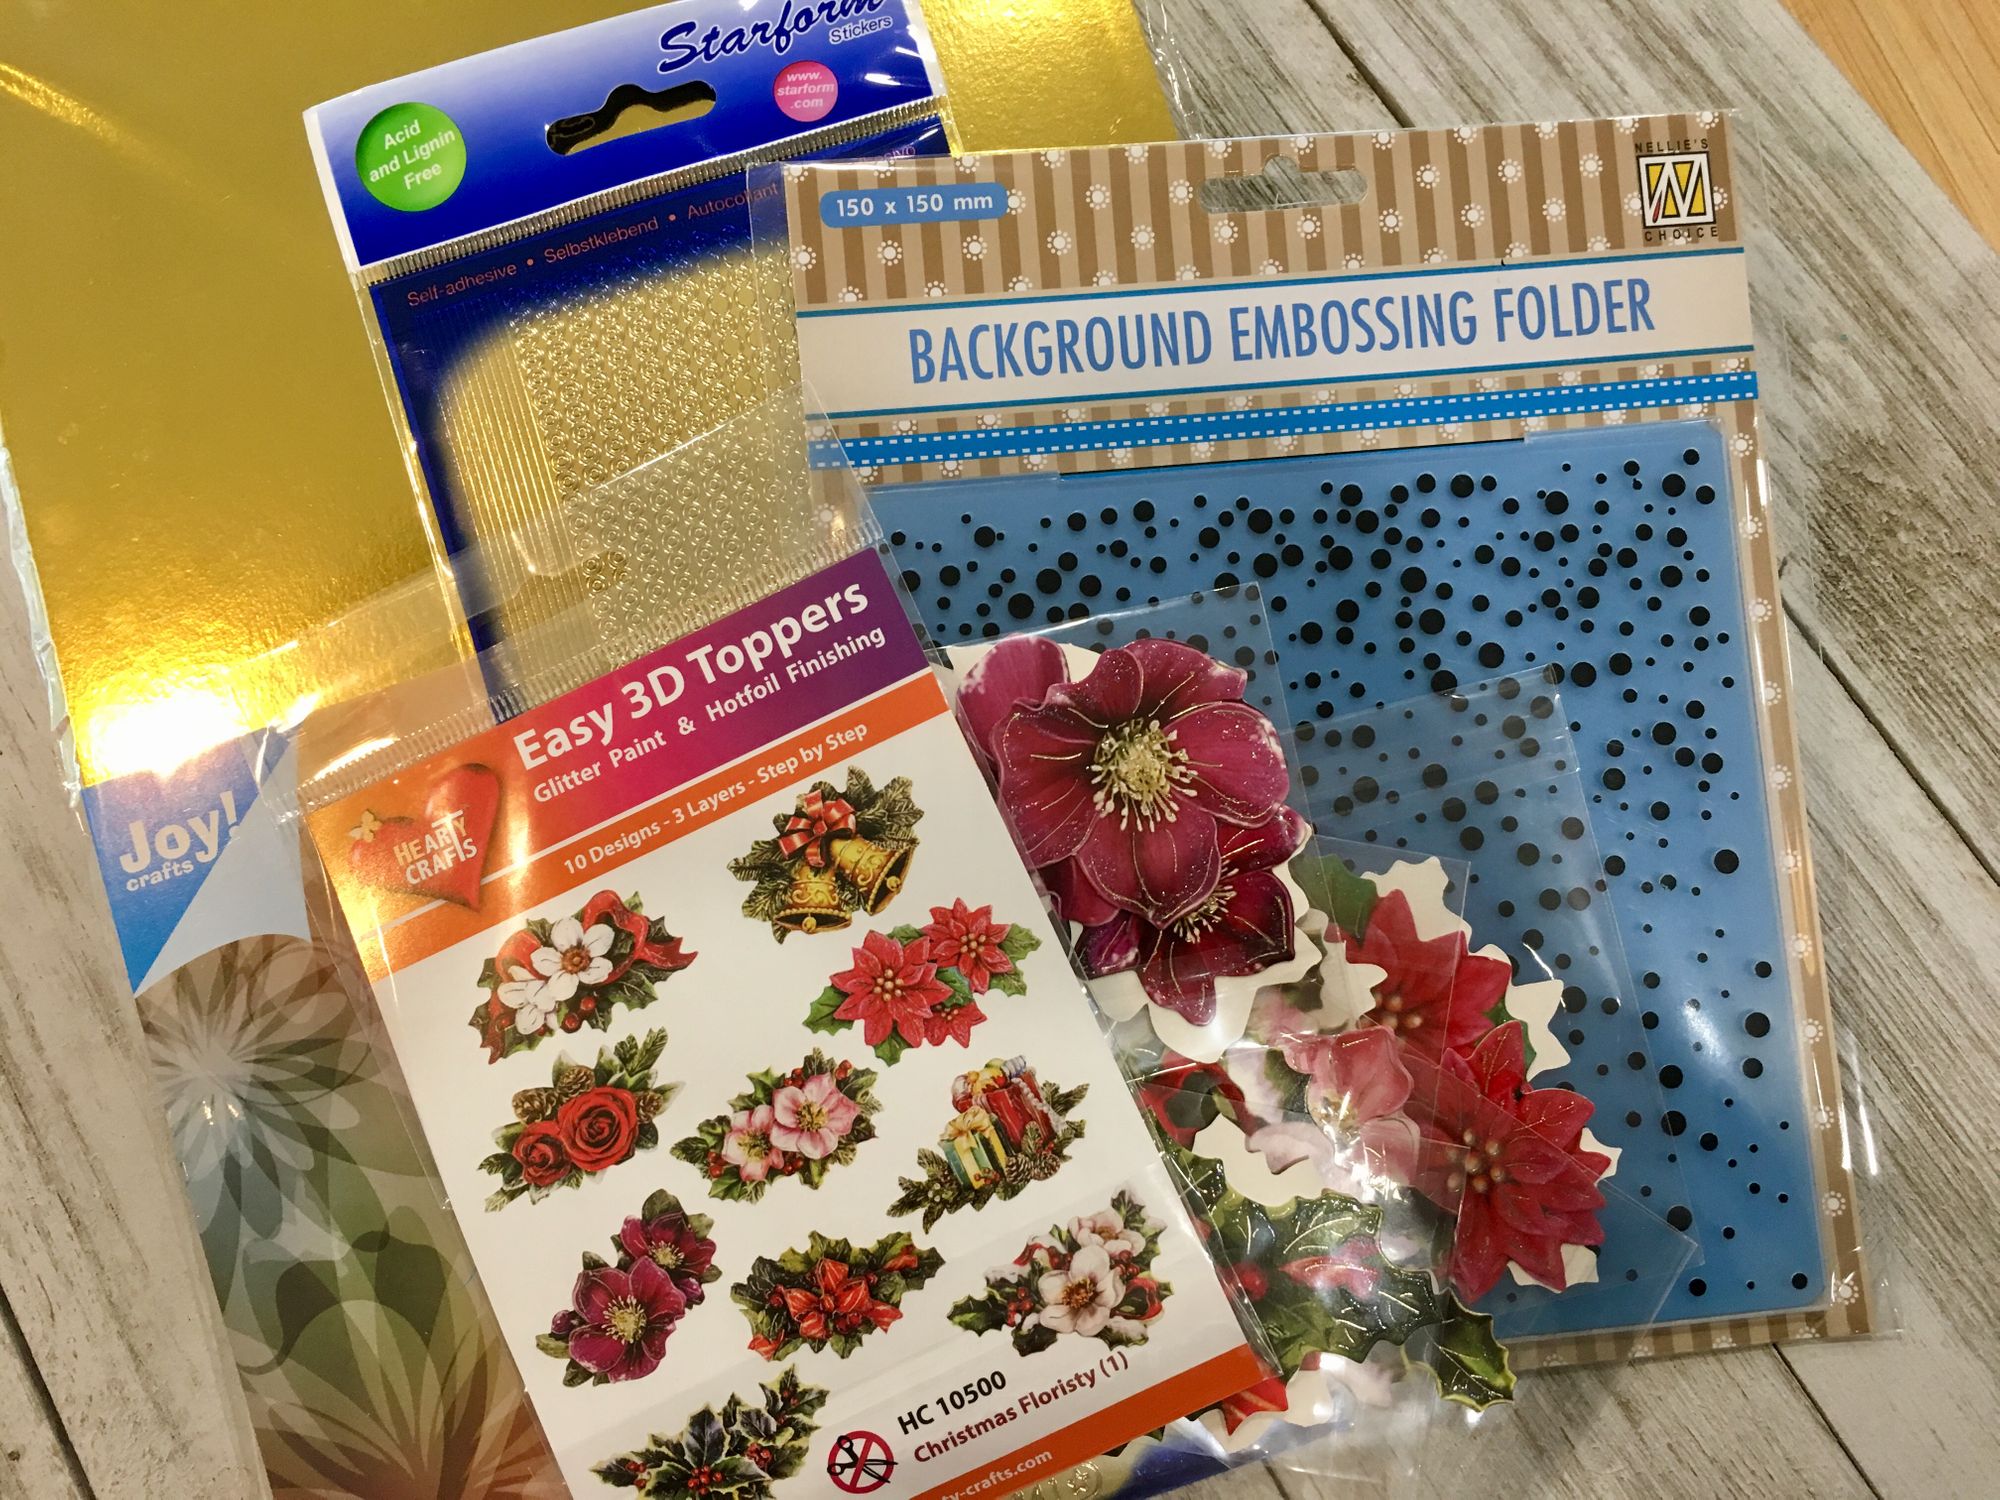
Products Used:
Embossing Folder:
NELLIE’S CHOICE EEB020 Snow 6x6 Embossing Folder
Topper:
HEARTY CRAFTS HC10500 Christmas Floristy 3D Topper
Other:
STARFORM 841G Gold Border Deco Sticker
JOY! CRAFTS 80110103 Gold Mirror A4 Cardstock
Cream A4 Cardstock
BE CREATIVE - Double Sided Tape
3D Foam Pads
Acrylic Glue