Stamping 101
When you first begin stamping you'll have to choose clear stamps that are not mounted or stamps that are already mounted on wood blocks. There are positive and negative to both so you'll have to decide which one you like when you begin stamping.
When you first begin stamping you'll have to choose clear stamps that are not mounted, or stamps that are already mounted on wood blocks. There are positives and negatives to both options, so you'll have to decide which one you like when you begin stamping.
Stuff you'll need to get you started
- Ink: Choose a neutral stamp pad
- Paper: Always have white on hand and a variety of colored sheets as well or a cards set to do your stamping on.
- Stamp Set. (*Note if you are using clear stamps that are not mounted, you will need an acrylic block or stamping tool like this one as well.)
Here are a few tips and tricks to getting your images to stamp perfectly almost every time:
Conditioning your stamps.
I'm going to be honest with you here and say I have never done this to any of my stamps and have had them stamp perfectly the first time I use them. But if you have conditioned your stamp and it made a difference I'd like to hear about it in the comments below. A co-worker of mine has done this but only with an eraser to take any of the residual muck off the surface of the stamp form production. I have been told to lightly sand them with a pumice stone to give the ink some texture to actually stick to. You can recondition them at any point that you notice the ink is not sticking well.
Use a foam stamping pad.
I learned this one the hard way. I was using a large stamp and every time I stamped it I would only get a partial print. Then someone suggested that I stick a foam stamping pad under my card and voila! The image stamped entirely the first time.
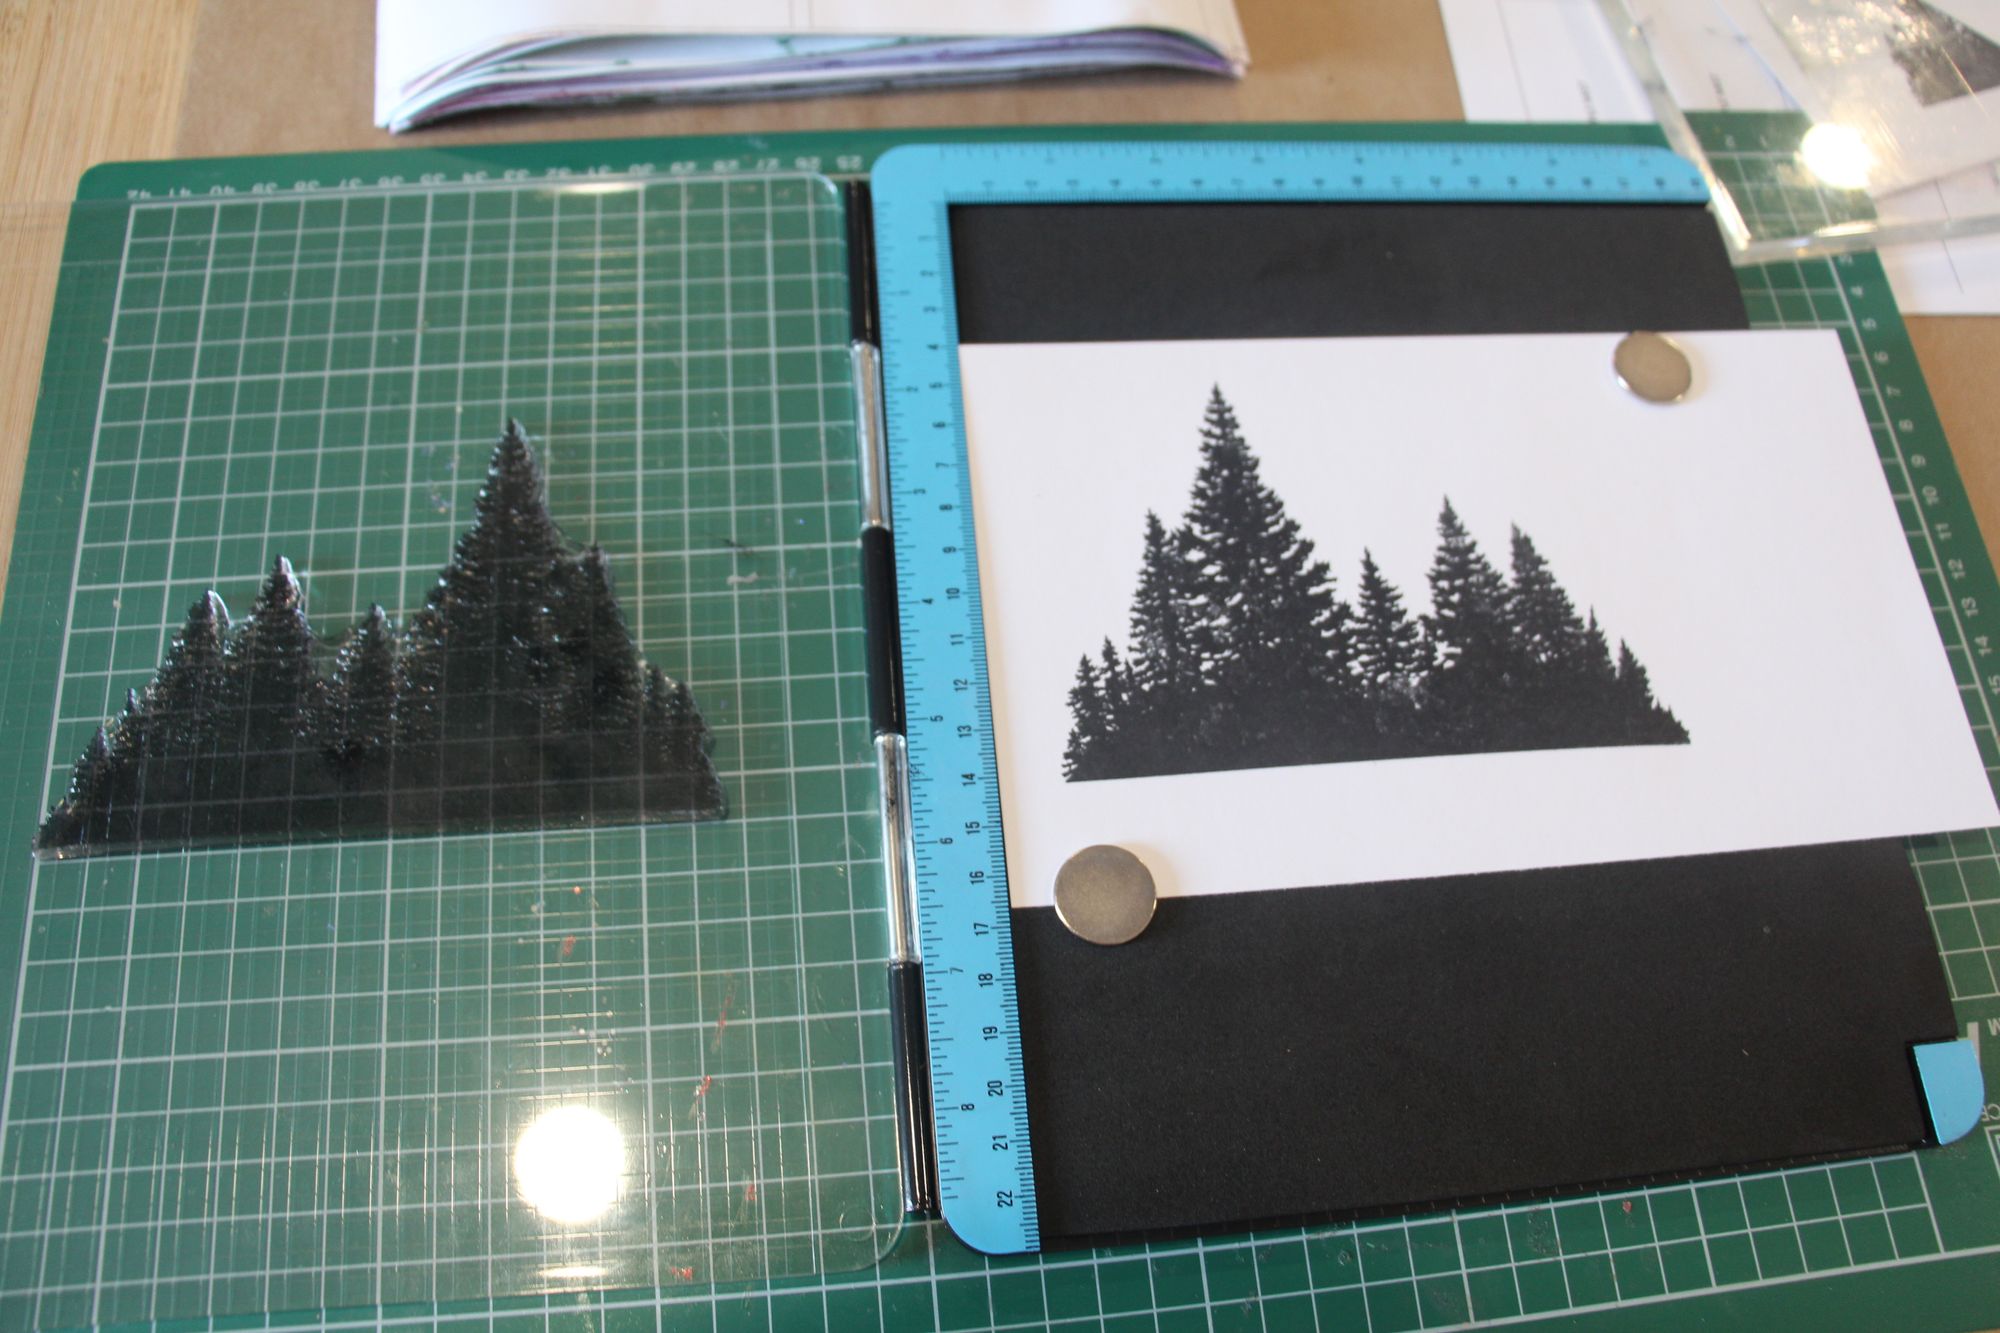
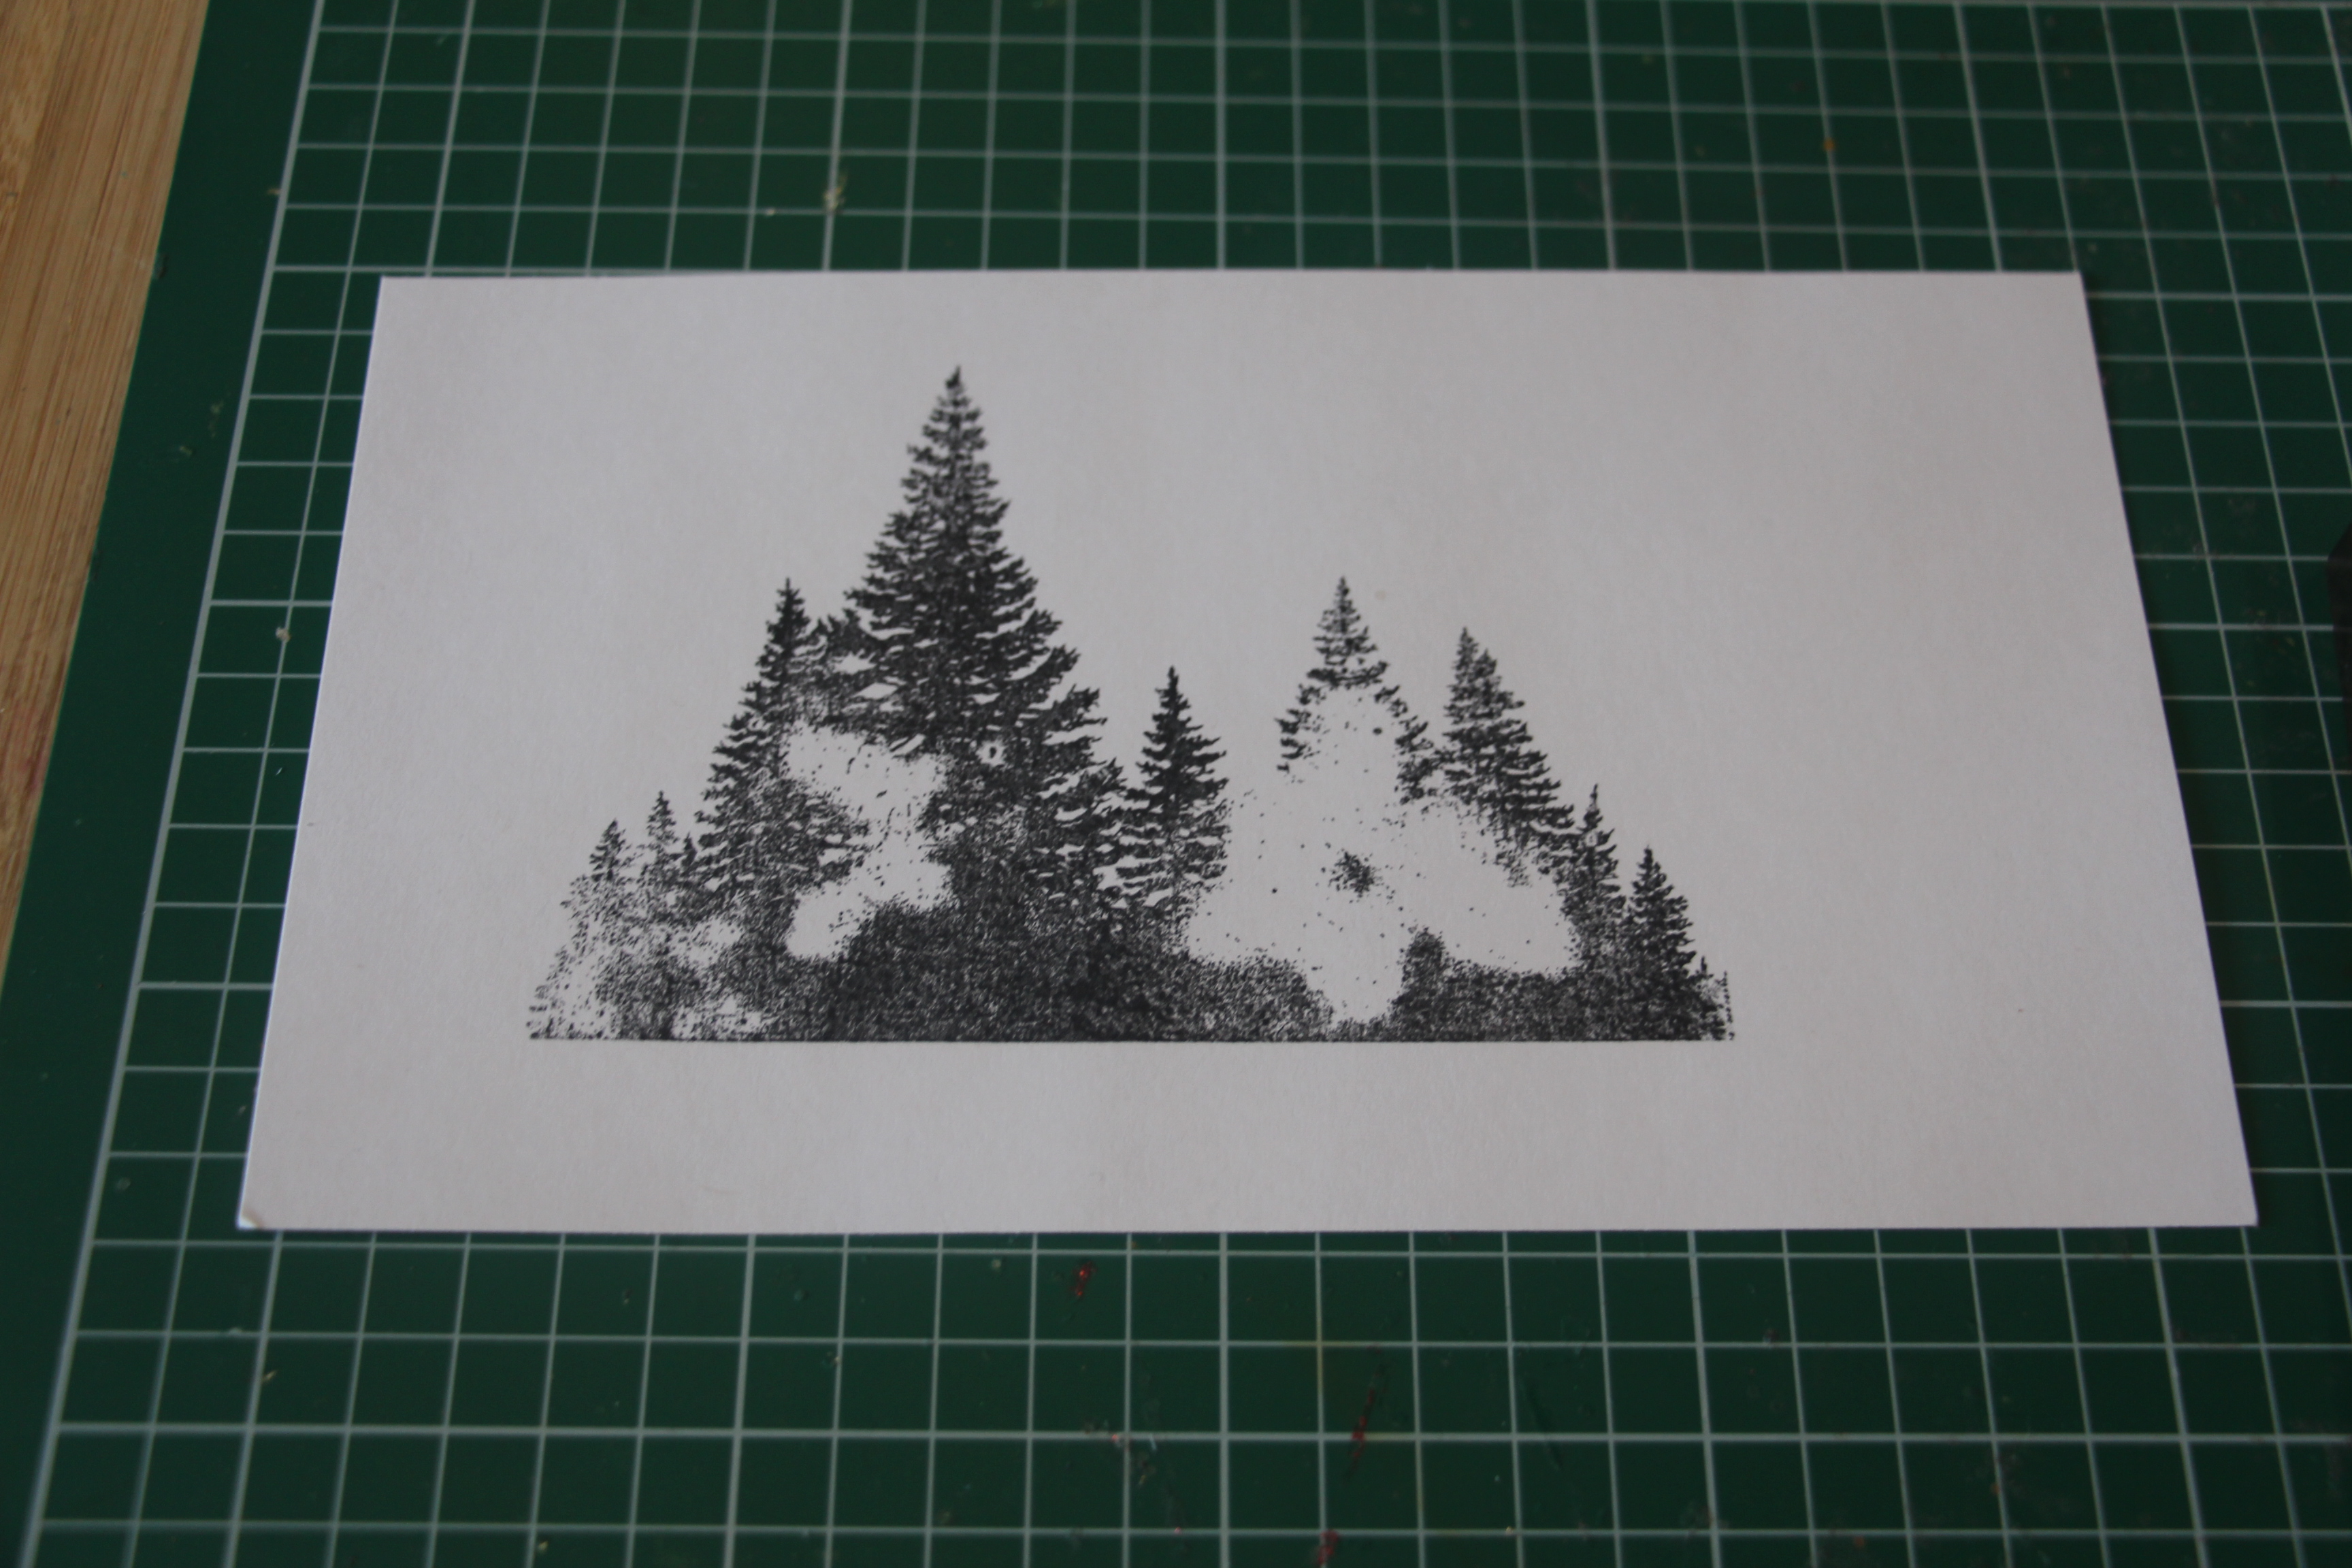
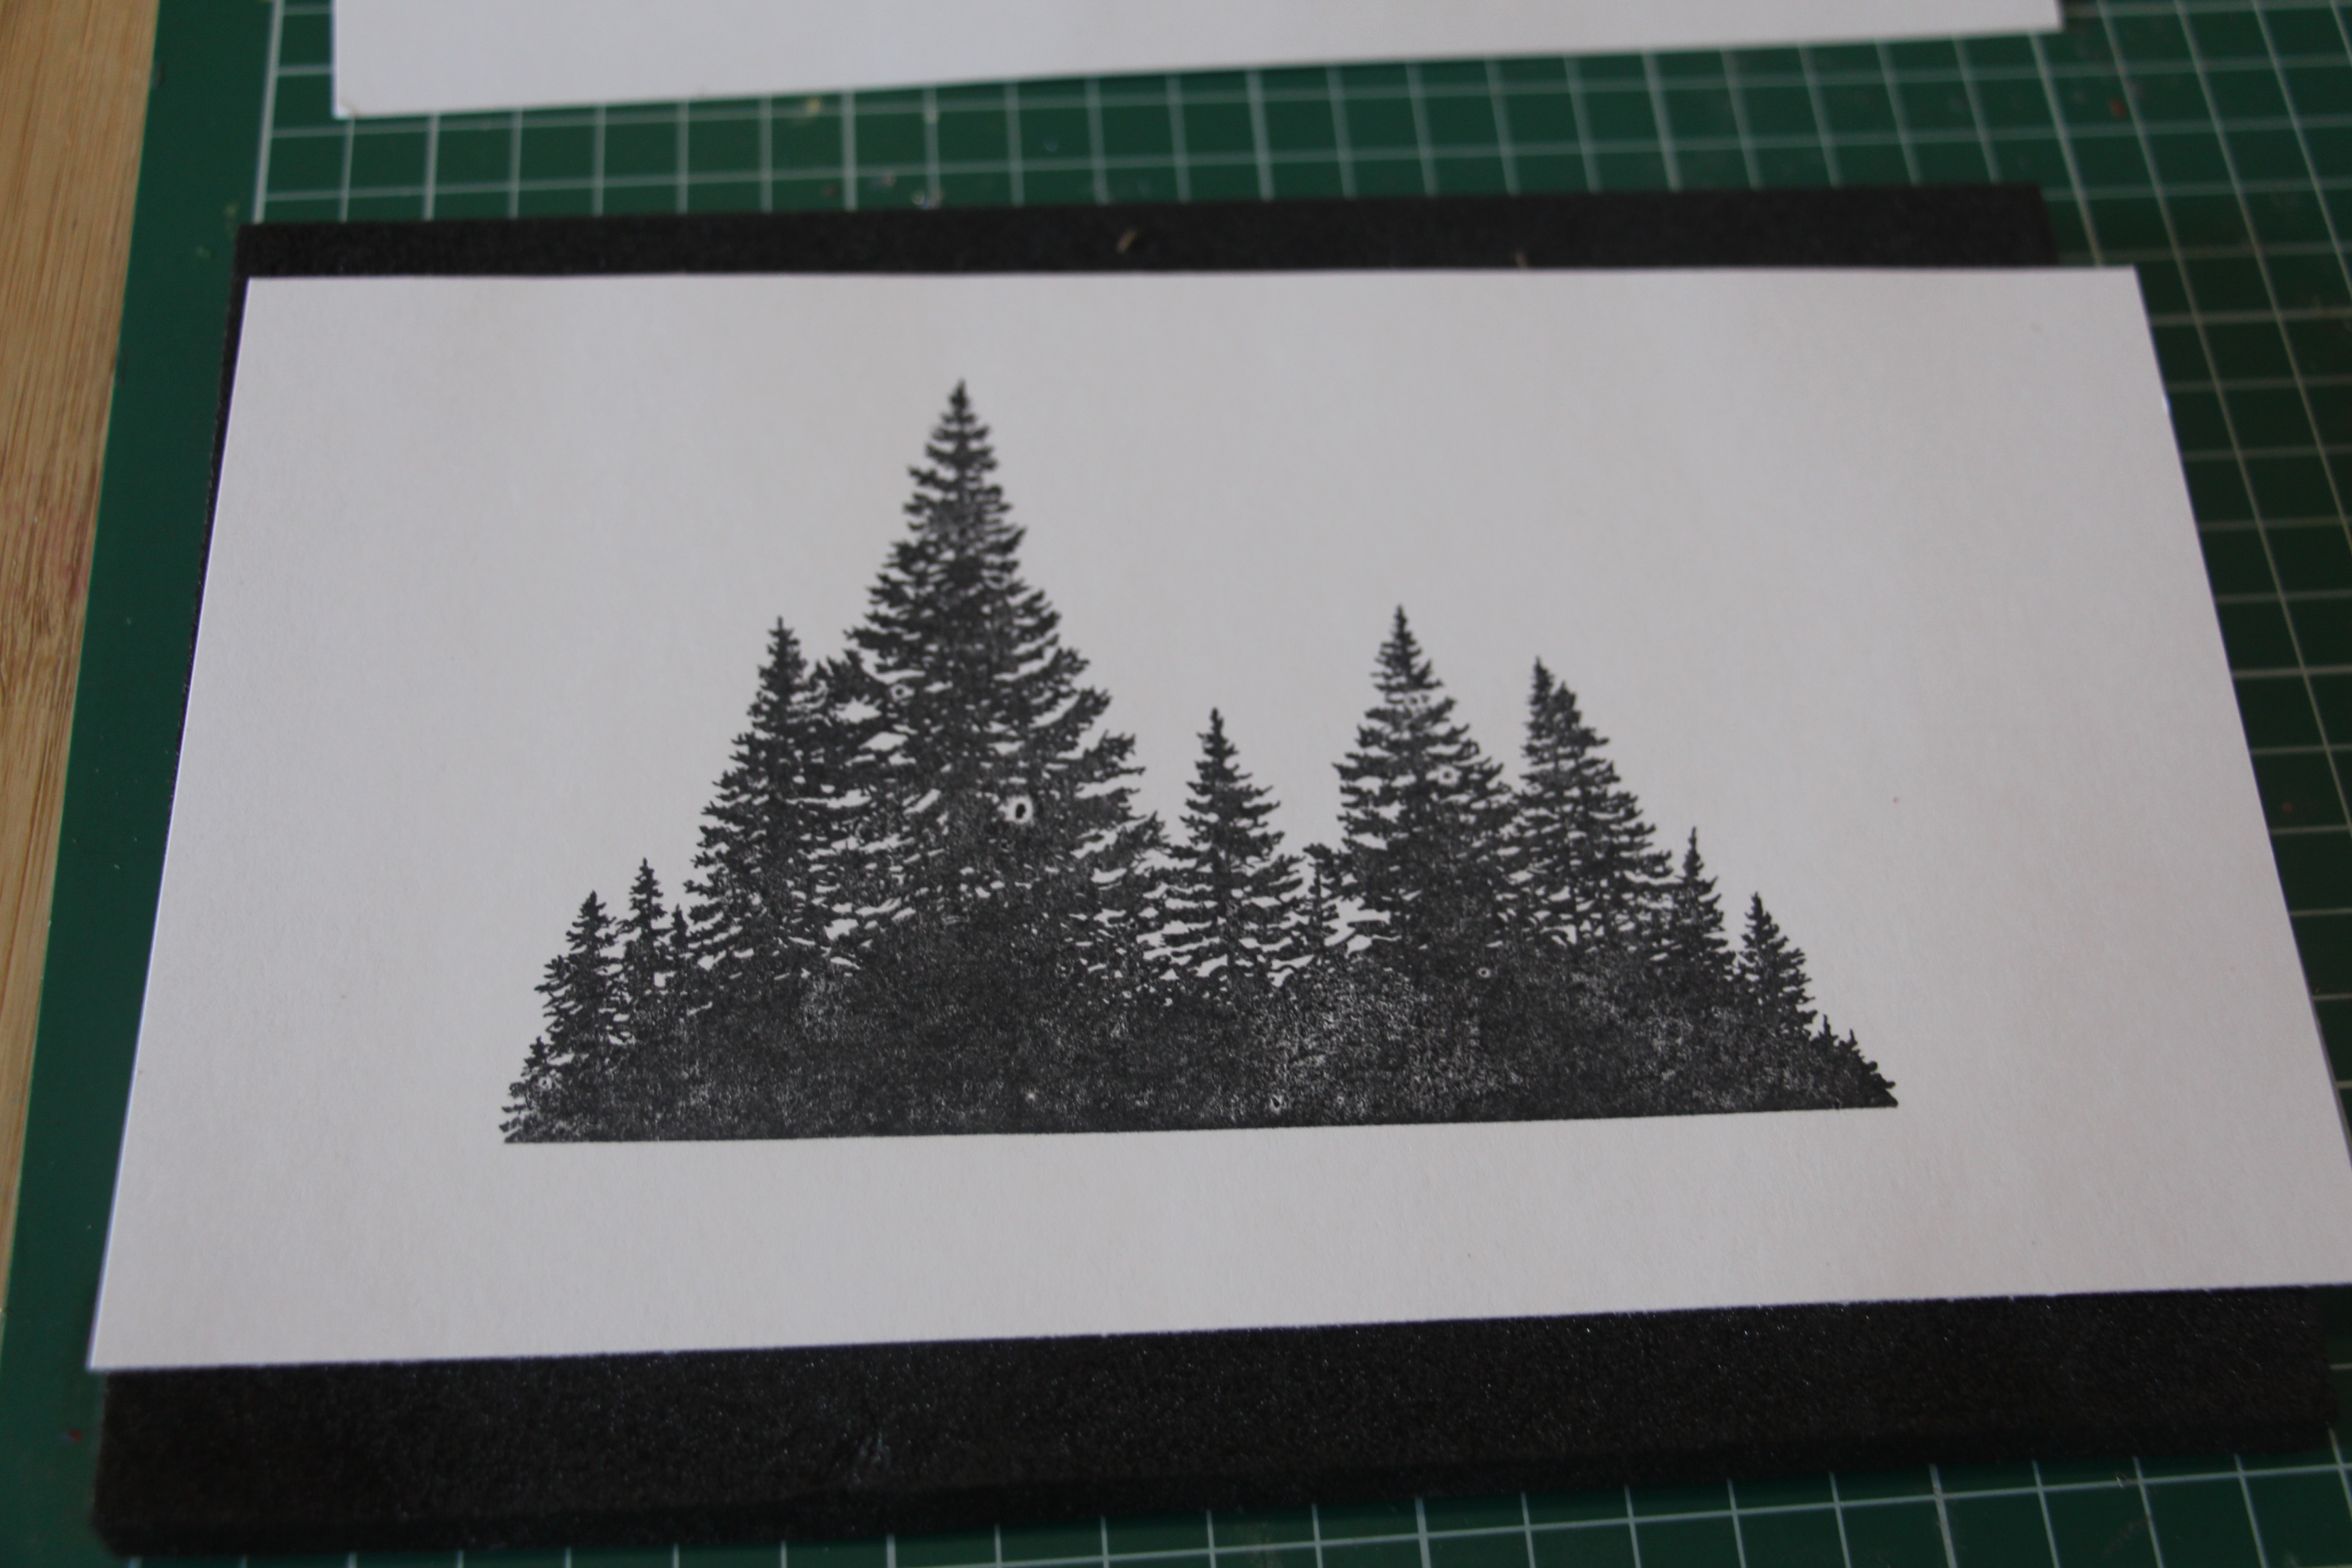
Here is why: when using a stamp on a wood block there is already a foam layer to allow the image to give just a little when stamping, but when you use clear acrylic stamps on acrylic blocks the foam layer is not there and therefore you need that give to allow for the image to transfer fully. In the first image below I didn't use a foam pad and my image didn't stamp as you can see. In the second image I did use a foam pad and it made a huge difference. Try this and see what happens.
Use the correct ink for the job.
In most cases when card making you would choose a dye-based ink to get clear, crisp image that won't smudge or smear. But pigment inks are mostly used for stamping on tile or glass.
Fully ink your stamp.
For larger stamps I like to bring the ink pad to the stamp and pat the ink on, turning the ink pad in all directions to get full coverage. Alternatively, with small stamps I bring the image to the ink and pat the image onto the ink pad to get coverage. In any case always take a look at the surface of you image and make sure there is coverage all over your stamp.
Don't rock you stamp.
When you stamp try to place the stamp straight down and don't rock it back and forth. Rocking your stamp will cause any ink from the edges of the stamp to transfer to your paper, which will give you an image you don't want.
Keep your stamps clean and store them properly.
Use a cleaner like Stazon All Purpose Cleaner (SZL56) and clean your stamps as soon as you can after you have finished using them. Some ink will stain your stamps, but rest assured that if you clean it the color will not transfer the next time you use your stamp. Always store stamps away from the elements, like sunlight and sources of heat. Keeping your stamps and the blocks clean will ensure a clean crisp stamp every time.
Use the right tools for the job.
A stamping tool can be very useful. I like Nellie's Choice Stamping Buddy Pro
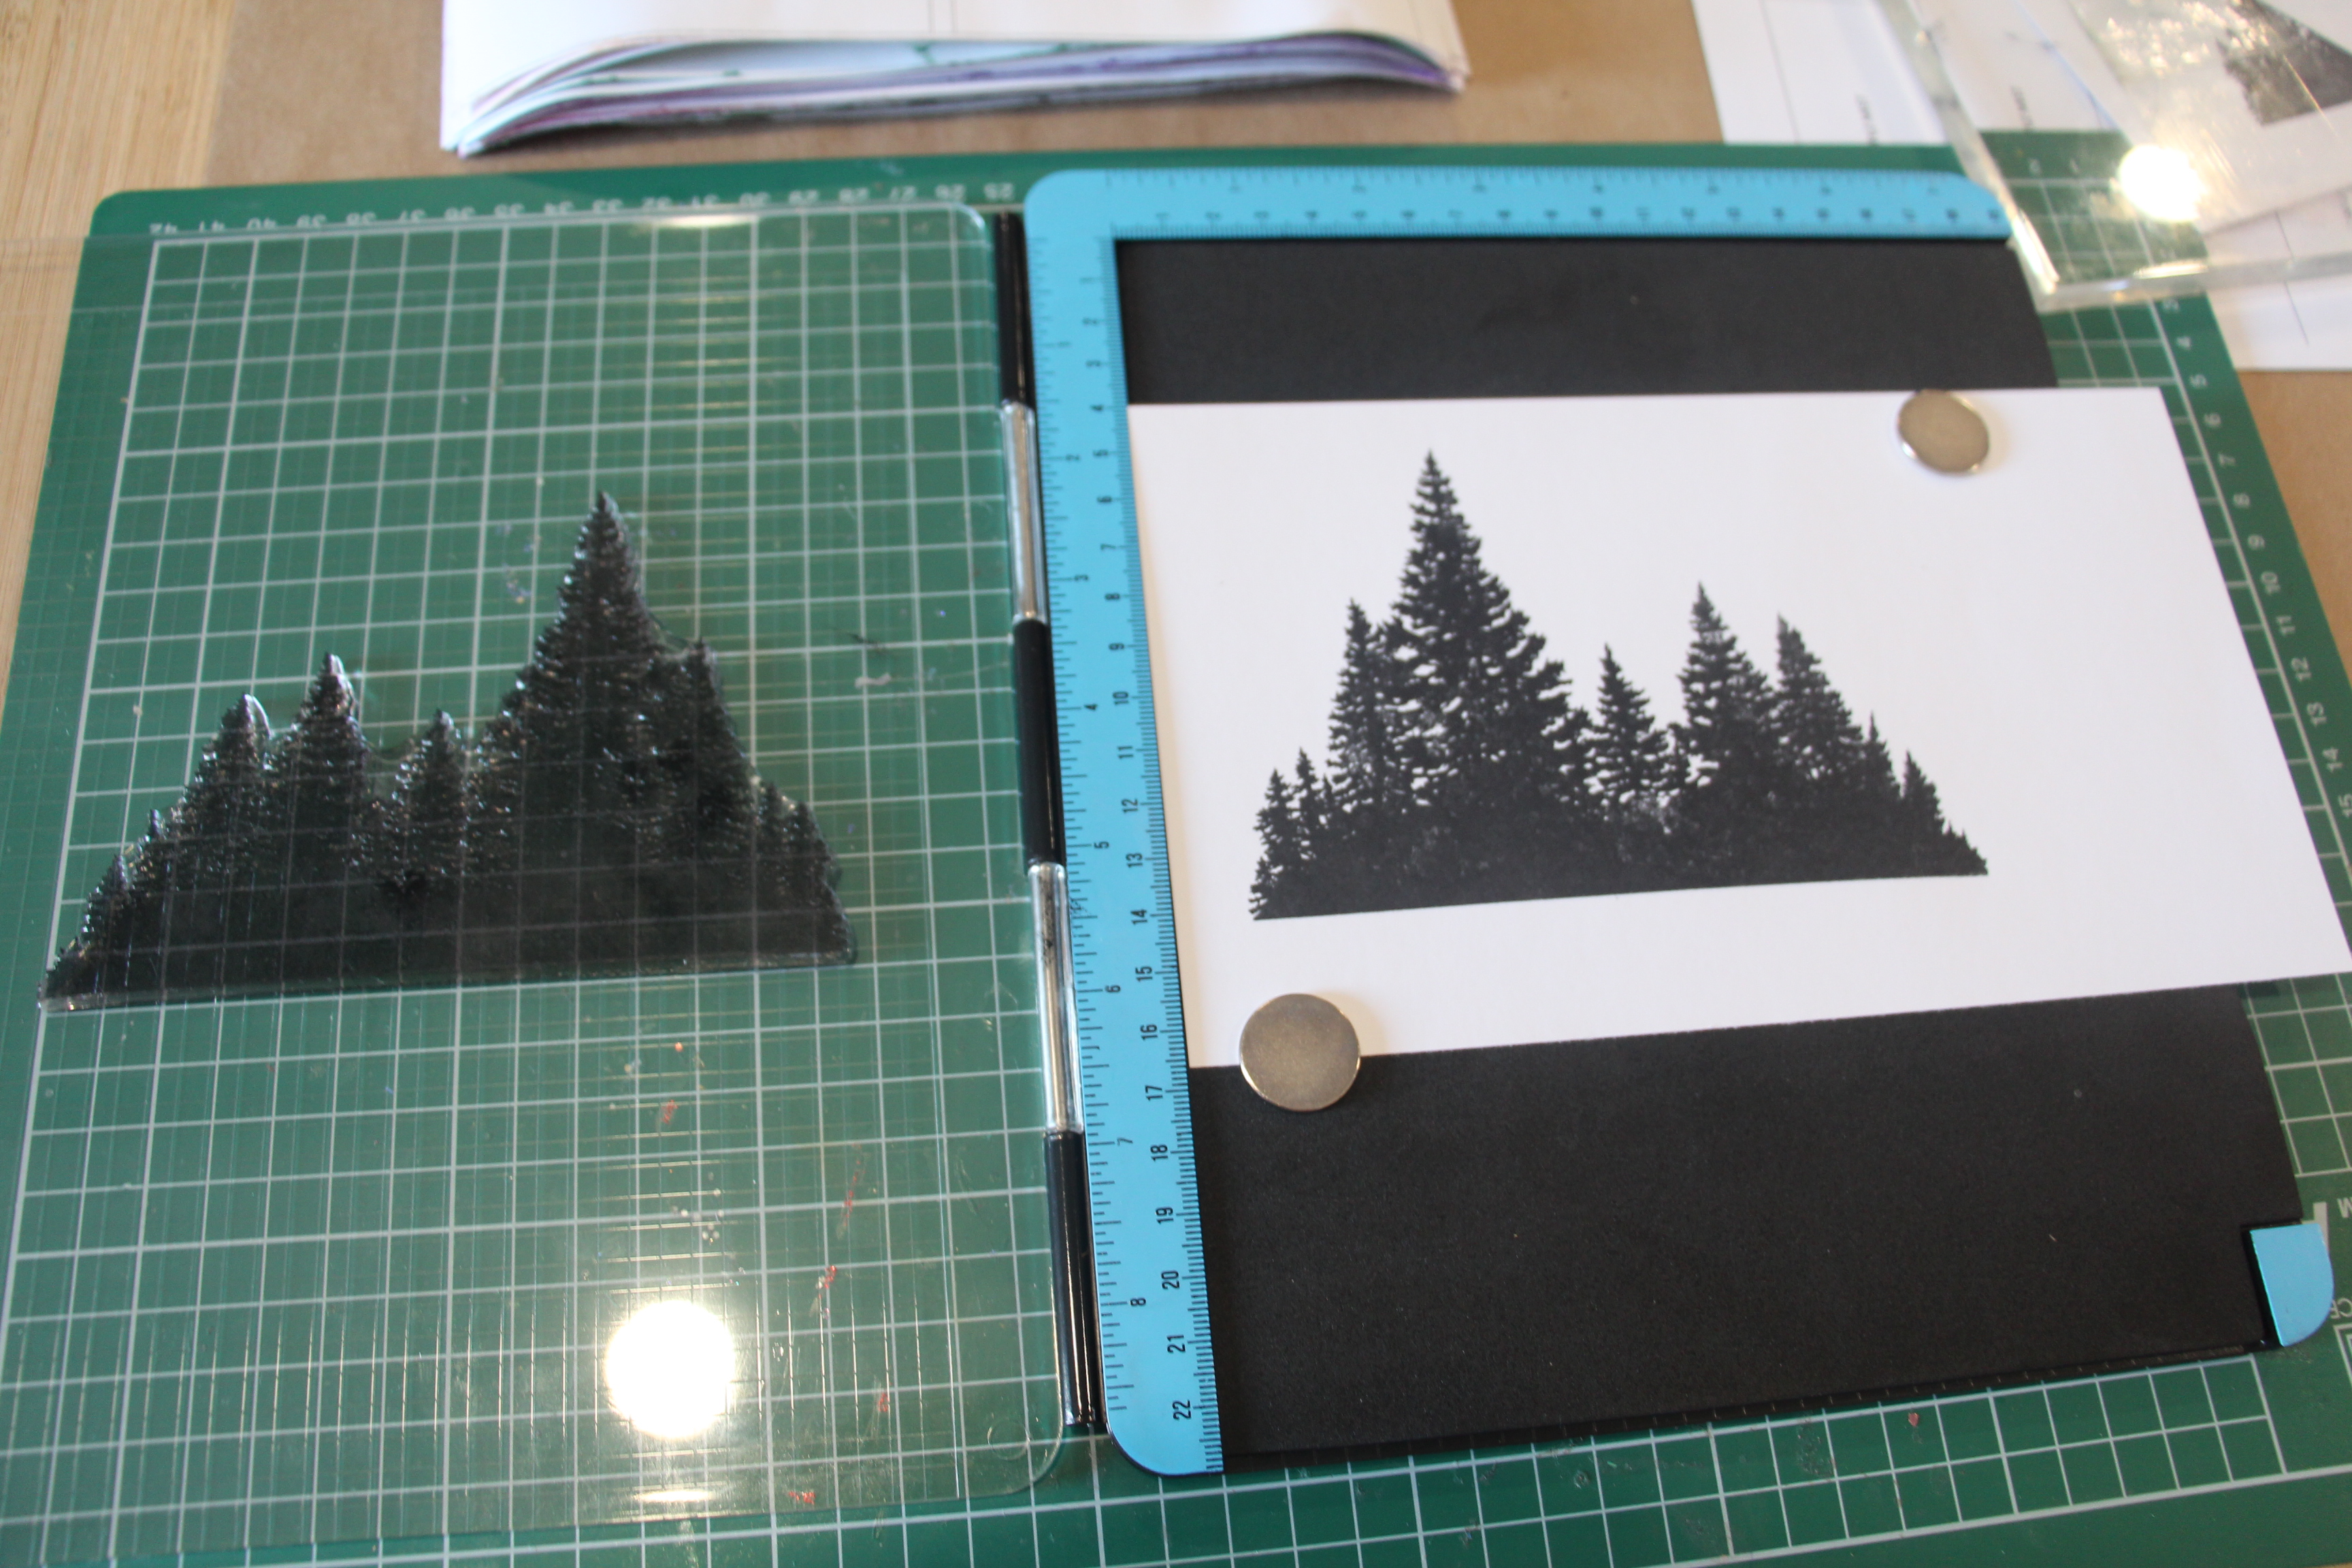
(STB002). This little device helps you stamp your image in the exact same spot multiple times if necessary. I stamped this tree image below three times using the stamping buddy pro so that my paper didn't move and I could get a solid dark black image for my background.
Remember to have fun with stamping and try different inks and paper to get different results with the same stamp.