Spring Flowers Class - Session 1
As promised, here is the recording of our live session.
Thanks to everyone who joined us for Session 1 of the Spring Flowers Virtual Class!
Once we got rolling, we had lots of fun! As promised, here is the recording of our live session. Unfortunately, our team was having some technical difficulties at the beginning, and we lost the first few minutes of the session. Please refer to the written instructions for measurements and any other directions.
Items to have on hand
- Your Ecstasy Crafts Card Class Kit 02 - Spring Flowers
- Die Cutting Machine
- White Card stock x 8 sheets
- Stamp Block or Stamping Platform
- Glue and/or Double Sided Tape
- Scissors
- Cutter
- Small Ink Applicator
- Blending Brush or Smoothie
- Heat Tool
- 2 ¾” circle die

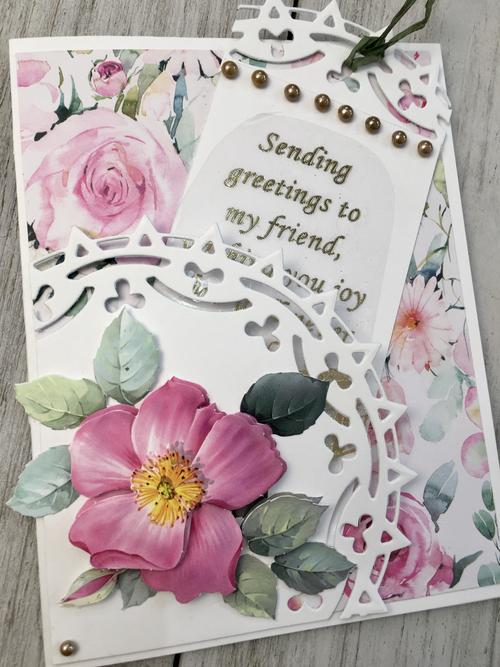
Card #1 - Tag Card
- Start with a white cardbase of 4 ¼” x 5 ½”
- Trim a piece of bloom & wild paper to 4” x 5 ¼”
- Die cut circle and trim to fit in the corner. Attach with tape on the sides
- Apply 3D flower with foam pads
- Make tag by cutting white card to 2 ¼” x 4” and attach piece from circle die cut
- Decorate with pearls and add sticker sentiment. Trim to fit on tag
- Unravel flower wire and use green paper to hang tag, or use the flower wire.
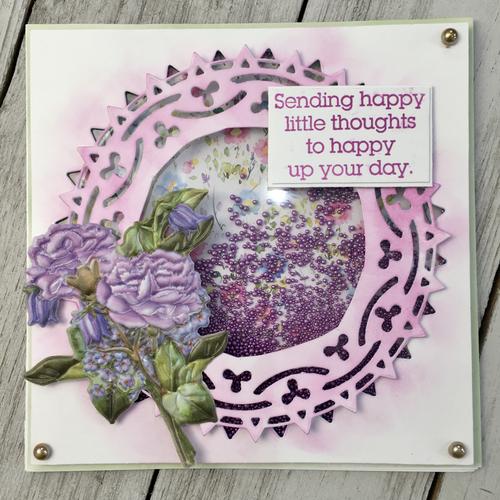
Card #2 - Shaker Card
- Start with a white cardbase of 5 ½” x 5 ½”
- Trim watercolour side of bloom & wild paper to 5 ½” x 5 ½” and attach to base
- Cut white card to 5 ¼” x 5 ¼” and use circle die cut in the centre
- Cut a circle out of the center of the circle die cut
- Apply ink with a blending brush to the card and circle die cut. Use a heat tool to seal.
- Trim Bloom & wild card to 5 ⅛” x 5 ⅛”. Attach to base and apply two strips of foam pads along the edges.
- Trim acetate to 5 ⅛” x 5 ⅛”. Carefully add beads to center of the card and attach acetate to foam pads.
- Attach white circle cut card to the acetate.
- Offset the circle die cut and attach to face of card.
- Cut white card to 1 ⅛” x 1 ⅞”. Stamp using IZINK pigment and frogs whiskers stamp. Set with a heat tool.
- Cut white card to 1 ¼” x 2” and attach to stamped sentiment. Attach to card
- Decorate with pearls and apply 3D relief sticker.
If you’re crafting along with us using your Ecstasy Crafts Card Class Kit 02, be sure to share your spring flower cards with us on in our Facebook group Crafting with Ecstasy using #ecstasycardclass by April 18th and you will be entered to win a our next Virtual Class Kit!
You can register to join us LIVE for Session 2 here:
https://www.eventbrite.ca/e/virtual-cardmaking-class-spring-flowers-session-2-registration-142140735767
Happy Crafting!