Scenic Stamp Card
Stamp and colour a beautiful scenic card using Idyllic Floral Scene stamps and the Stamping Buddy Pro from Nellie's Choice.
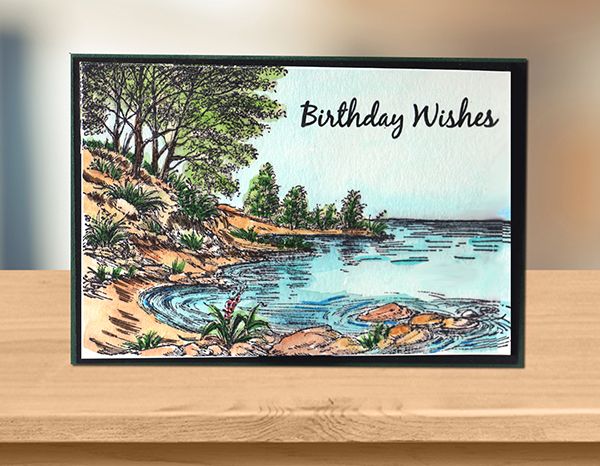
Stamp and colour a beautiful scenic card using Idyllic Floral Scene stamps and the Stamping Buddy Pro from Nellie's Choice.
Materials
- Nellie's Choice Clear Stamp Idyllic Floral Scenes - Water's Edge (IFS006)
- Nellie's Choice Stamping Buddy Pro (STB002)
*The Stamping Buddy Pro is only available in Canada - Canvas Corp Water Media Paper 5 x 7 (CCBKNO4504)
- Cosmic Shimmer Water Brush (CSWB01)
- Aladine IZINK Dye Inkpads in Mer du Sud, Verveine, Menthe, The, and Miel
- Markers
Get all of the supplies you need to make this project on our website:
Directions
 Step 2
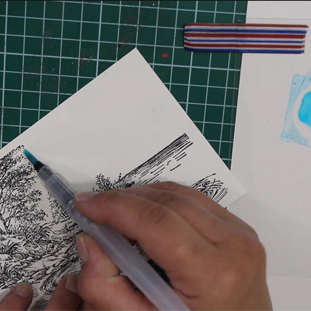 Step 5
- Place your watercolor paper on the stamping buddy pro using the magnets provided
- Line up your clear stamp on top of the water color paper, then close the lid of the Stamping Buddy Pro. When you re-open the lid, the stamp should be clinging to it, in the proper position to stamp.
- Use your pigment ink to ink the stamp by pressing the inkpad directly onto the stamp. Close the lid of the Stamping Buddy Pro to apply your ink to your paper.
- Open the lid of the Stamping Buddy Pro and review your stamped image. If required, apply more ink to the stamp and repeat the previous step. You may need to do this 2 or 3 times for a detailed stamp. Once your are happy with your stamped image, remove your project from the Stamping Buddy Pro.
- Now it is time to colour your project. Apply your inkpad directly to your craft mat and add a drop of water, mixing with your water brush until you achieve the desired level of opacity. Use the water brush, inks and markers to color in your project.
- Once you have finished colouring in your project, trim off the edges. If you wish to add a sentiment, return your project to the Stamping Buddy Pro, and line up your sentiment stamp on the card. Repeat steps 2-4 as needed.
- Now that your image is complete, you can layer it on top of cardstock to add some dimension, and mount it on a card.