Penguin Easel Card
Winter is here and how better to spend some time all cozy in your craft room making cute shaker cards. I have recently been infatuated with easel cards so I thought to myself why not combined the two card designs into one.
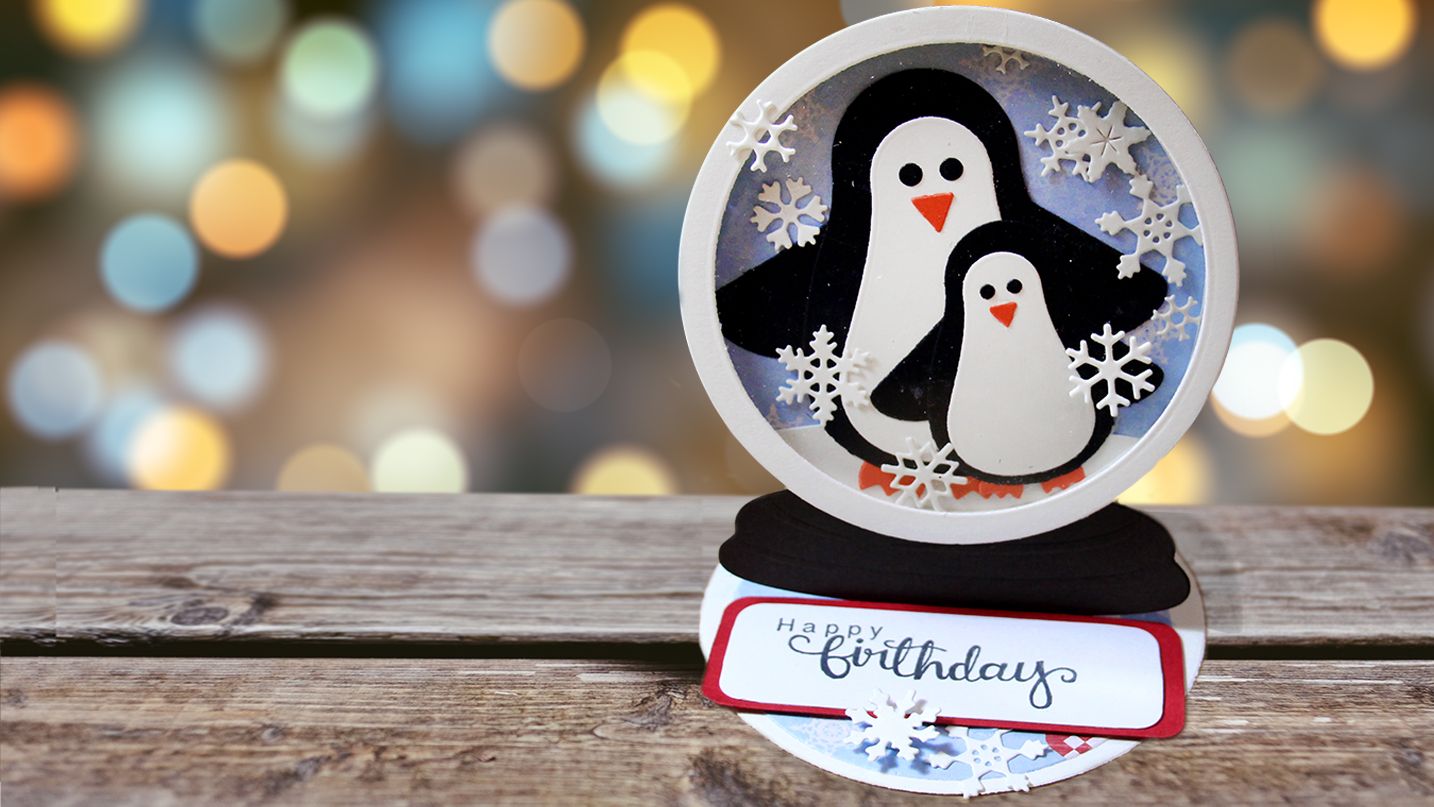
Winter is here and how better to spend some time all cozy in your craft room making cute easel cards. I have recently been infatuated with easel cards and shaker cards so I thought to myself why not combined the two card designs into one.
This card design was made with family in mind. They are the type that love to spend endless hours playing in the snow and just enjoying the winter weather, quite opposite of me. With some winter birthday in the family what better way to show them that I'm thinking of them and what they like to do.
What you need to cut out for the card:
Using the largest round die cut form the snow globe die set cut out one circle from white card stock and one circle using patterned paper, a circle that is hinged on one side.
Also using the largest die and the second largest cut out a frame for the front of the card design (do not discard the center piece) as well as a clear piece of acetate for the shaker part of the card. With the center piece cut a curve to make the hill the penguins will be standing on.
Using the second largest circle cut out a circle using the same patterned paper for the base of the card.
Using dark brown paper cut out the case of the snow globe.
Using black and white paper cut out the penguin and a small piece of orange paper for the feet and beak.
Cut out snowflakes or dots to represent snowflakes
Now to assemble the card
Assemble the penguins and add accessories if you like. Attach the hill you cut out to the large patterned paper and then attach the penguins to the hill. Attach all this to the solid white circle.
Using the frame you cut out attach the acetate circle to the back using acrylic glue.
Using the foam strips double it up and take the backing off. Attach this to the back of the acetate around the edge trying not to leave a gap.
Dump the snowflakes or dots you cut out onto the penguins face, carefully place the assembled acetate frame to the front trying to line up the circles as best you can.
Now for the base part.
Score and fold the top of the card 1/3rd from the top edge, fill this area with strong tape and attach the top part of the card to that.
On the base of the card attach the smaller patterned paper circle.
Bump up your sentiment so that it will hole the card open , and attach it to the card base.
This card design can be for any occasion, birthday, Christmas, thinking of you, miss you.. the options are endless. I had so much fun designing and creating this card I hope you will give it a try and have fun as well.
Until next project
Katarina
The products I used to make this card include:
Marianne Design Collectables Snow Globe die set - COL1362
Marianne Design Collectables Penguin die set - COL1331
Marianne's Pretty Paper Bloc: Eline's Scandinavian Winter - PB7040
Mini Expressions Collection Warmest Wishes die - CEDME018
(Happy Birthday) Woodware Clear Stamps Countryside Stems - JGS559
Mini Expressions Collection Let it Snow die - CEDME022
Marianne Design Collectables Bells and Holly die - COL1363