MDF Fairy in a Bottle
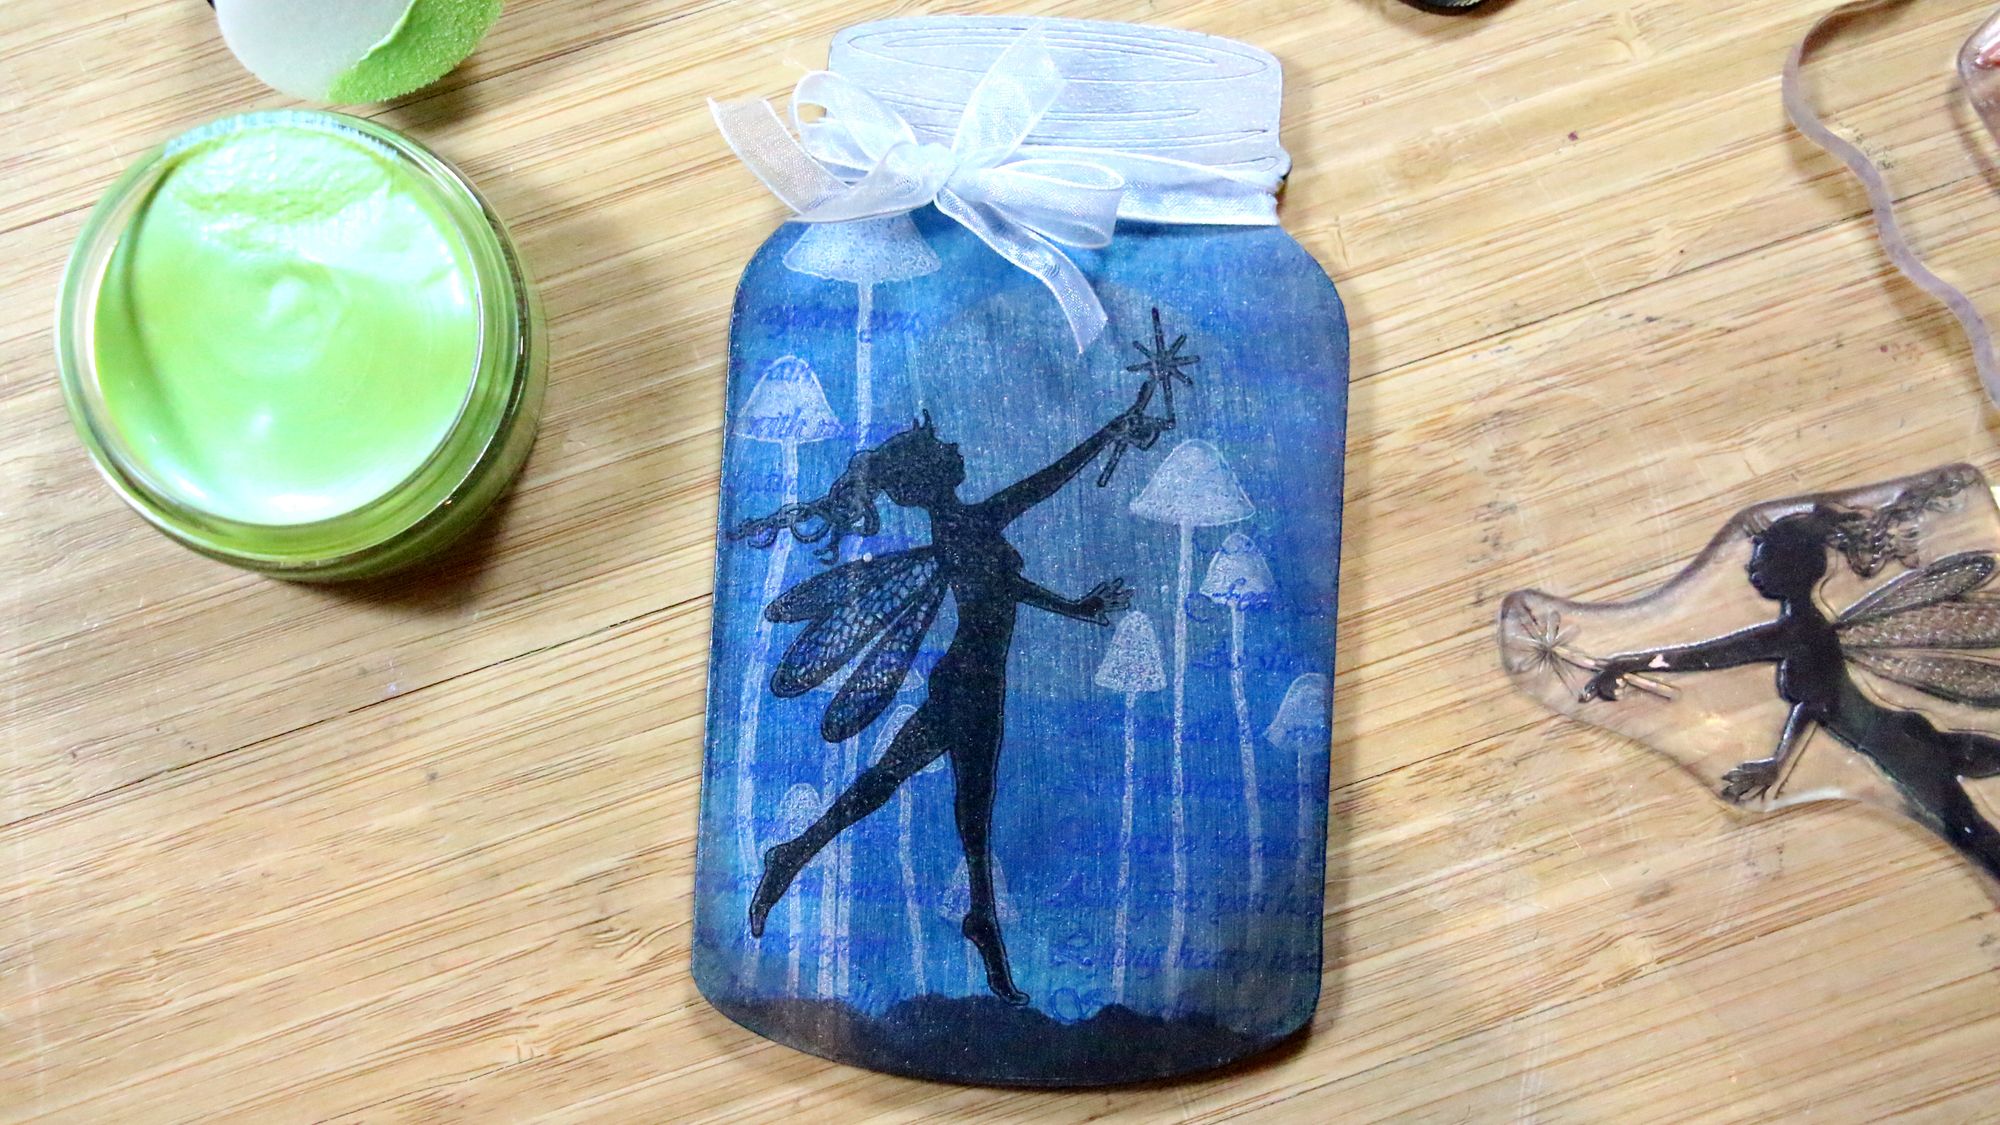
Today we'll be making this beautiful Fairy in a Bottle using the new Cosmic Shimmer Opal Polish - Blue Parakeet along with a few Lavinia stamps and a MDF mason jar.
Welcome back, today's free project includes something new and exciting and I hope you enjoy this one.

Today we'll be making this beautiful Fairy in a Bottle using the new Cosmic Shimmer Opal Polish - Blue Parakeet along with a few Lavinia stamps and a MDF mason jar. Let's begin by priming your MDF piece. I used black acrylic paint for one and white for the other. I did this to show you how the Opal polish has a different hue depending on what colour is in the background. When you’re using this polish experiment on other colours of paper as well like blue and green and you'll be surprised on how they will turn out.
I did prime my pieces ahead of time and allow time to dry between coats. I also applied a few layers of the opal polish to get a clean and solid background on my piece and allowed them to dry as well.
Once the layers are dry I began with masking the moon. I used a piece of scrap paper and my MDF 055 of circles to cut it out and used it to mask off the moon while I applied ink around the moon. I used Delicata Ink - Sapphire Blue and began in the center of the moon and work my way out towards the edge of the Mason jar all around the moon. Try not to be to heavy handed here so that you don't cover up all the beautiful opal polish in the background.
Once the moon is done I placed the Mason jar into my Stamping Buddy Pro and held it in place with the magnets so that it doesn't move when I repeatedly stamp my images. I begin with the mushrooms in the background using Delicata Ink - Silvery Shimmer to stamp them onto my Mason jar piece. I re-positioned one of the two mushrooms and stamped it again on the other side of the jar. Once they were done I stamped the Lavinia Fairy Stamp - Fayllin onto the jar using Delicata Ink - Black Shimmer and I stamped it several times to get a solid black silhouette of the fairy.
The next step is to add the words in the background. To do this I adhered my Lavinia Shaylee's Spell to an acrylic block and used the Sapphire Blue Ink. Working around the edges of the jar and stamping off first so that not to have really dark transfer.
To add the ground that the fairy is on I ripped a piece of scrap paper and used the edge to align to the fairy's foot and gently with the same Sapphire Ink applied the ink to appear like ground, yet still not solid so that all that shine still comes thru. At this point I used the Black Shimmer to add a bit of darkness around the edges of the jar to add dimension. With a few layers, paint the lid of the jar with a silver paint add a bow and you’re done.
I hope you like this new free project and give some of these product’s a try.
Products I used :
Cosmic Shimmer Opal Polish - Blue Parakeet
Tsukineko Delicata Pigment Ink Pads
Lavinia Stamp Shaylee's Spell - LAV300
Lavinia Stamp Skinny Mushrooms - LAV400
Lavinia Stamp Fayllin - LAV277
Creative Expressions Smoothies
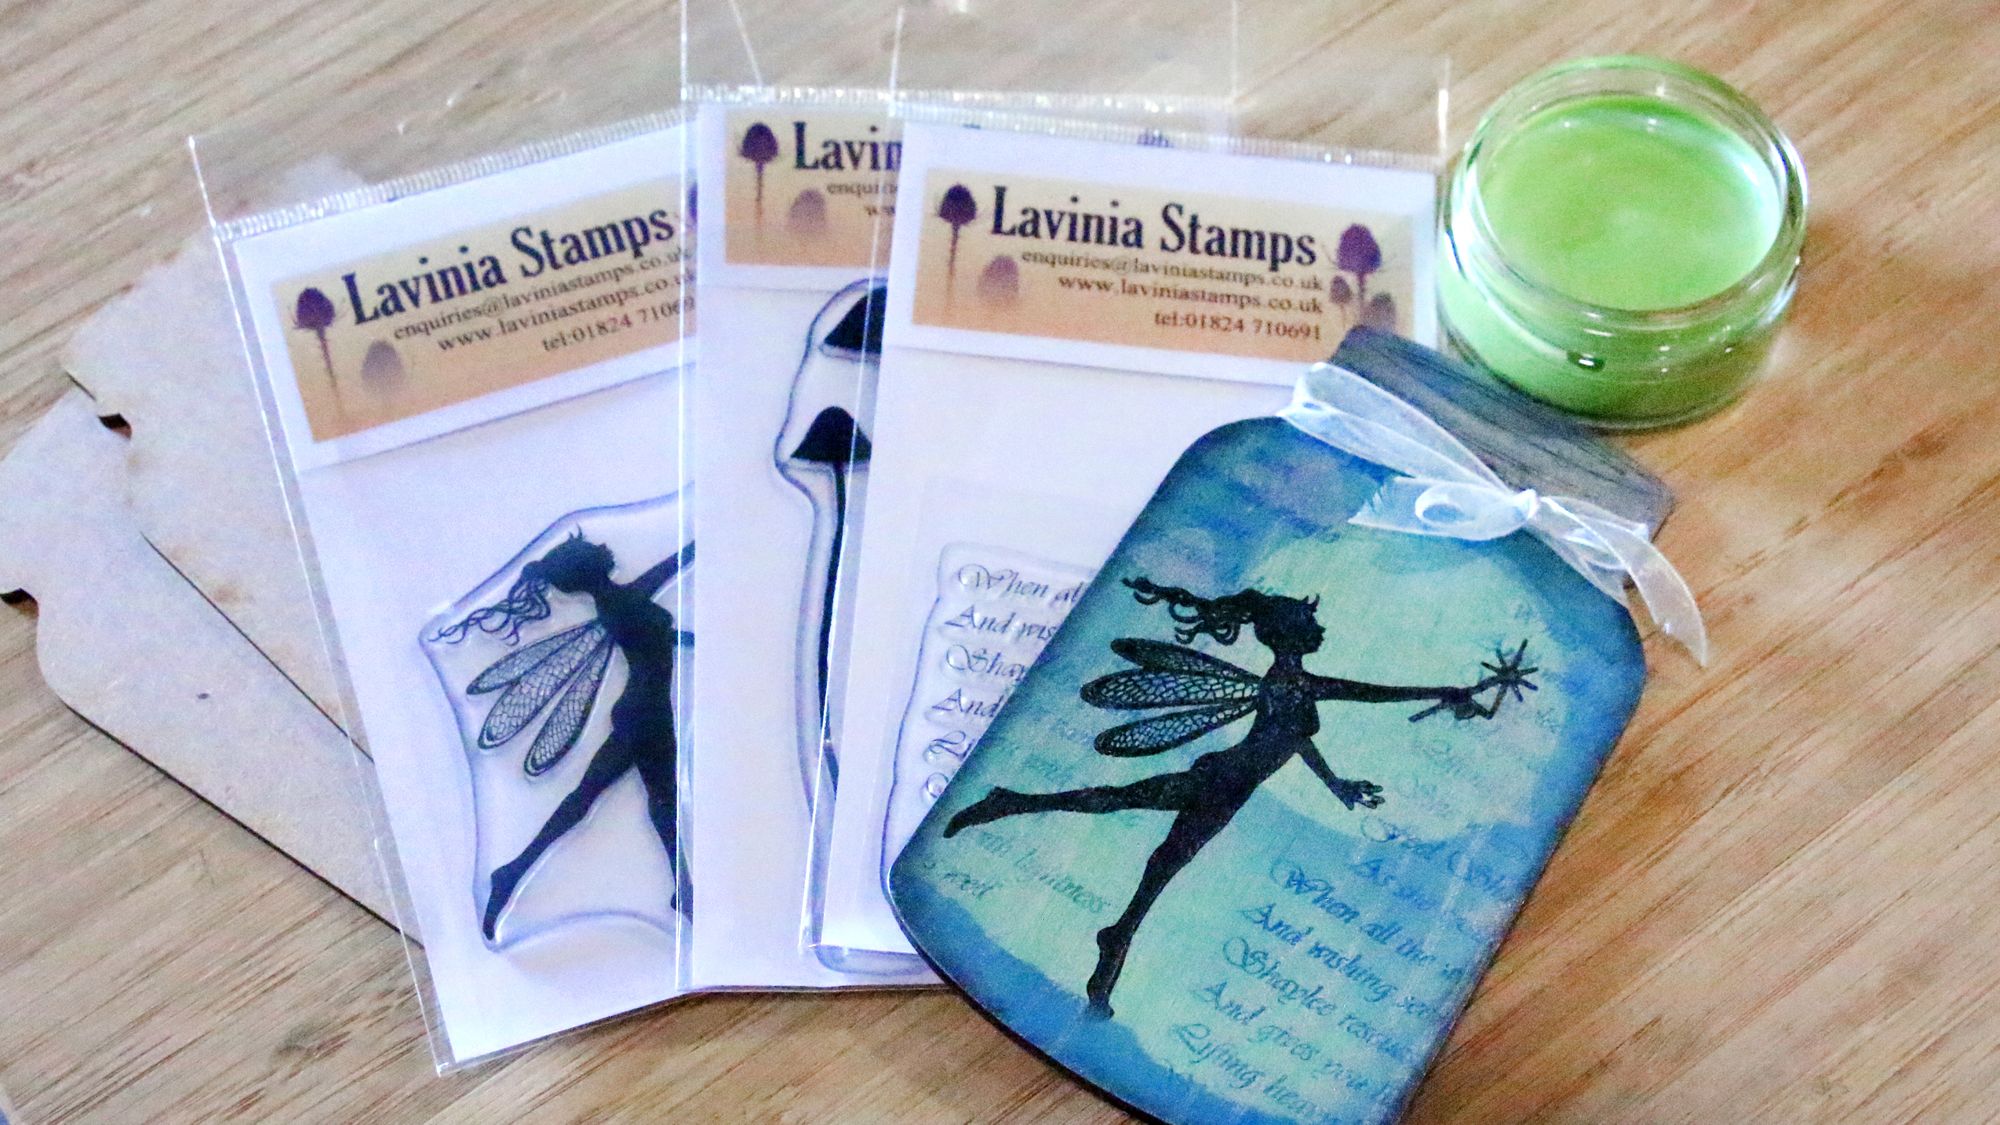
MDF Fairy in a Bottle Project Bundle
We are offering a new 6-piece bundle that includes everything you need to make the Fairy in a Bottle Project: 2 MDF Jars, 1 Opal Polish in Blue Parakeet, and the 3 Lavinia Stamps featured in the video.