Layered Background Dies
How to use the Nellie's Choice Layering Background dies to get the most out of them.
I've been seeing so many ideas with layered background dies around and finally I get to play with some!! We now carry several background dies that layer and give your project some great interest.
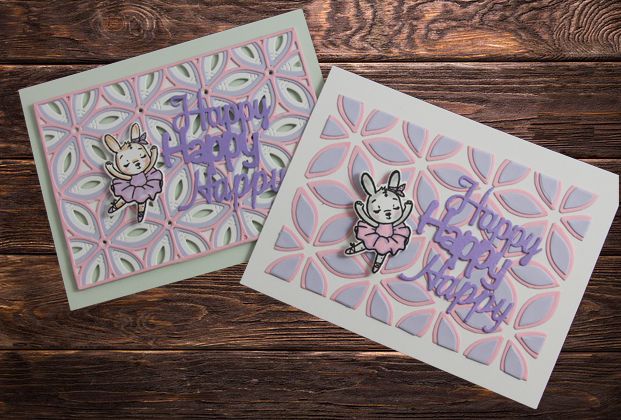
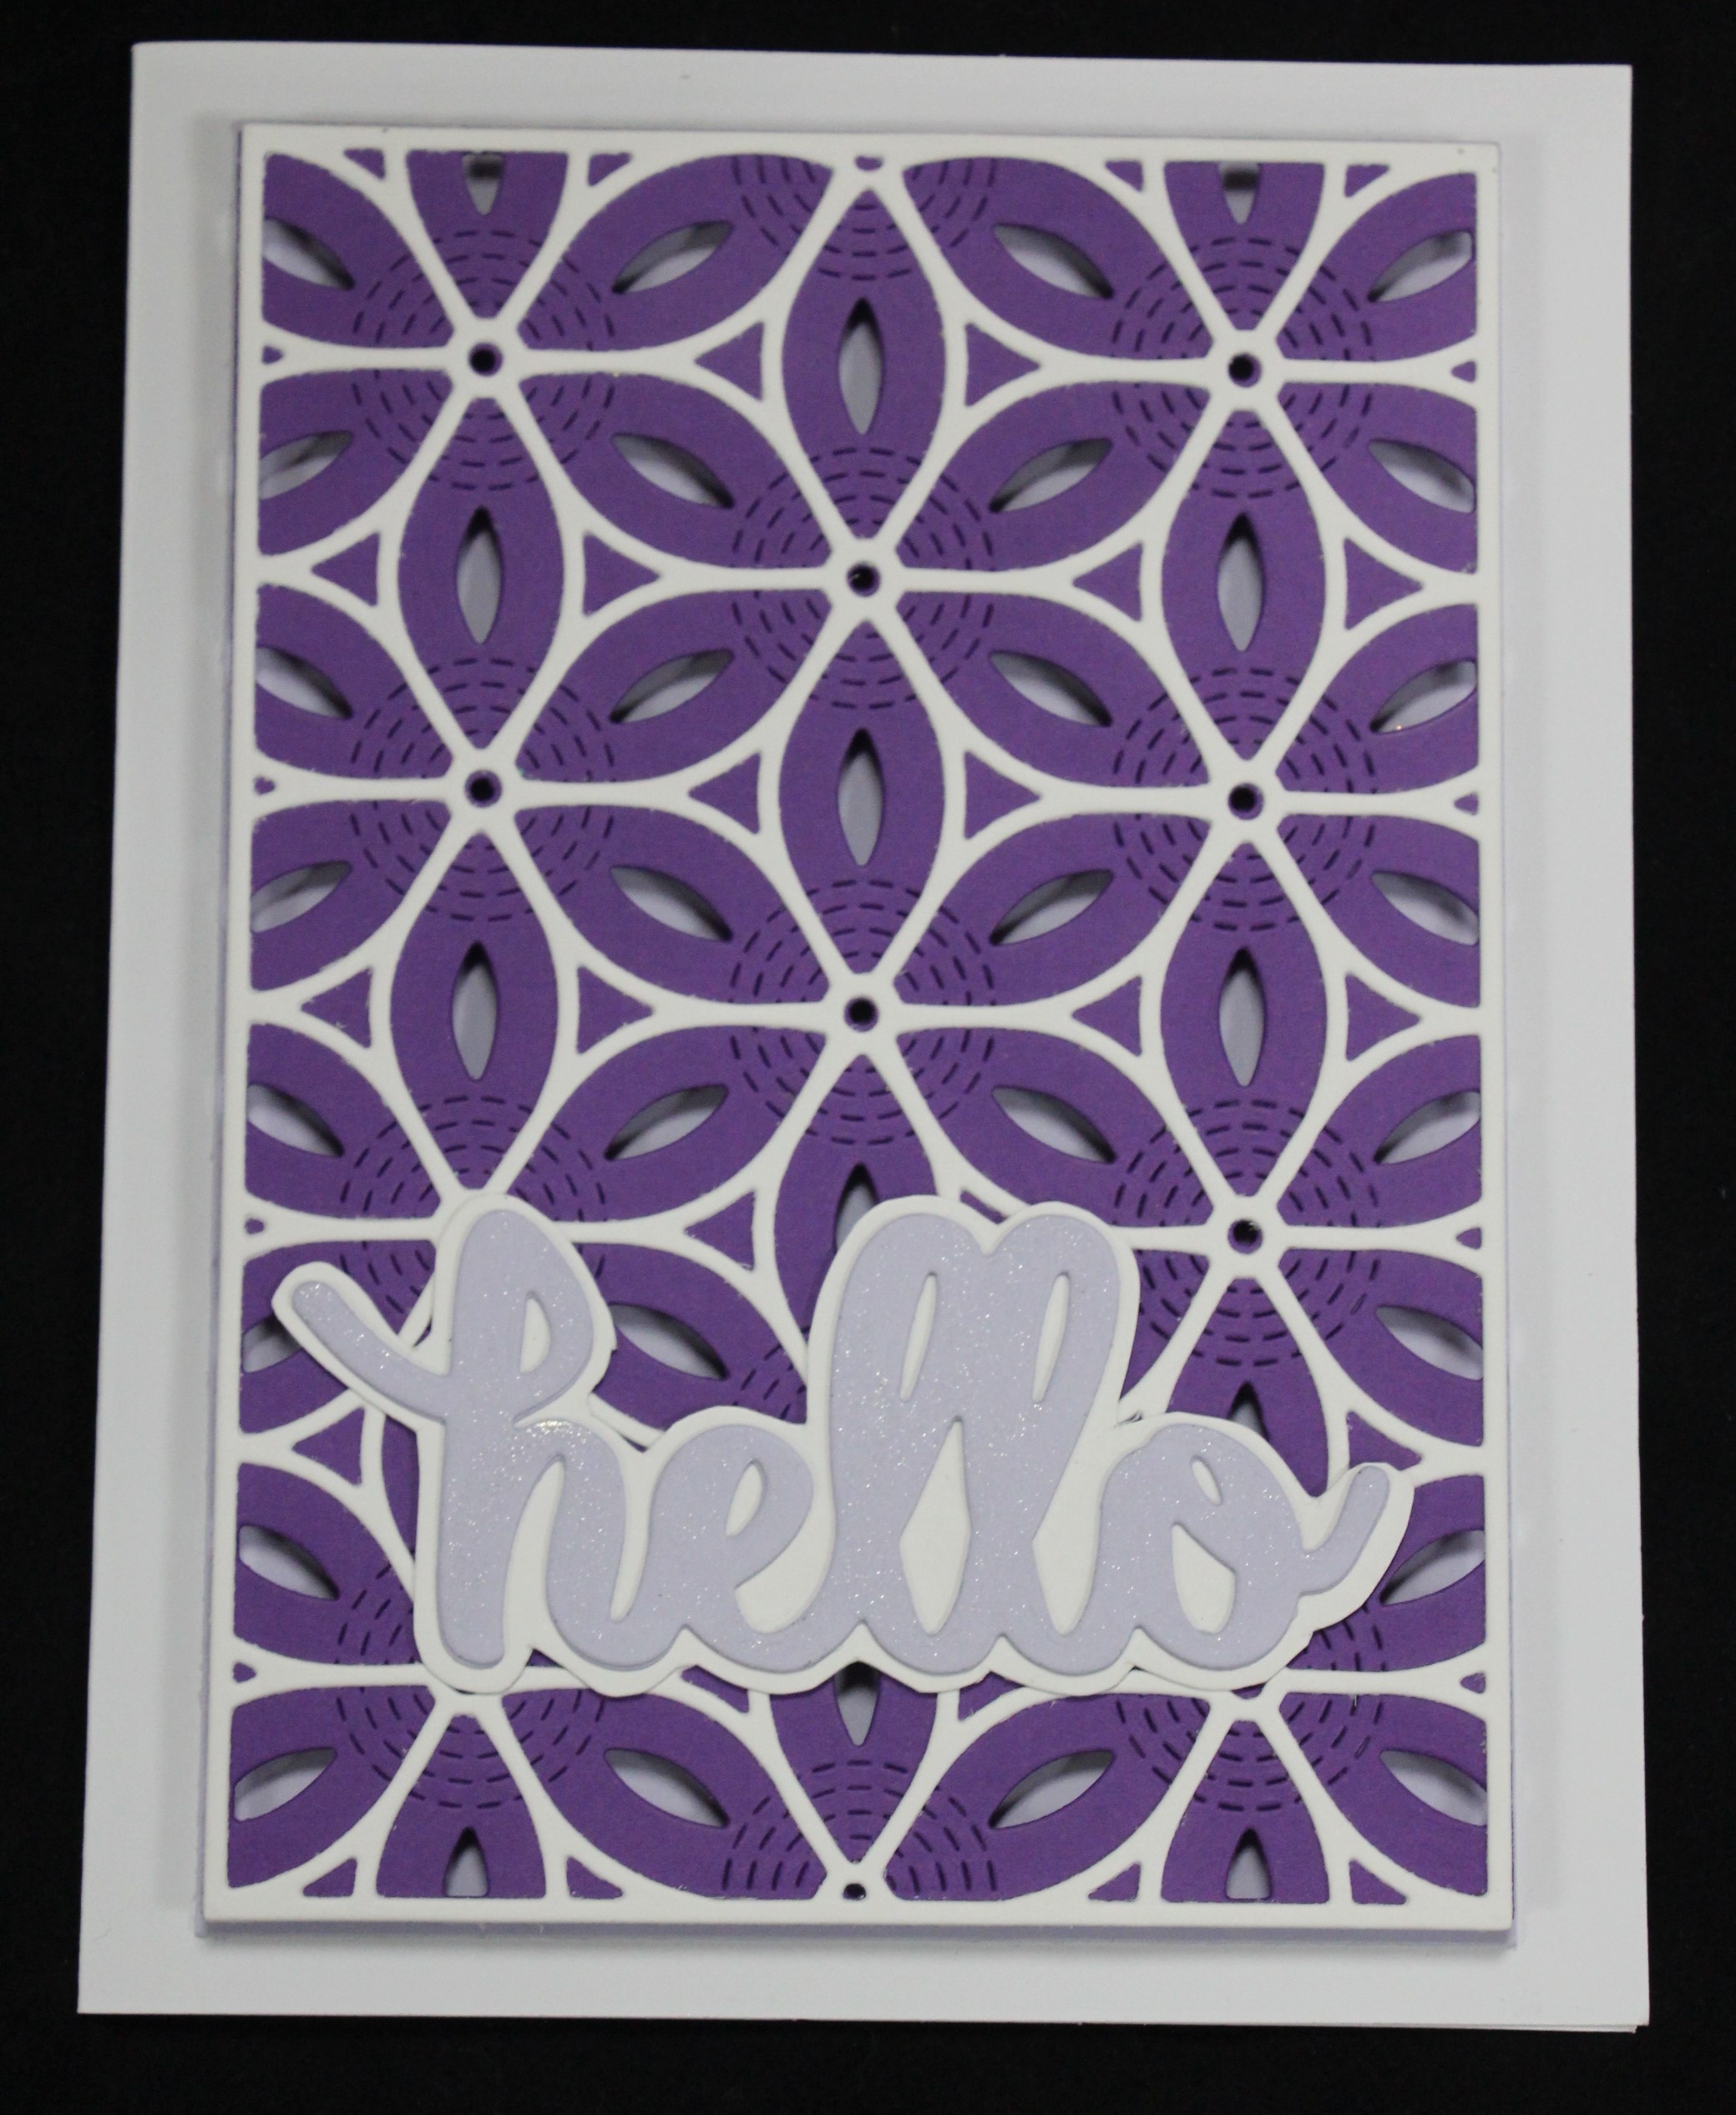
For my example today I used the Nellie's Choice Layered Combi Dies Flower Layer A, B and C. And not only did I use the positive cut out to create one card but I used the negative cut outs to create a second card. By doing this you extend the use of your dies, making the initial investment more worth it.
OK so lets get started here.
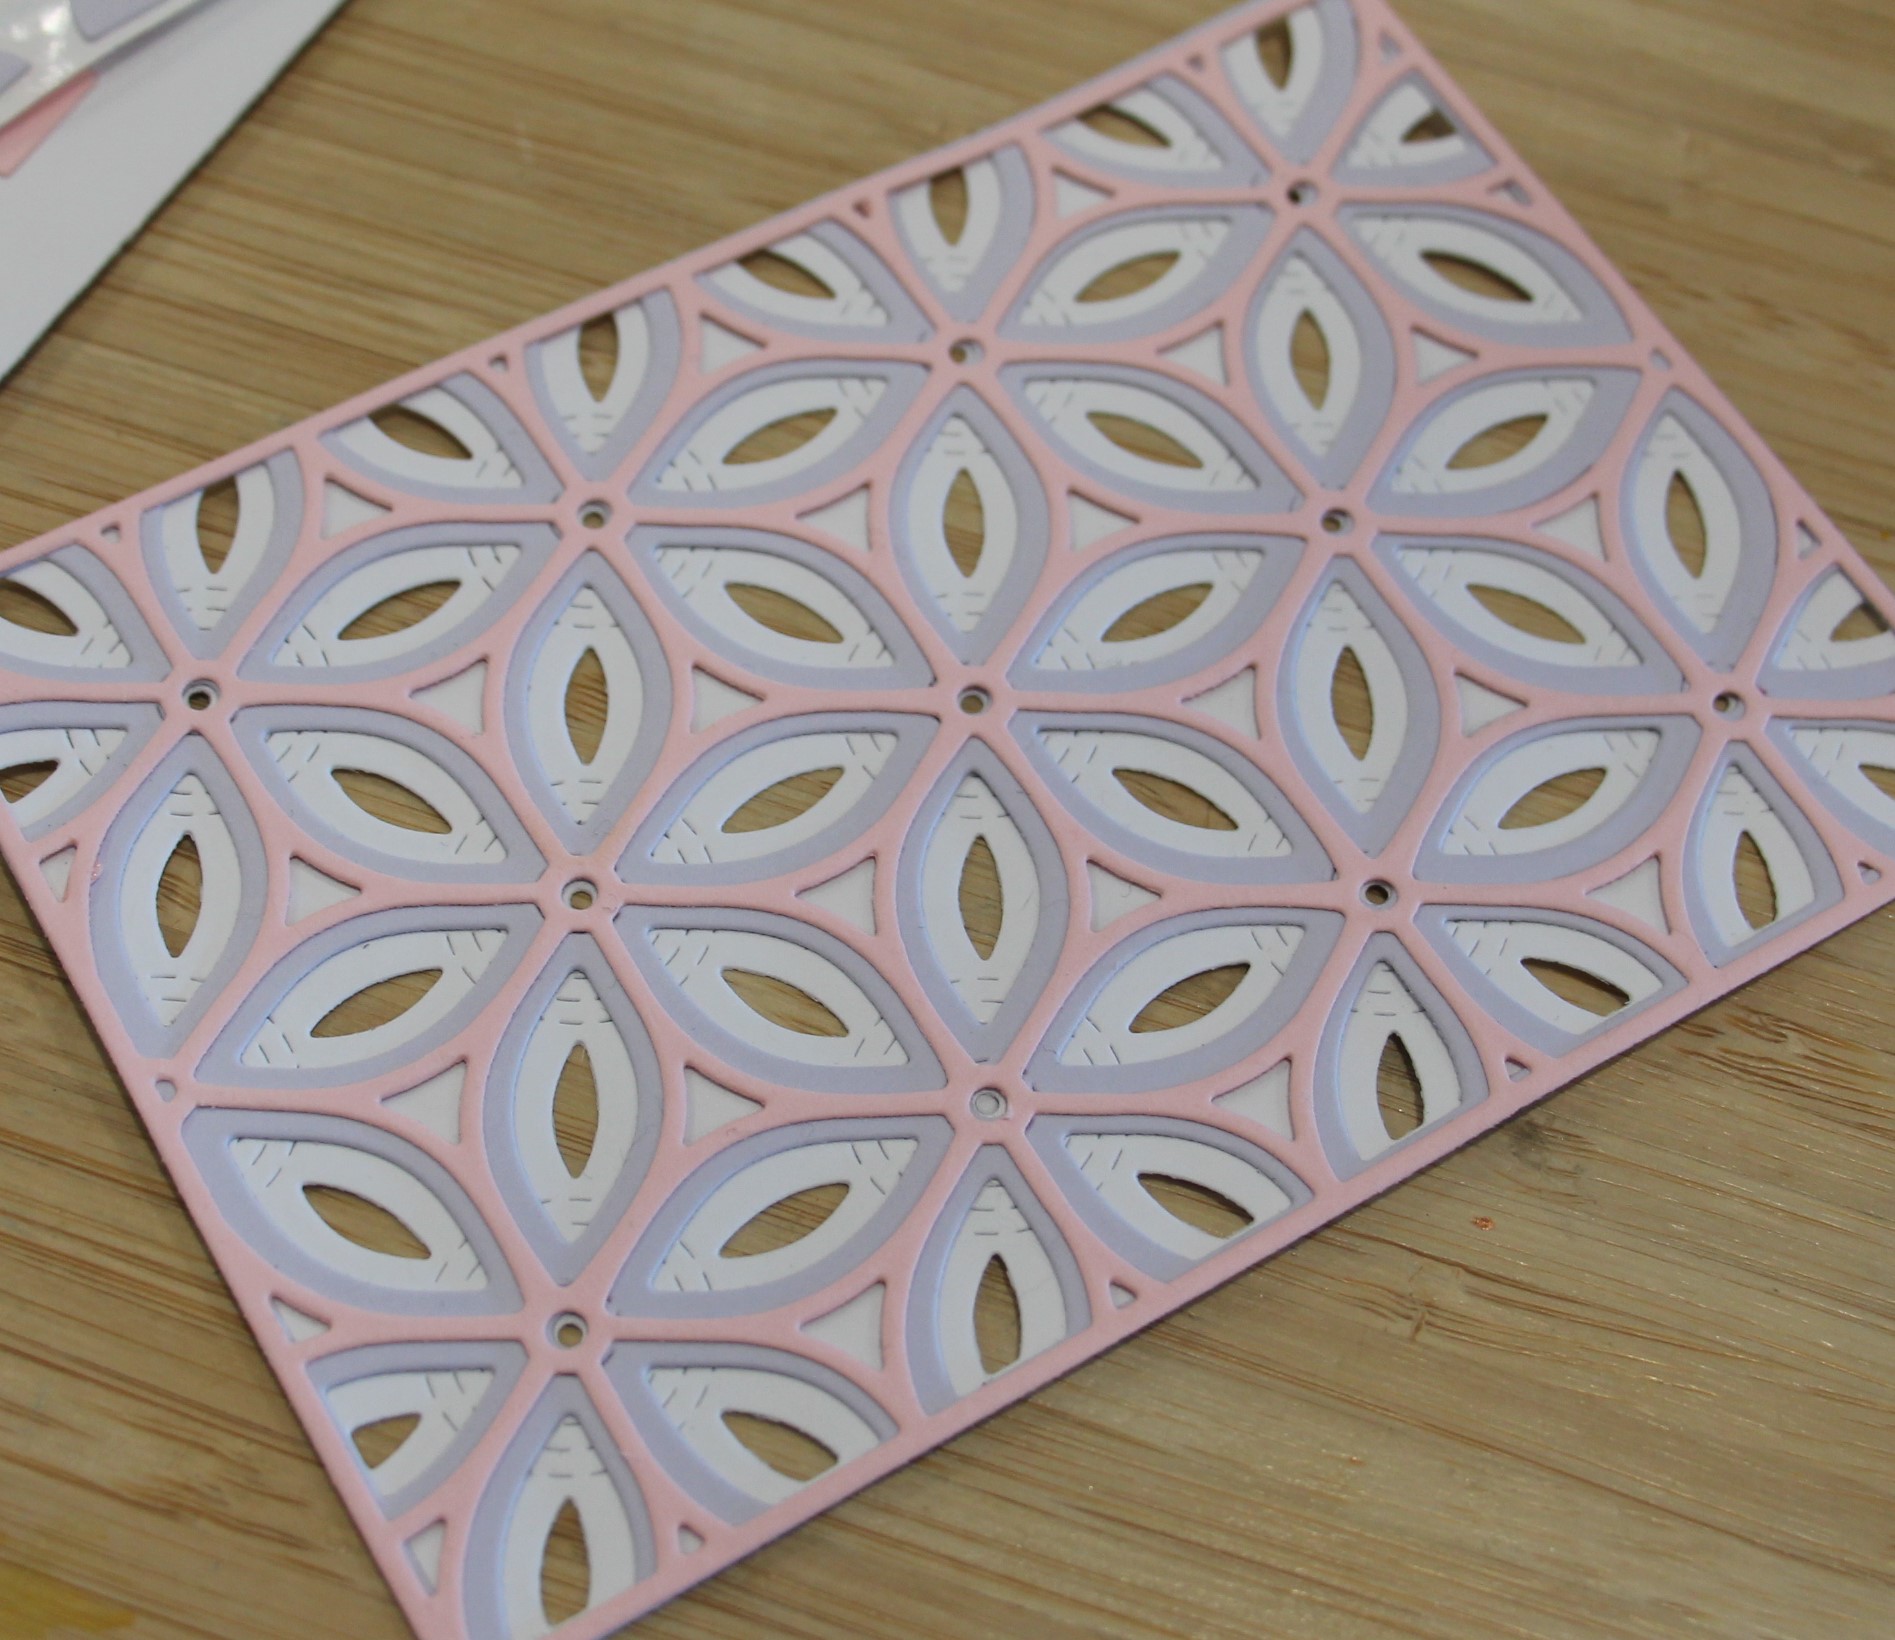
My first step is to adhere a piece of Foundation Cardstock Pink - 41035 and Foundation Cardstock Wisteria- 41036 cut to 4.5" x 6" to a piece of Be Creative Sheets, double sided tape paper.
You'll run these thru your cutting machine using Layer A and B of the Nellie's Chioce Layered Combi Dies. You may have to run it thru a few times to sure it cuts thru.
Cut out Layer C using white card stock.
Cut a separate Layer A using a piece of scrap paper, we will use this as a template to assemble card 2.
Card 1 Assembly:
Peel the pink layer off the double sided tape paper and adhere it to Layer C that was cut from white cardstock. Peel the wisteria layer and adhere on top of the pink layer.
Use 3D Craft Foam Tape 2 mm to attach the layers to a 5" x 6.5" card base cut out in light green cardstock.
Card Assembly 2:
Using the piece you cut out for your template, lay it centered on a white card base cut to 5" x 6.5" and secure with temporary tape to hold into place.
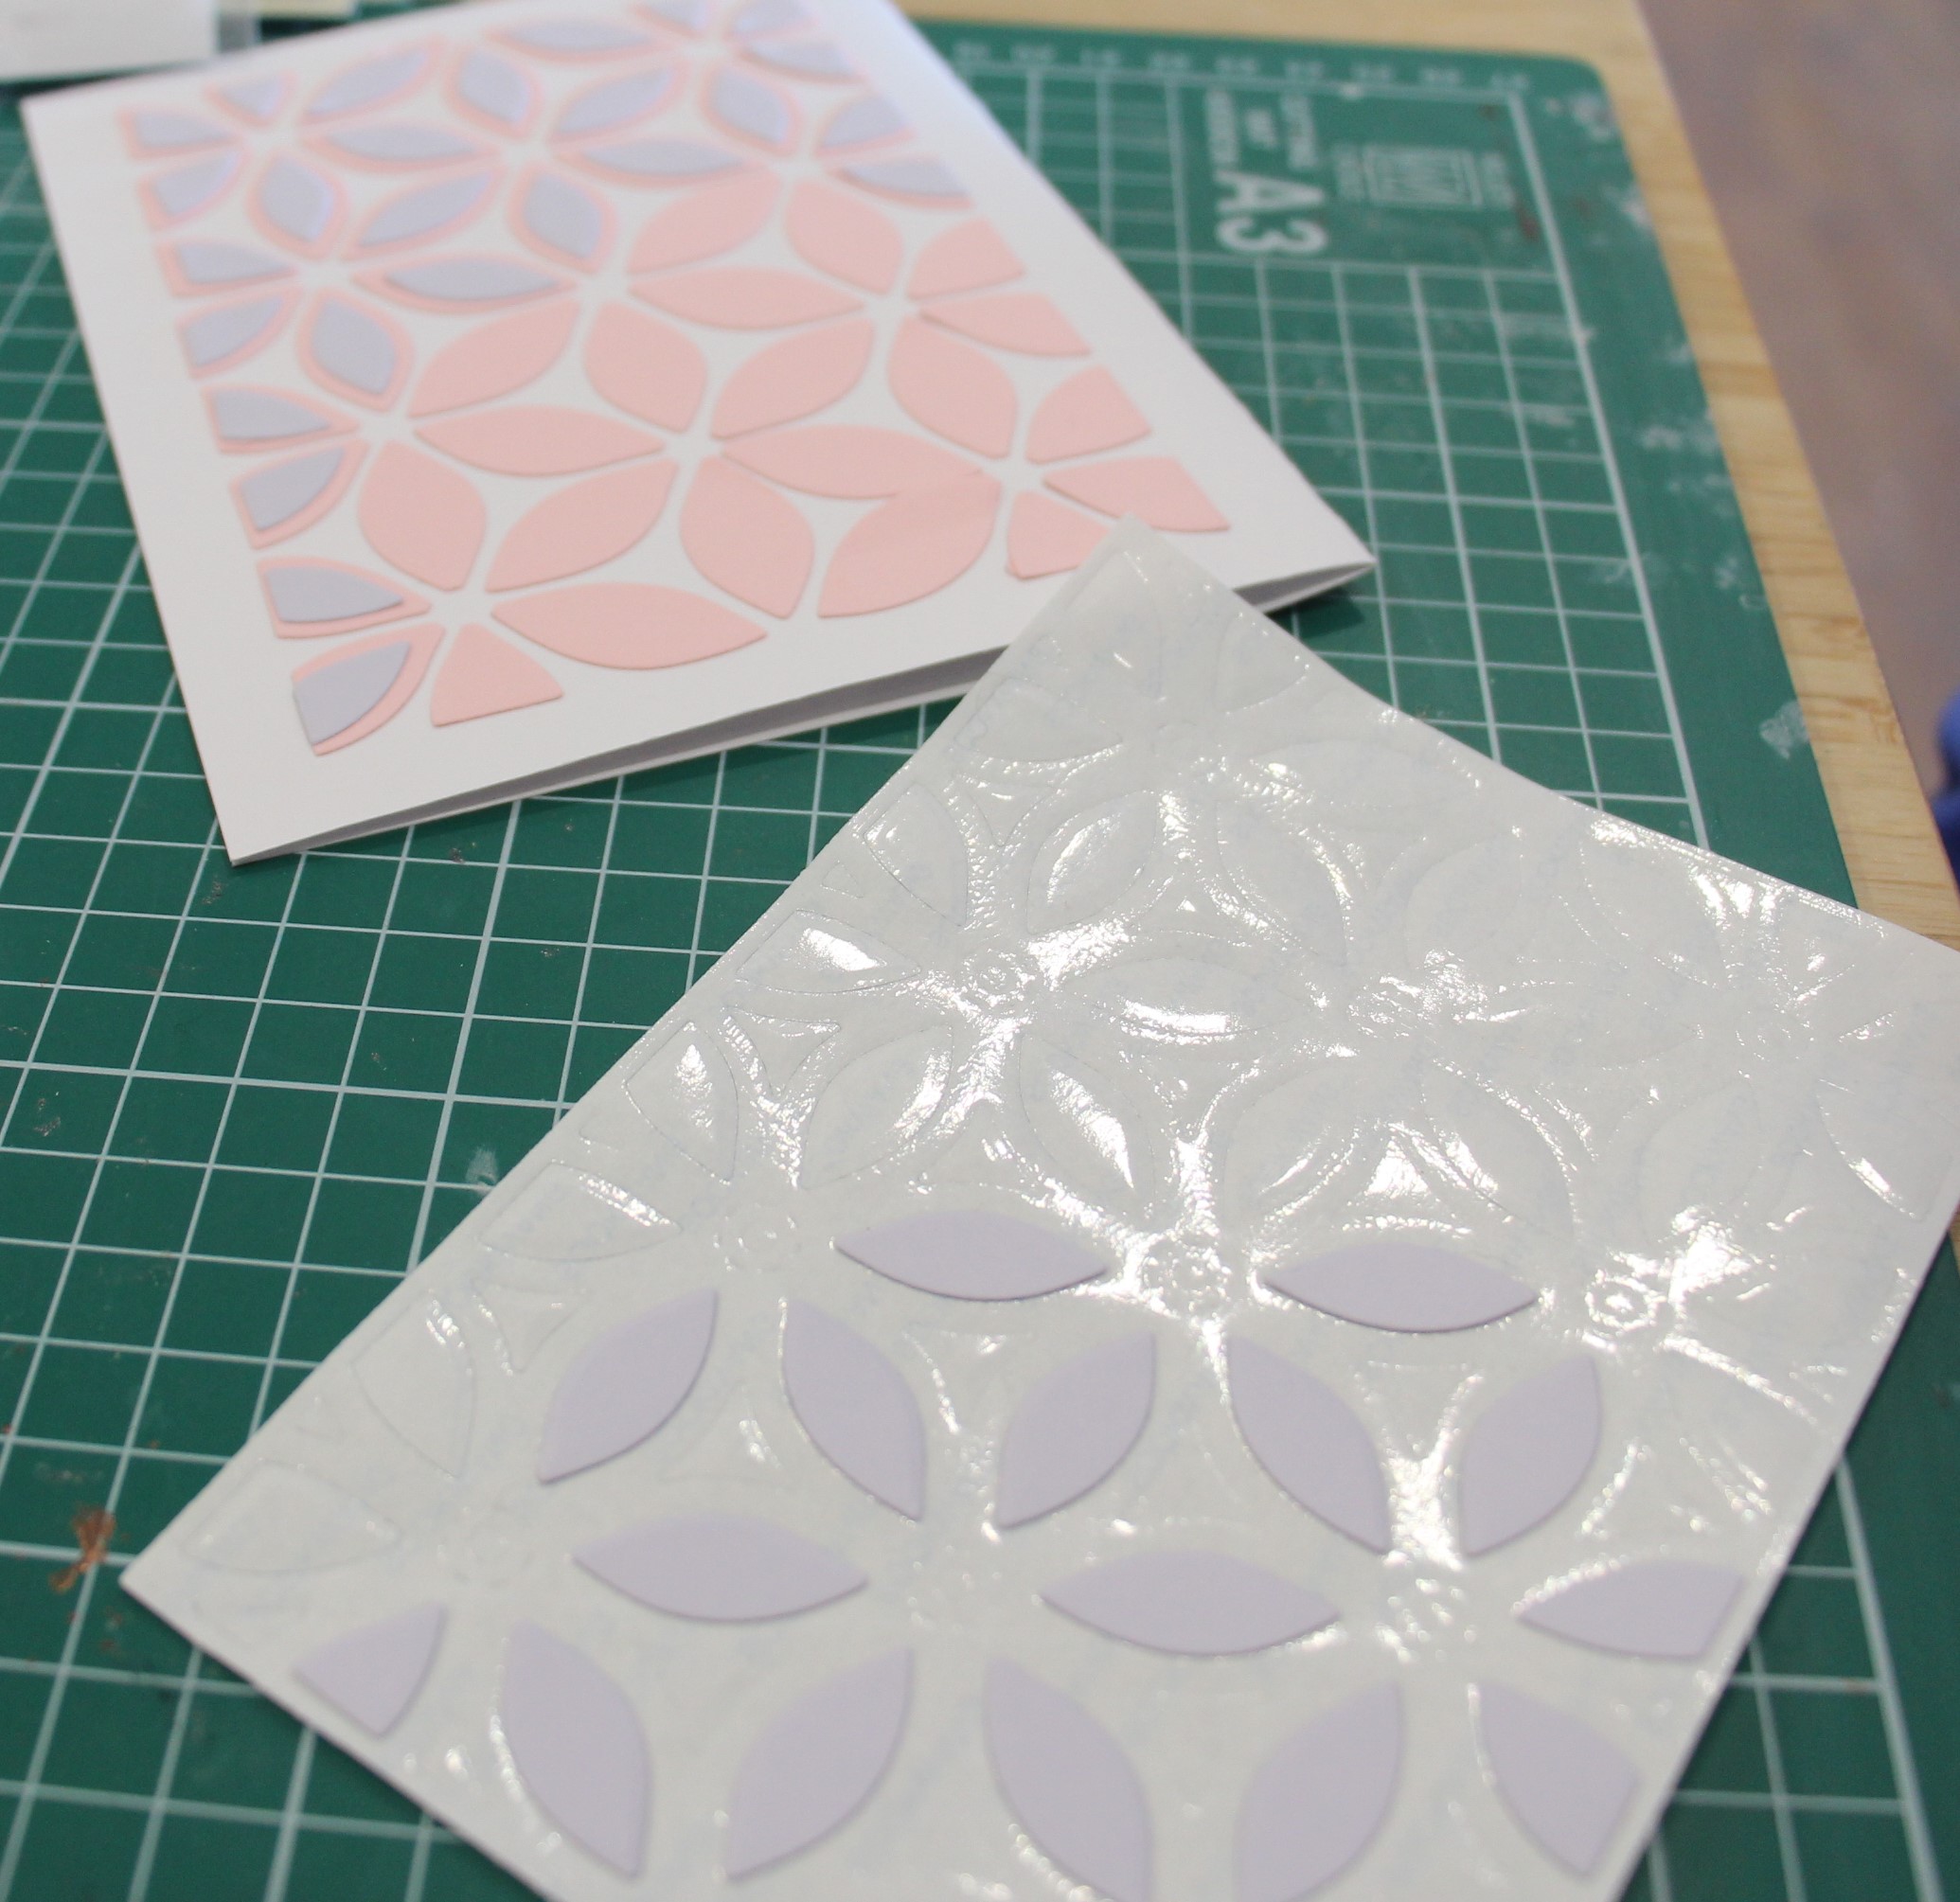
Using a craft pick or tweezers carefully remove each piece of petal from the Pink layer cut with double sided tape paper on the back and place on your prepared template aligning all the petals until they are all transferred over.
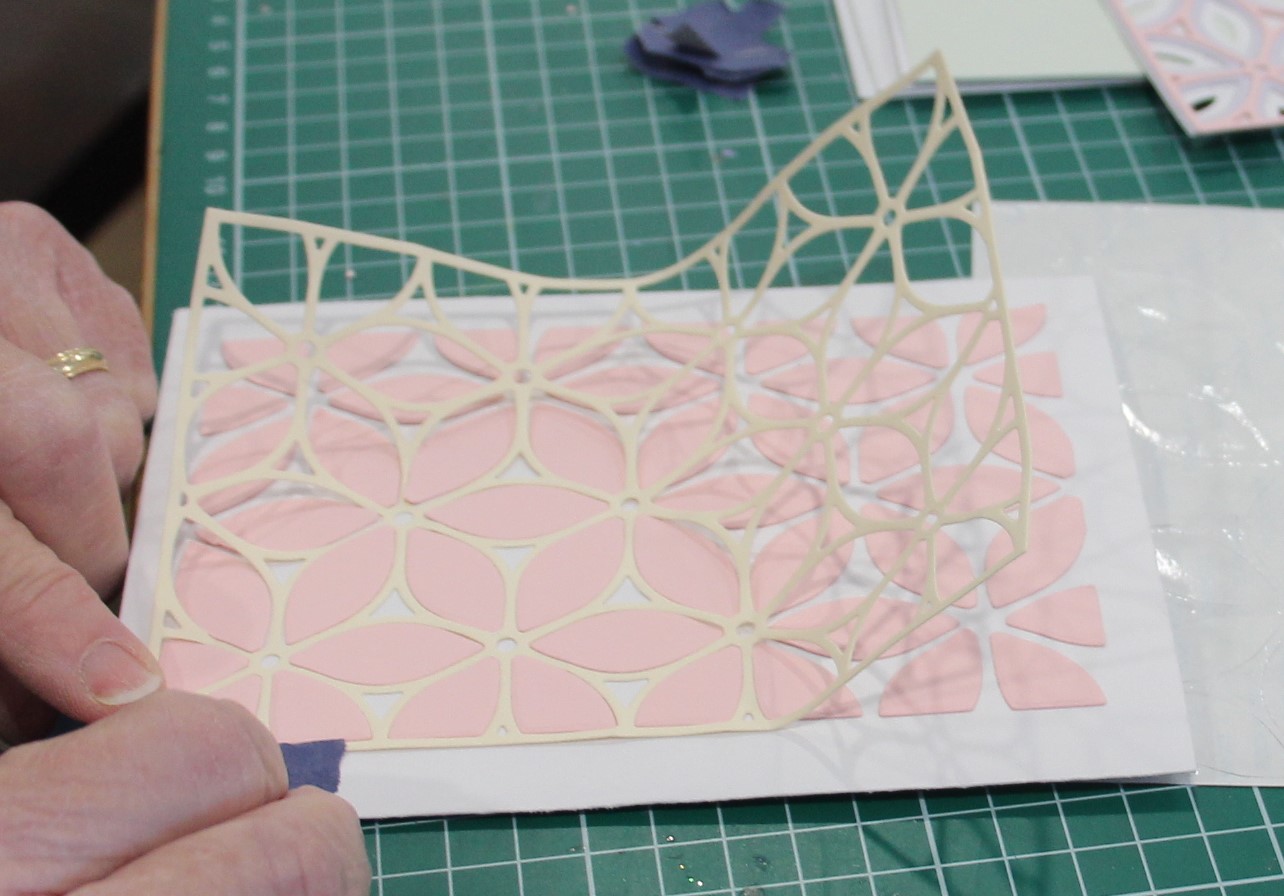
At this point you can carefully remove the template and repeat the steps with the wisteria cut outs, arranging them in the center of each of the pink petals.
Bunny Stamp and Die:
Using Nellie's Choice Dada Dies with Clear Stamp - DDCS004, stamp and cut out the ballerina bunny twice.
Color the image with whatever medium you have at home, I use my memento markers. Attach to your cards using 3D foam tape.
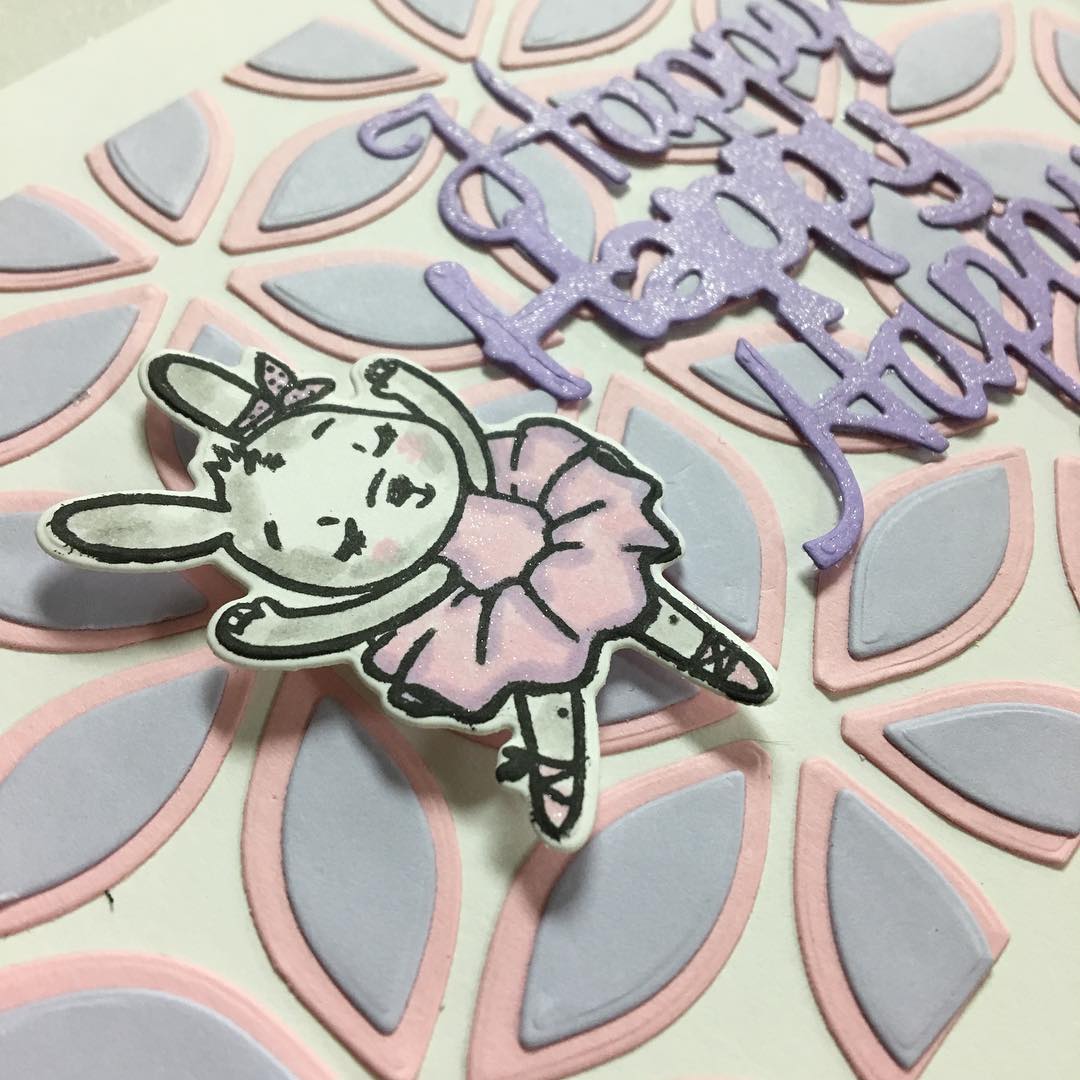
Sentiment:
I used the Happy Happy Happy die cut by Frantic, cut out in Foundation Cardstock Mauve - 41018, to add my sentiment to the card fronts.
To finish my cards I used Wink of Stella to add sparkle to the bunny and the sentiment.
I really hope you enjoyed this card and give it a try.
Until next project
Katarina
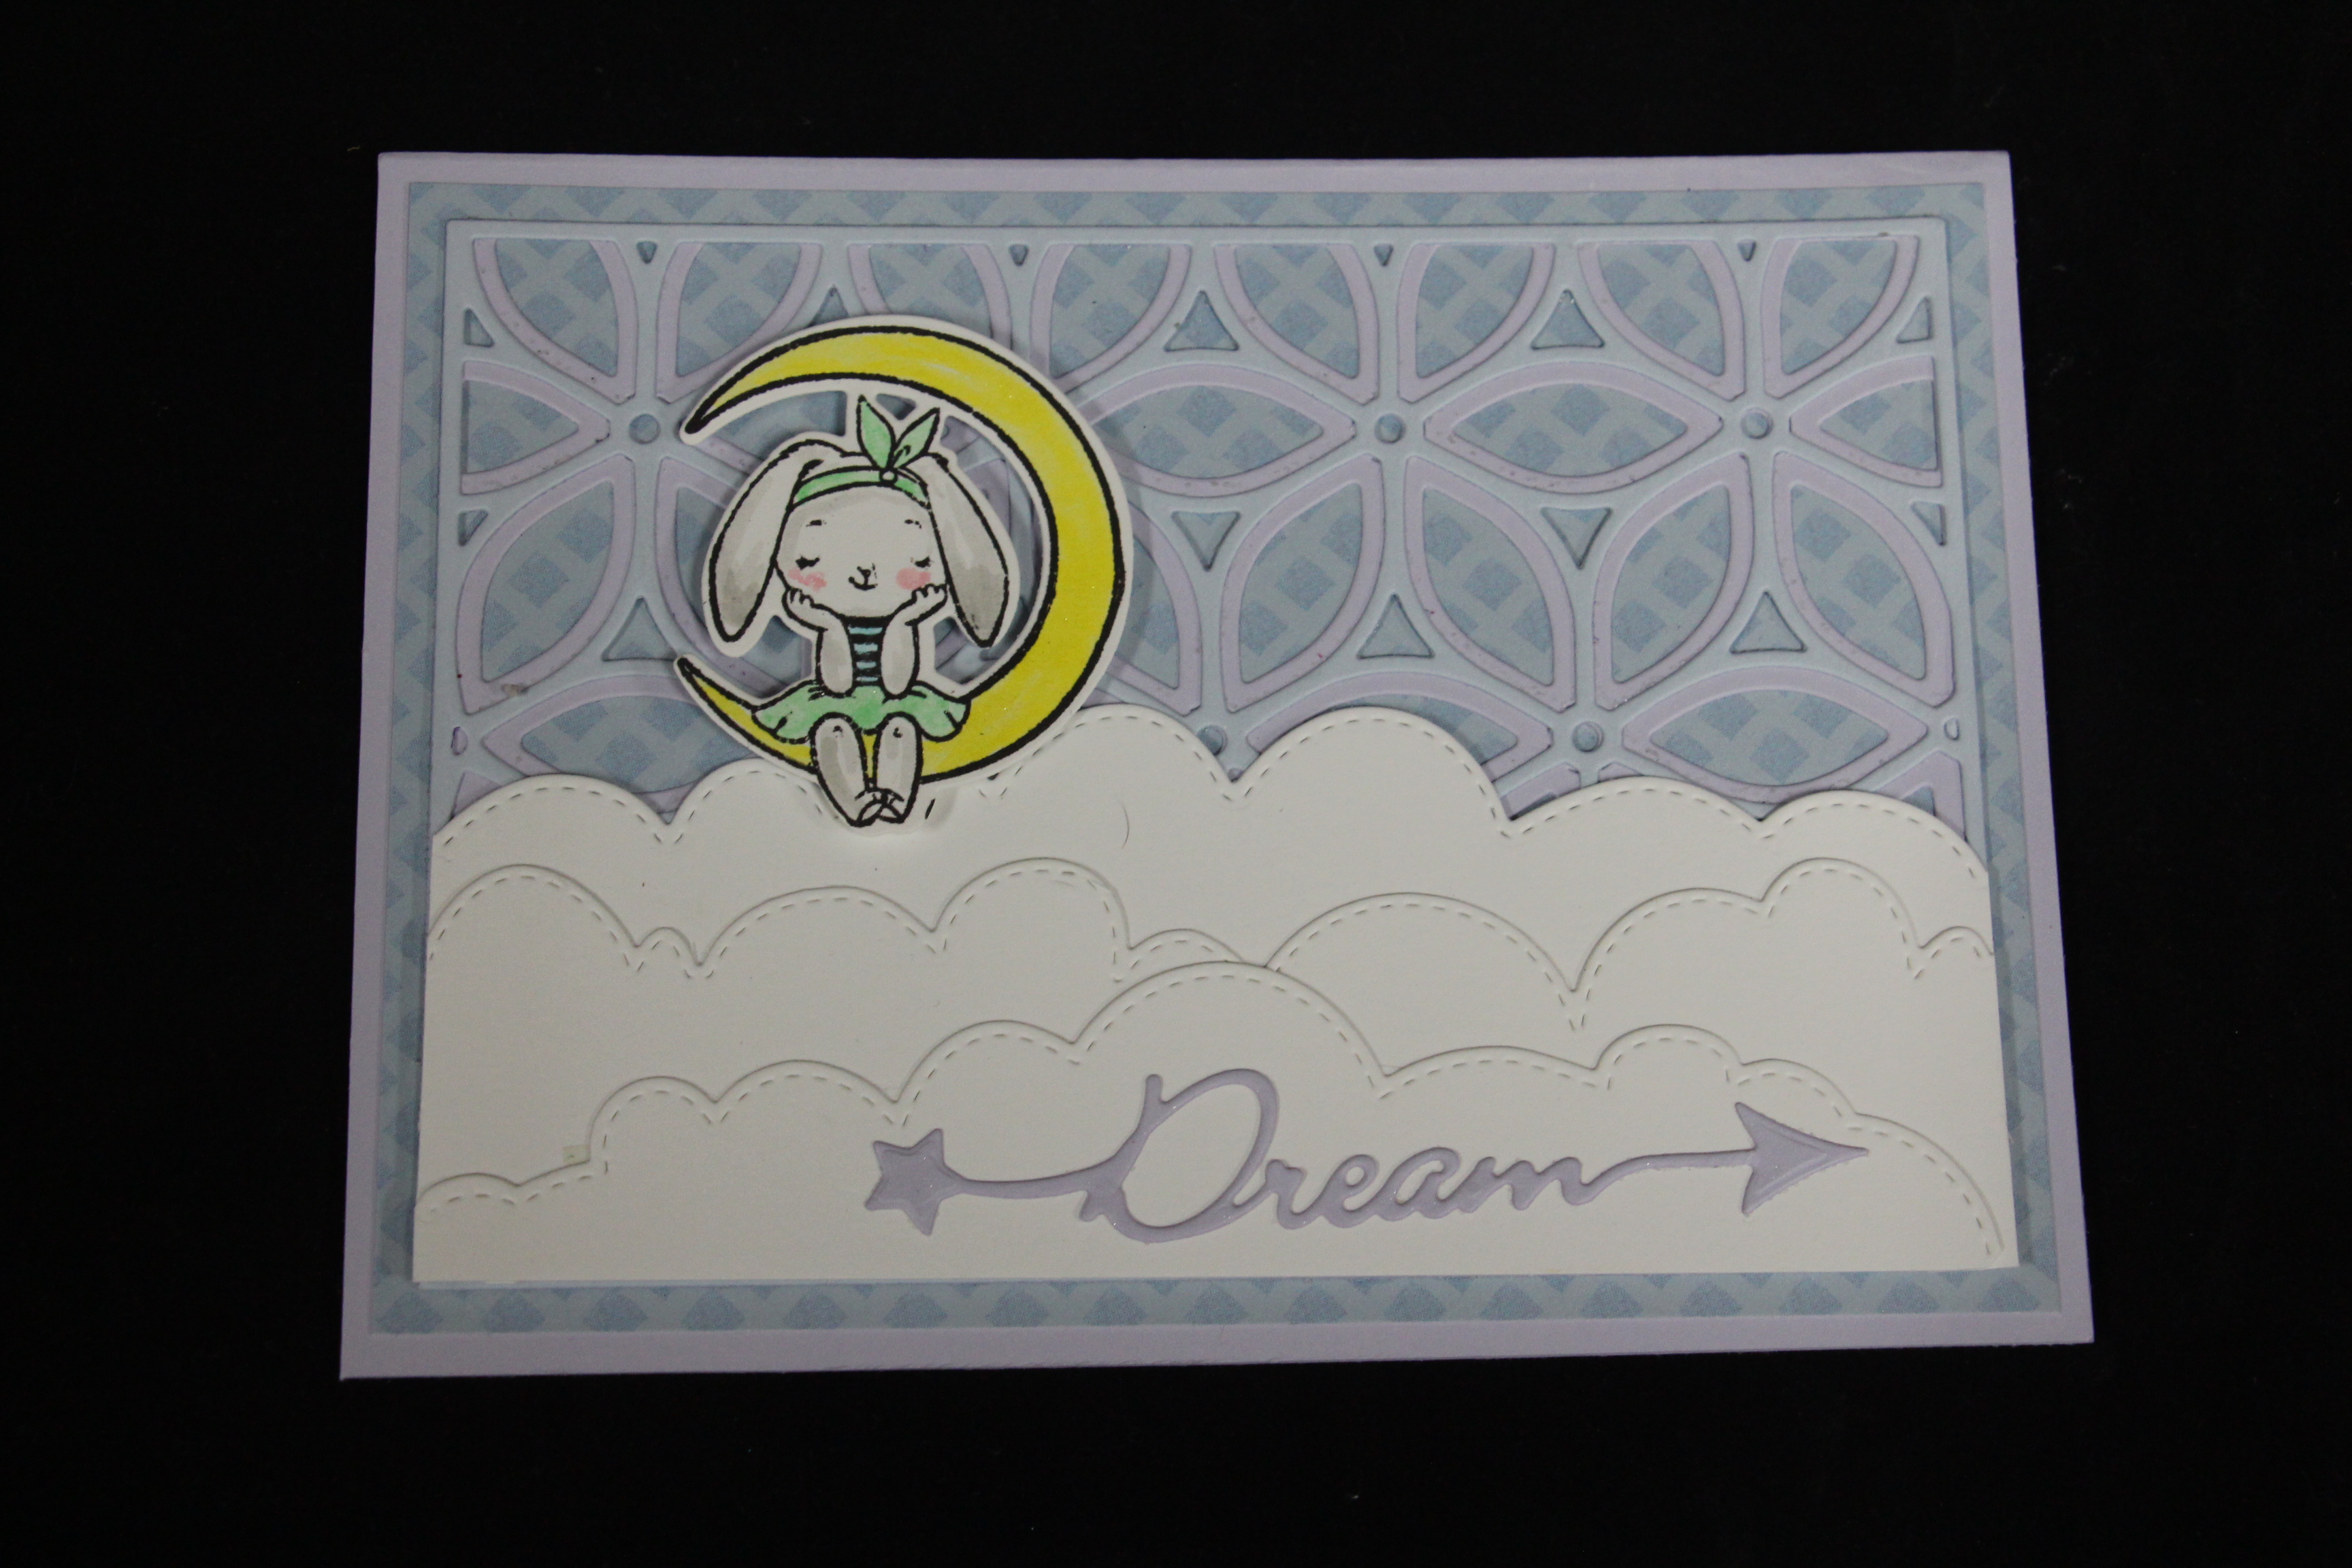
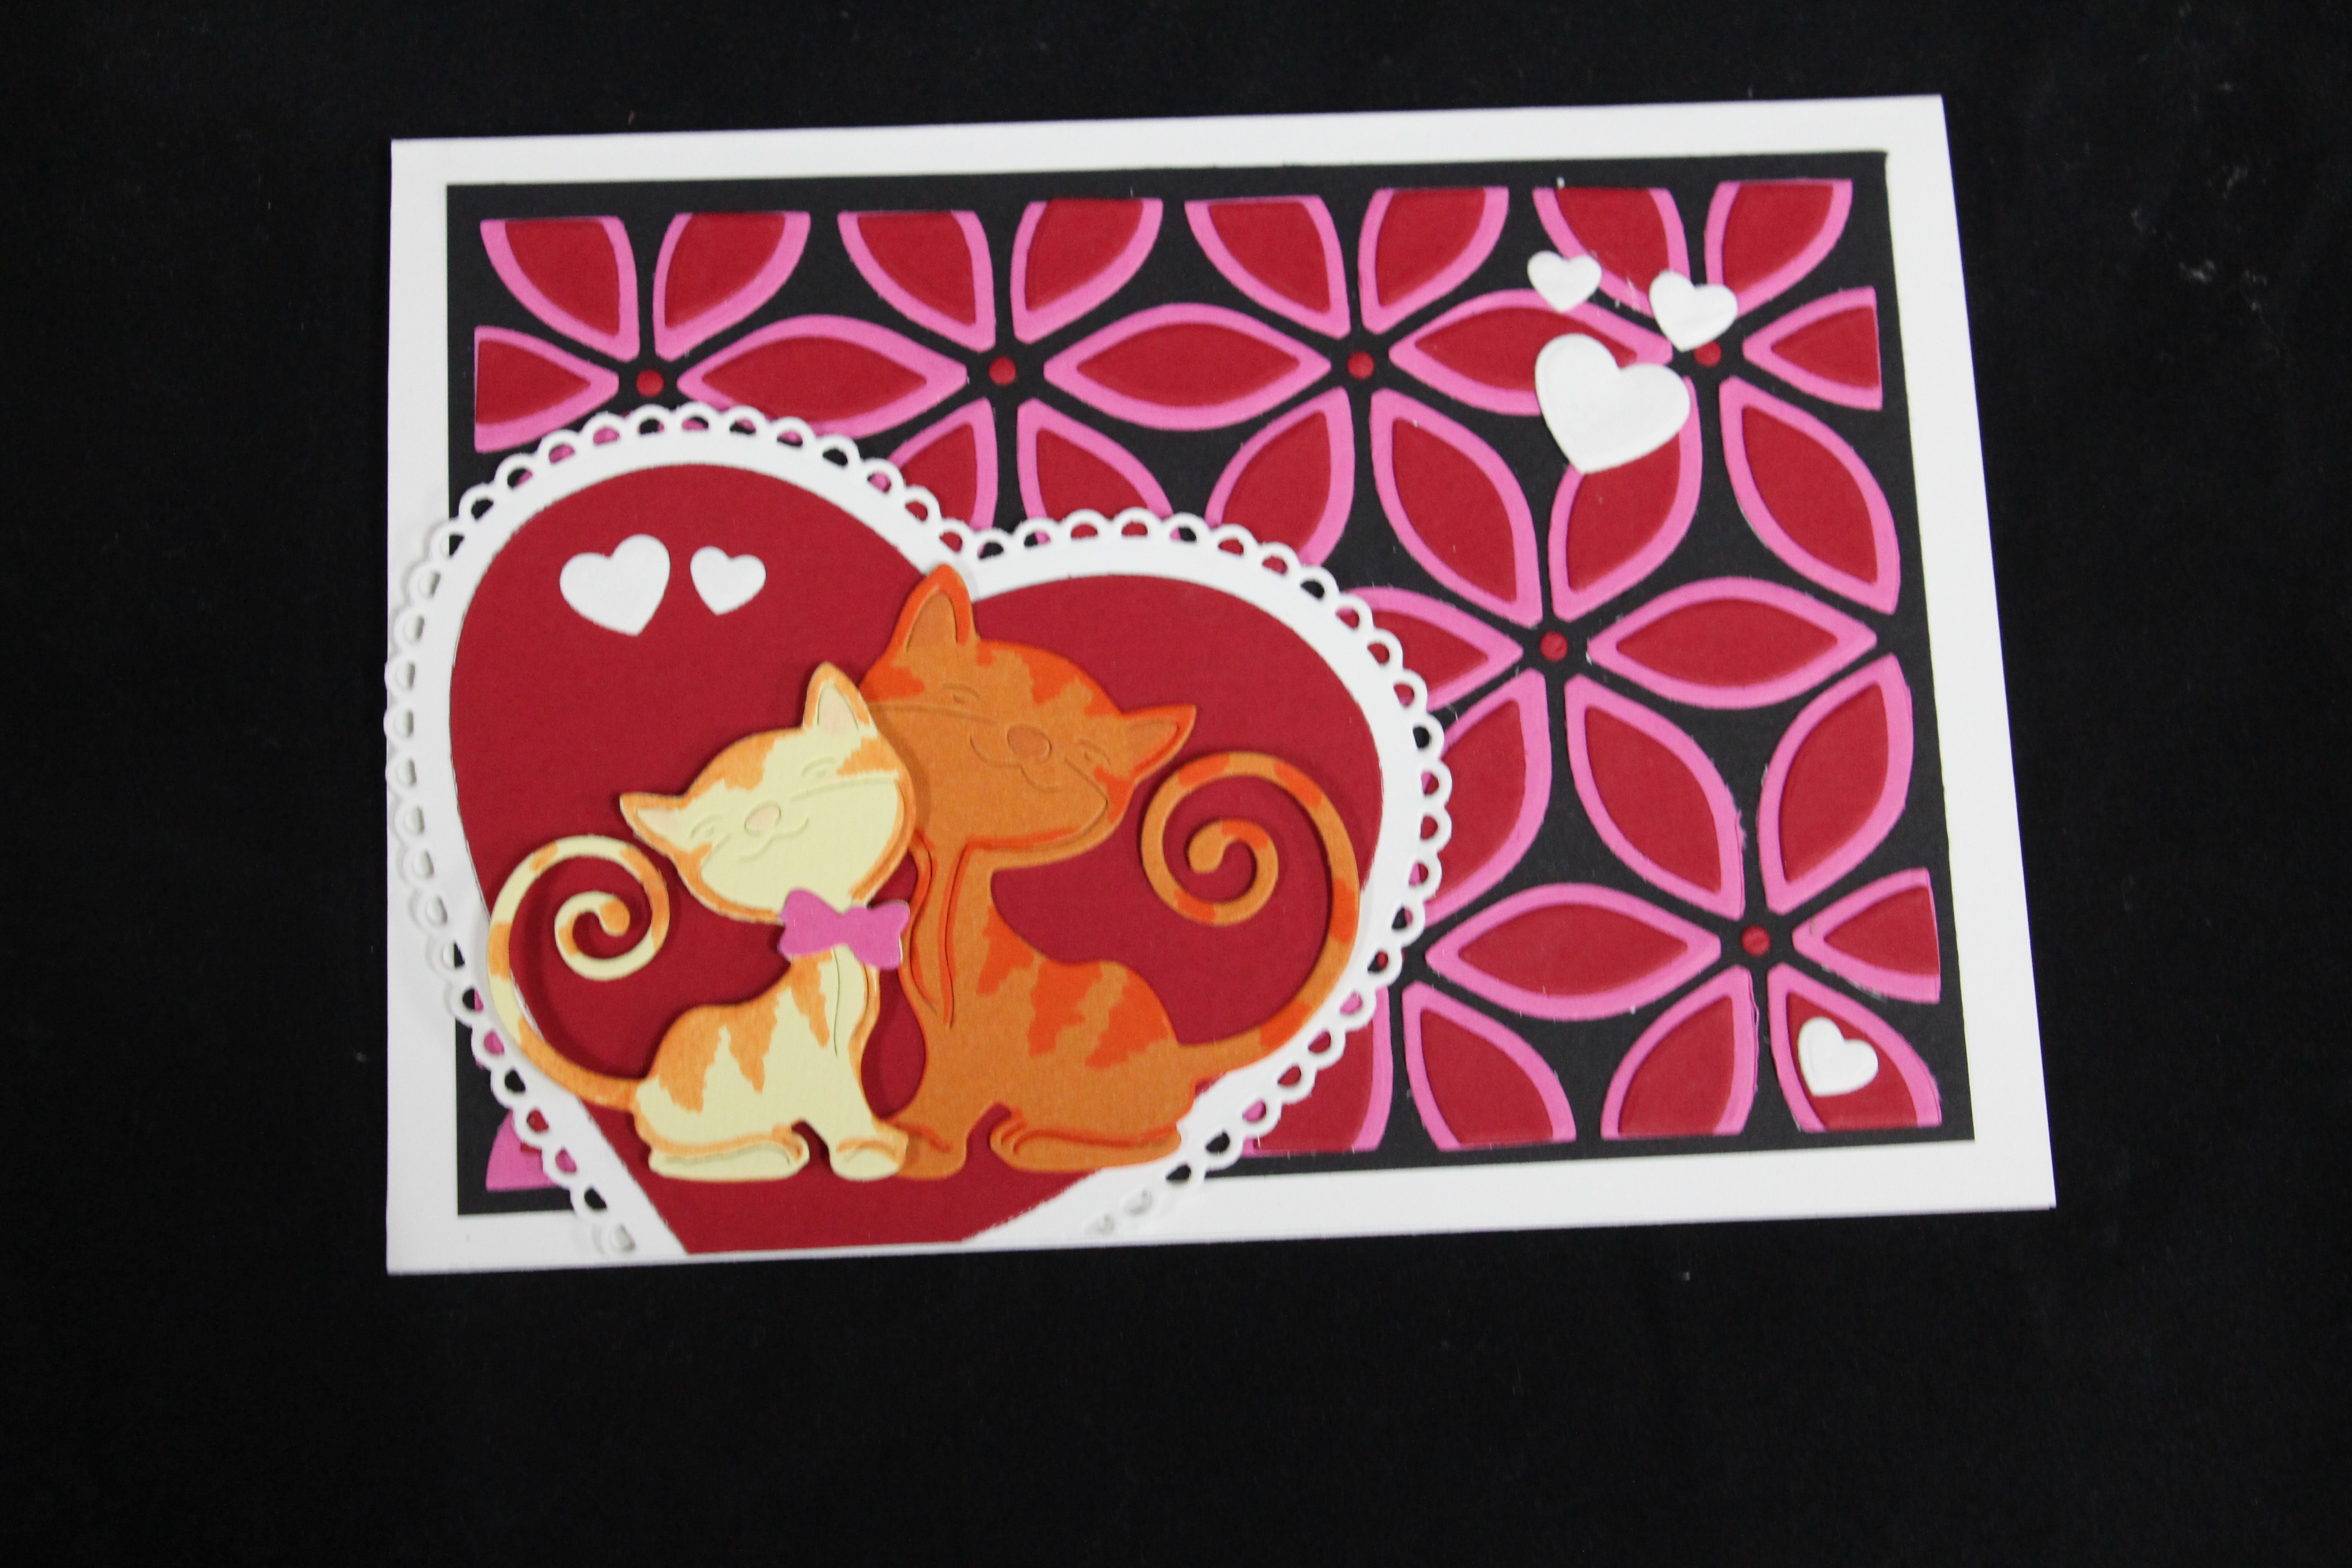
Here are a couple of other cards I created using the layered dies.
Products I used for these cards:
Nellie's Choice Layered Combi Dies Flower Layer A, B and C.
Foundation Cardstock Pink - 41035
Foundation Cardstock Wisteria- 41036
Be Creative Sheets - 5 to a package
Nellie's Choice Dada Dies with Clear Stamp - DDCS004
Happy, Happy , Happy die cut - FRA9222
Foundation Cardstock Mauve - 41018
Zig memory system Wink of Stella Brush Tip Glitter Maker - MS55