Garden Greetings
In this tutorial, we will create a couple cards to bring some sunshine to your soul!
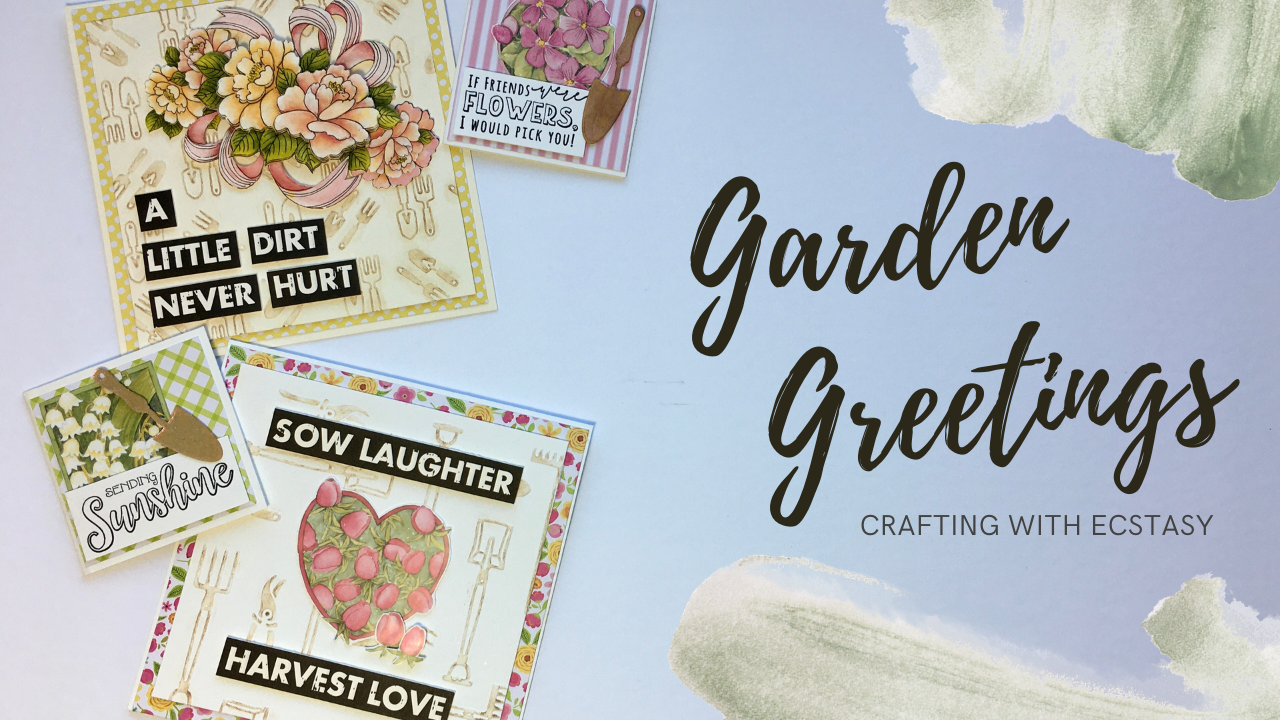
The dark and dreary days of winter us dreaming of long summer days in the garden. In this tutorial, we will create a couple cards to bring some sunshine to your soul!
These cards are all made with elements from our Garden Theme Bundle from our Black Friday Sale. But, whether you purchased our Garden Theme Bundle, or you wish to pick-up some of these summer-y elements separately, we hope that this post brings a little light to you during these dark winter days.
Follow along with the video, and check out the step-by-step instructions for more details and a list of the products used.
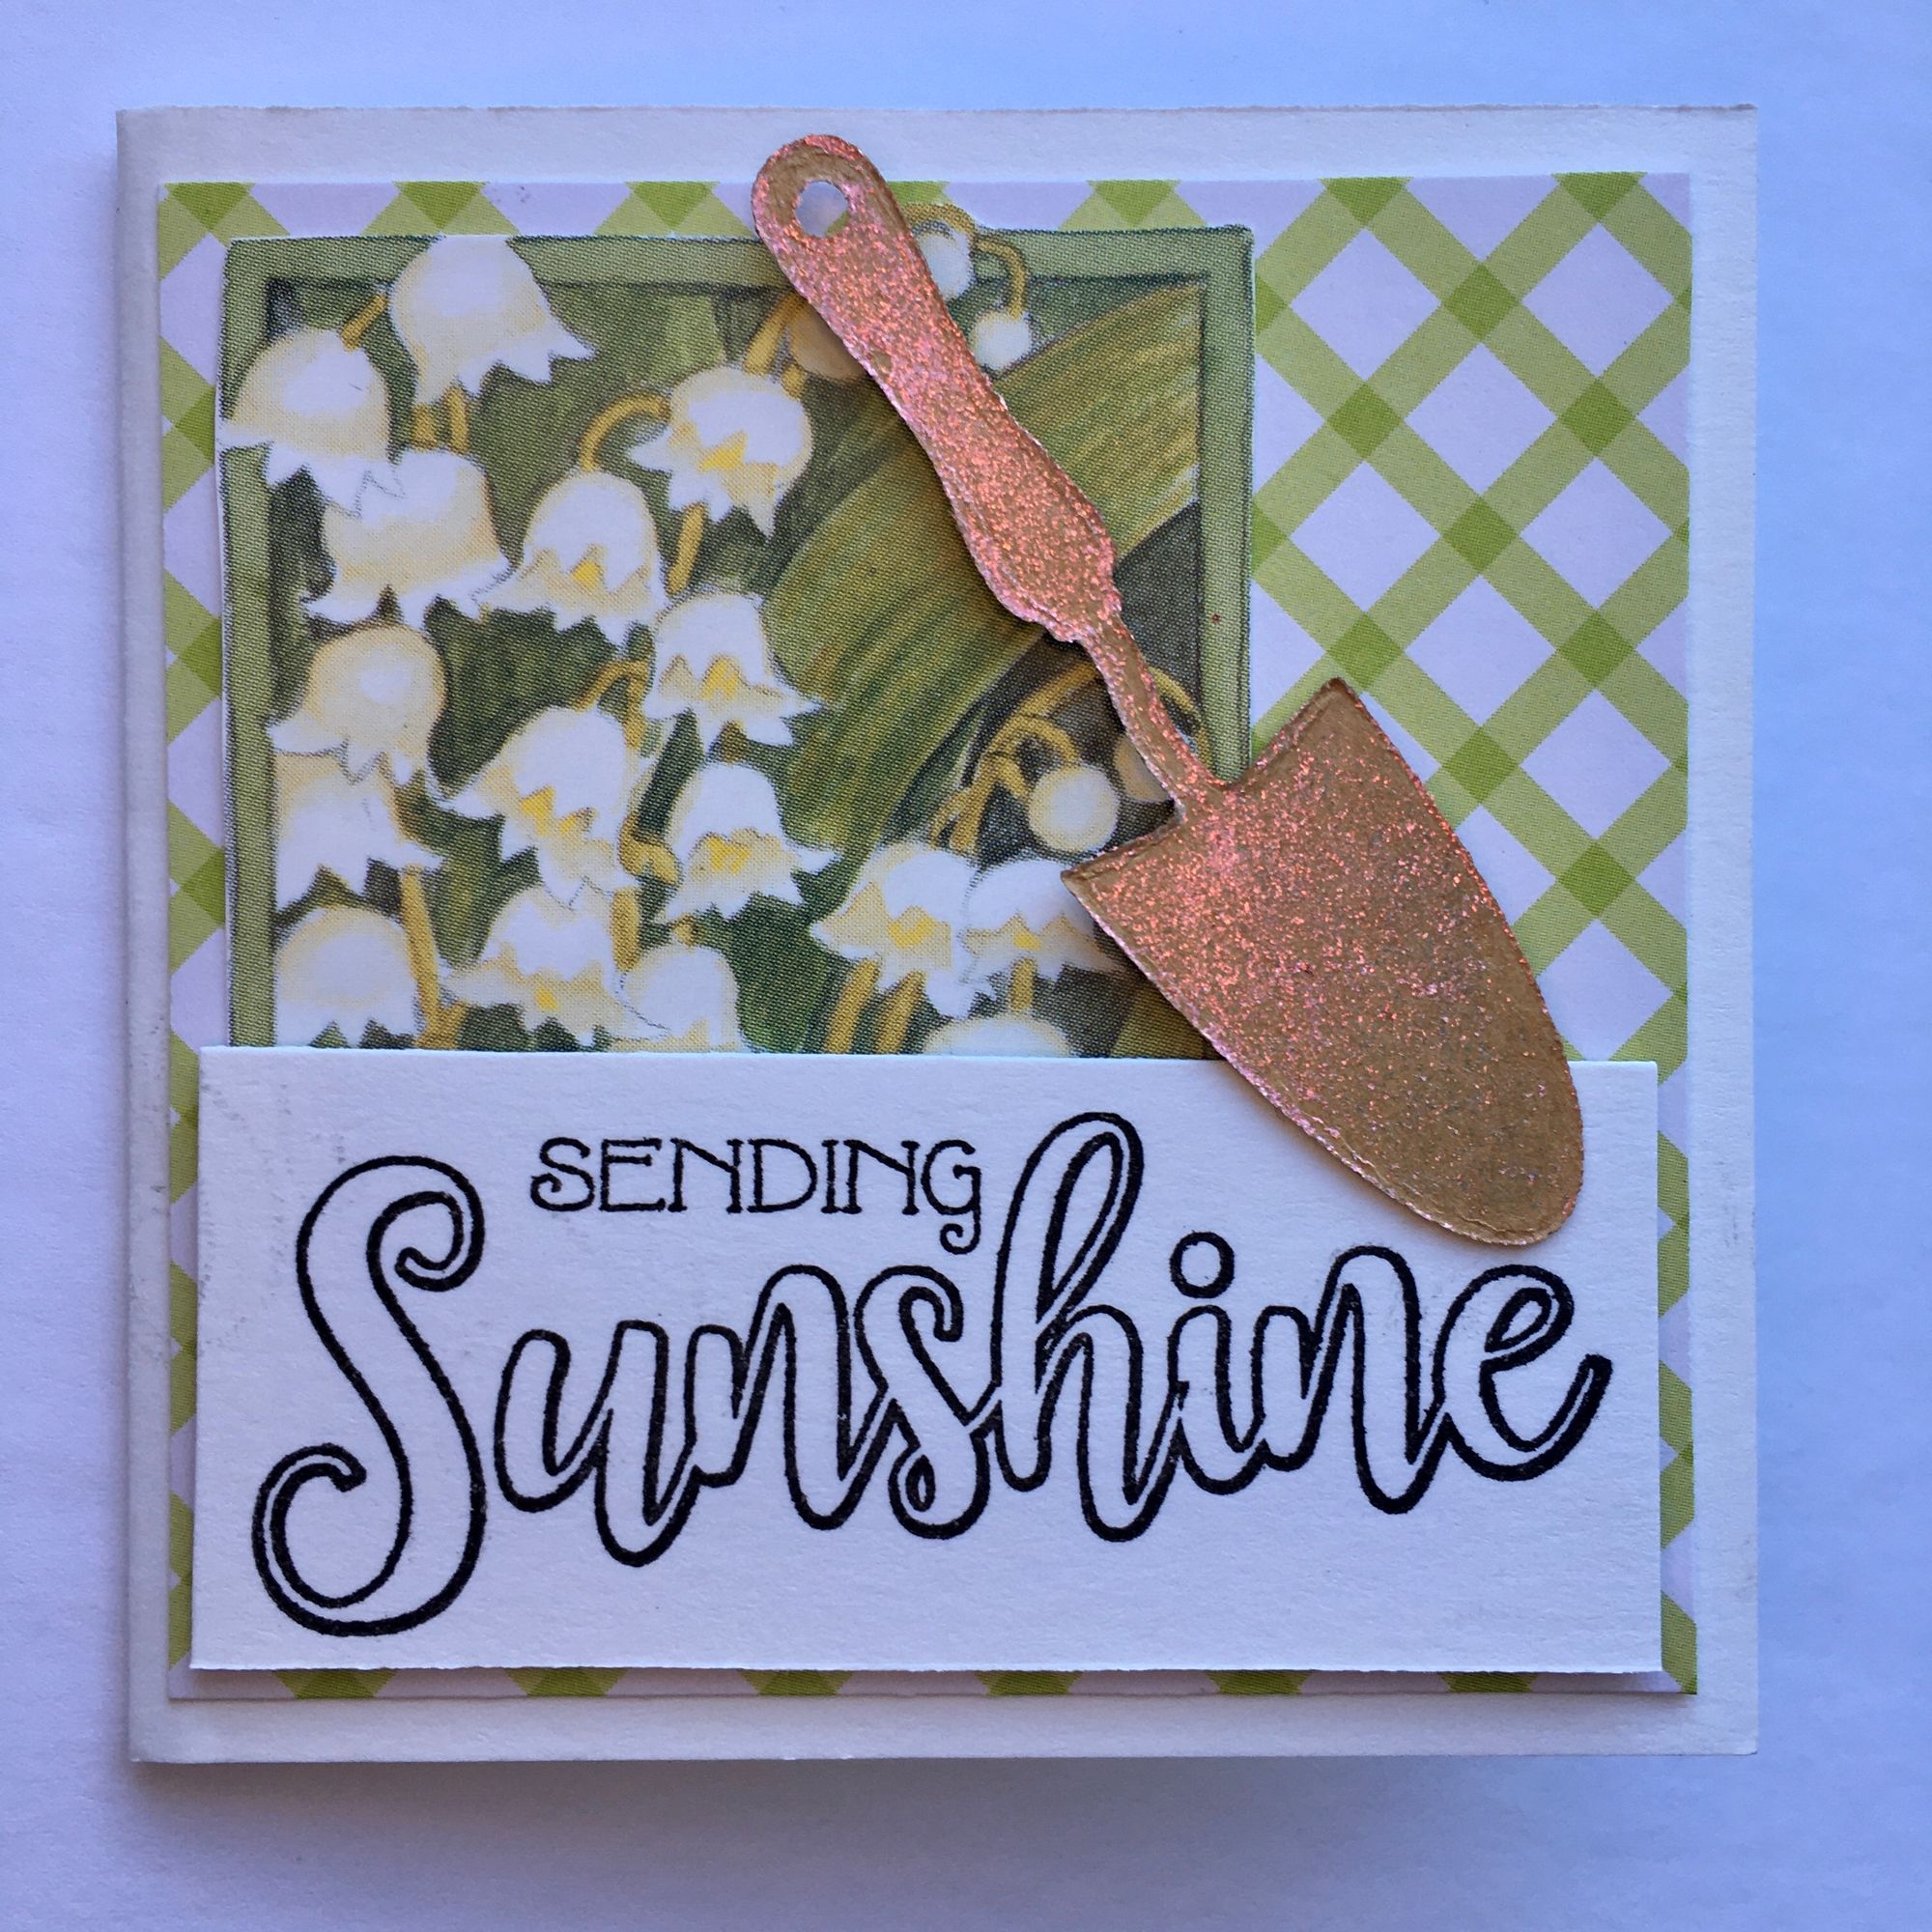
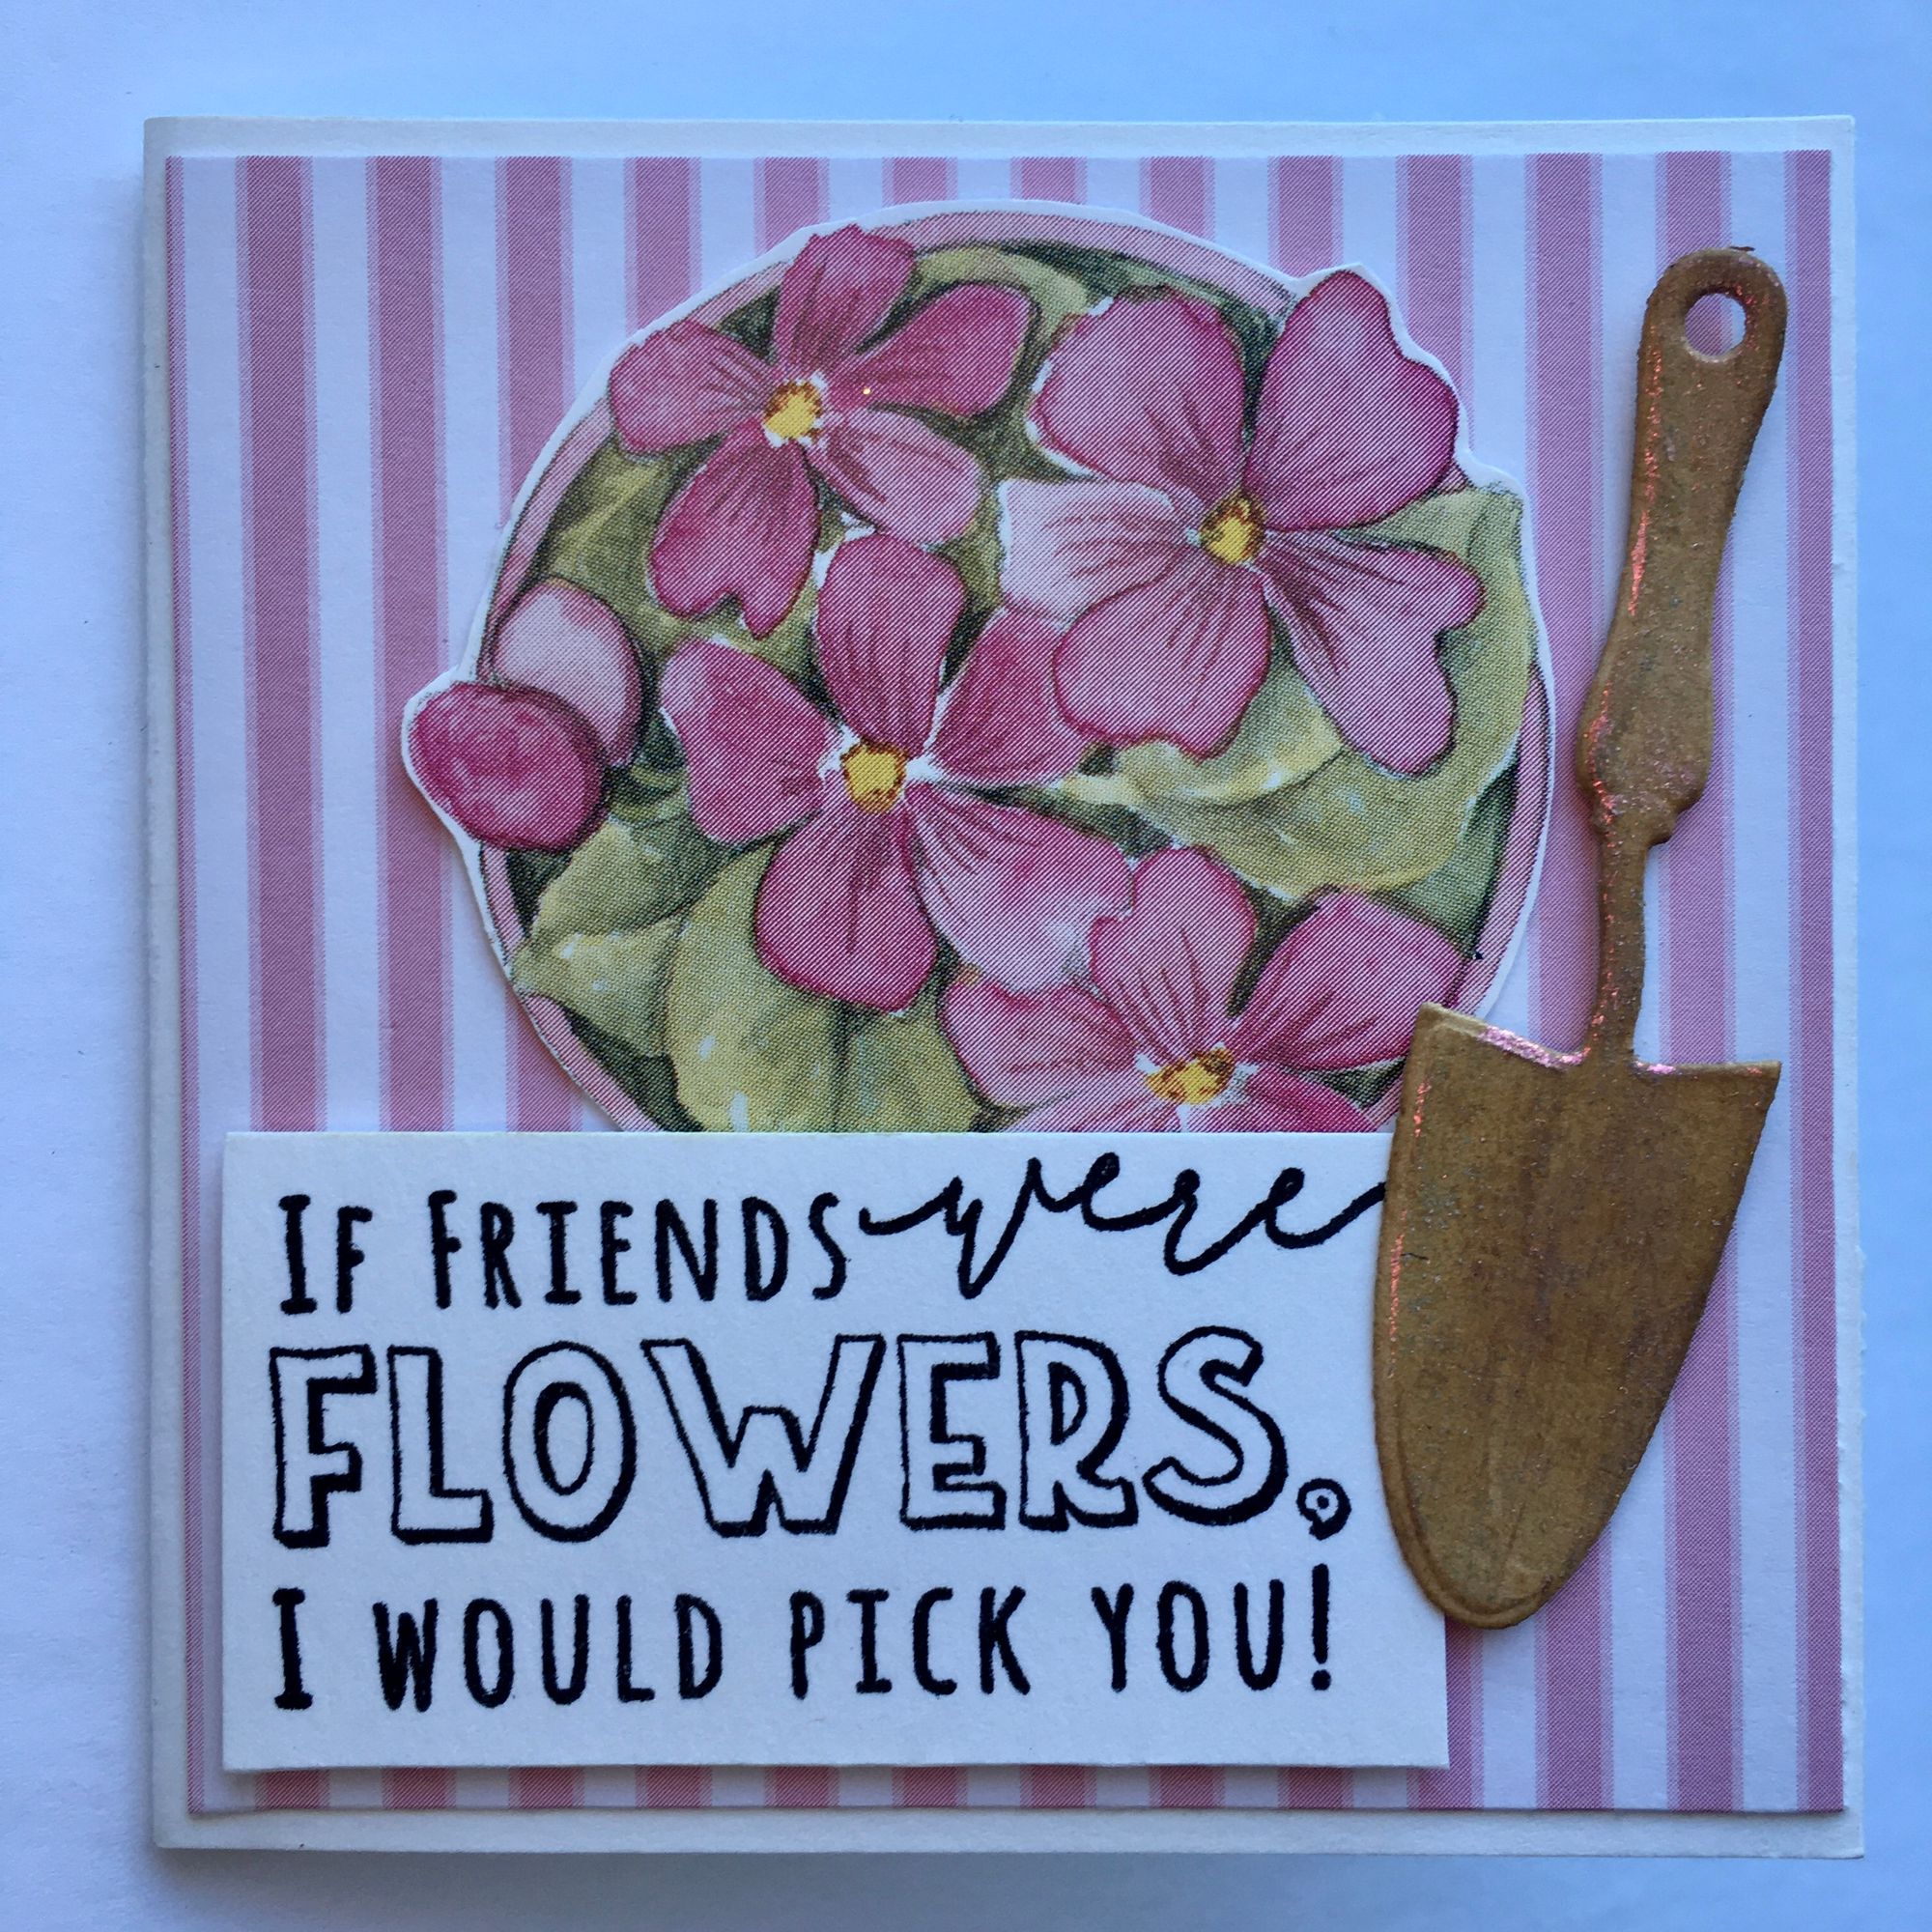
Flower Tags
Step-By-Step Instructions
- Start with a 3x3" cardbase in coconut white card stock
- Cut a background paper to 2 3/4 x 2 3/4" and attach with double-sided tape
- Cut out a floral element
- Stamp a sentiment on coconut white card stock that is small enough to fit onto your tag
- Cut a garden tool from kraft paper using a die from COL1346, or a similar product
- Apply Opal Blaze Polish to the garden tool using an applicator or your finger
- Arrange and attach elements using foam tabs and tape
Products Used
41051 - Creative Expressions Foundation Card Coconut White
CEC941 - Creative Expressions Flower Journaling A5 Clear Stamp Set
COL1346 - Marianne Collectable Die/Stamp Set - Garden
PK9109 - Marianne Design Kraft Paper
CSOBPSUN - Cosmic Shimmer Opal Blaze - Sunset Orange
BC7 - Be Creative Tape - 7mm
65000022 - Joy! Crafts 3D Craft Foam Tape
65000011 - Joy! Crafts 3D Foam Pads
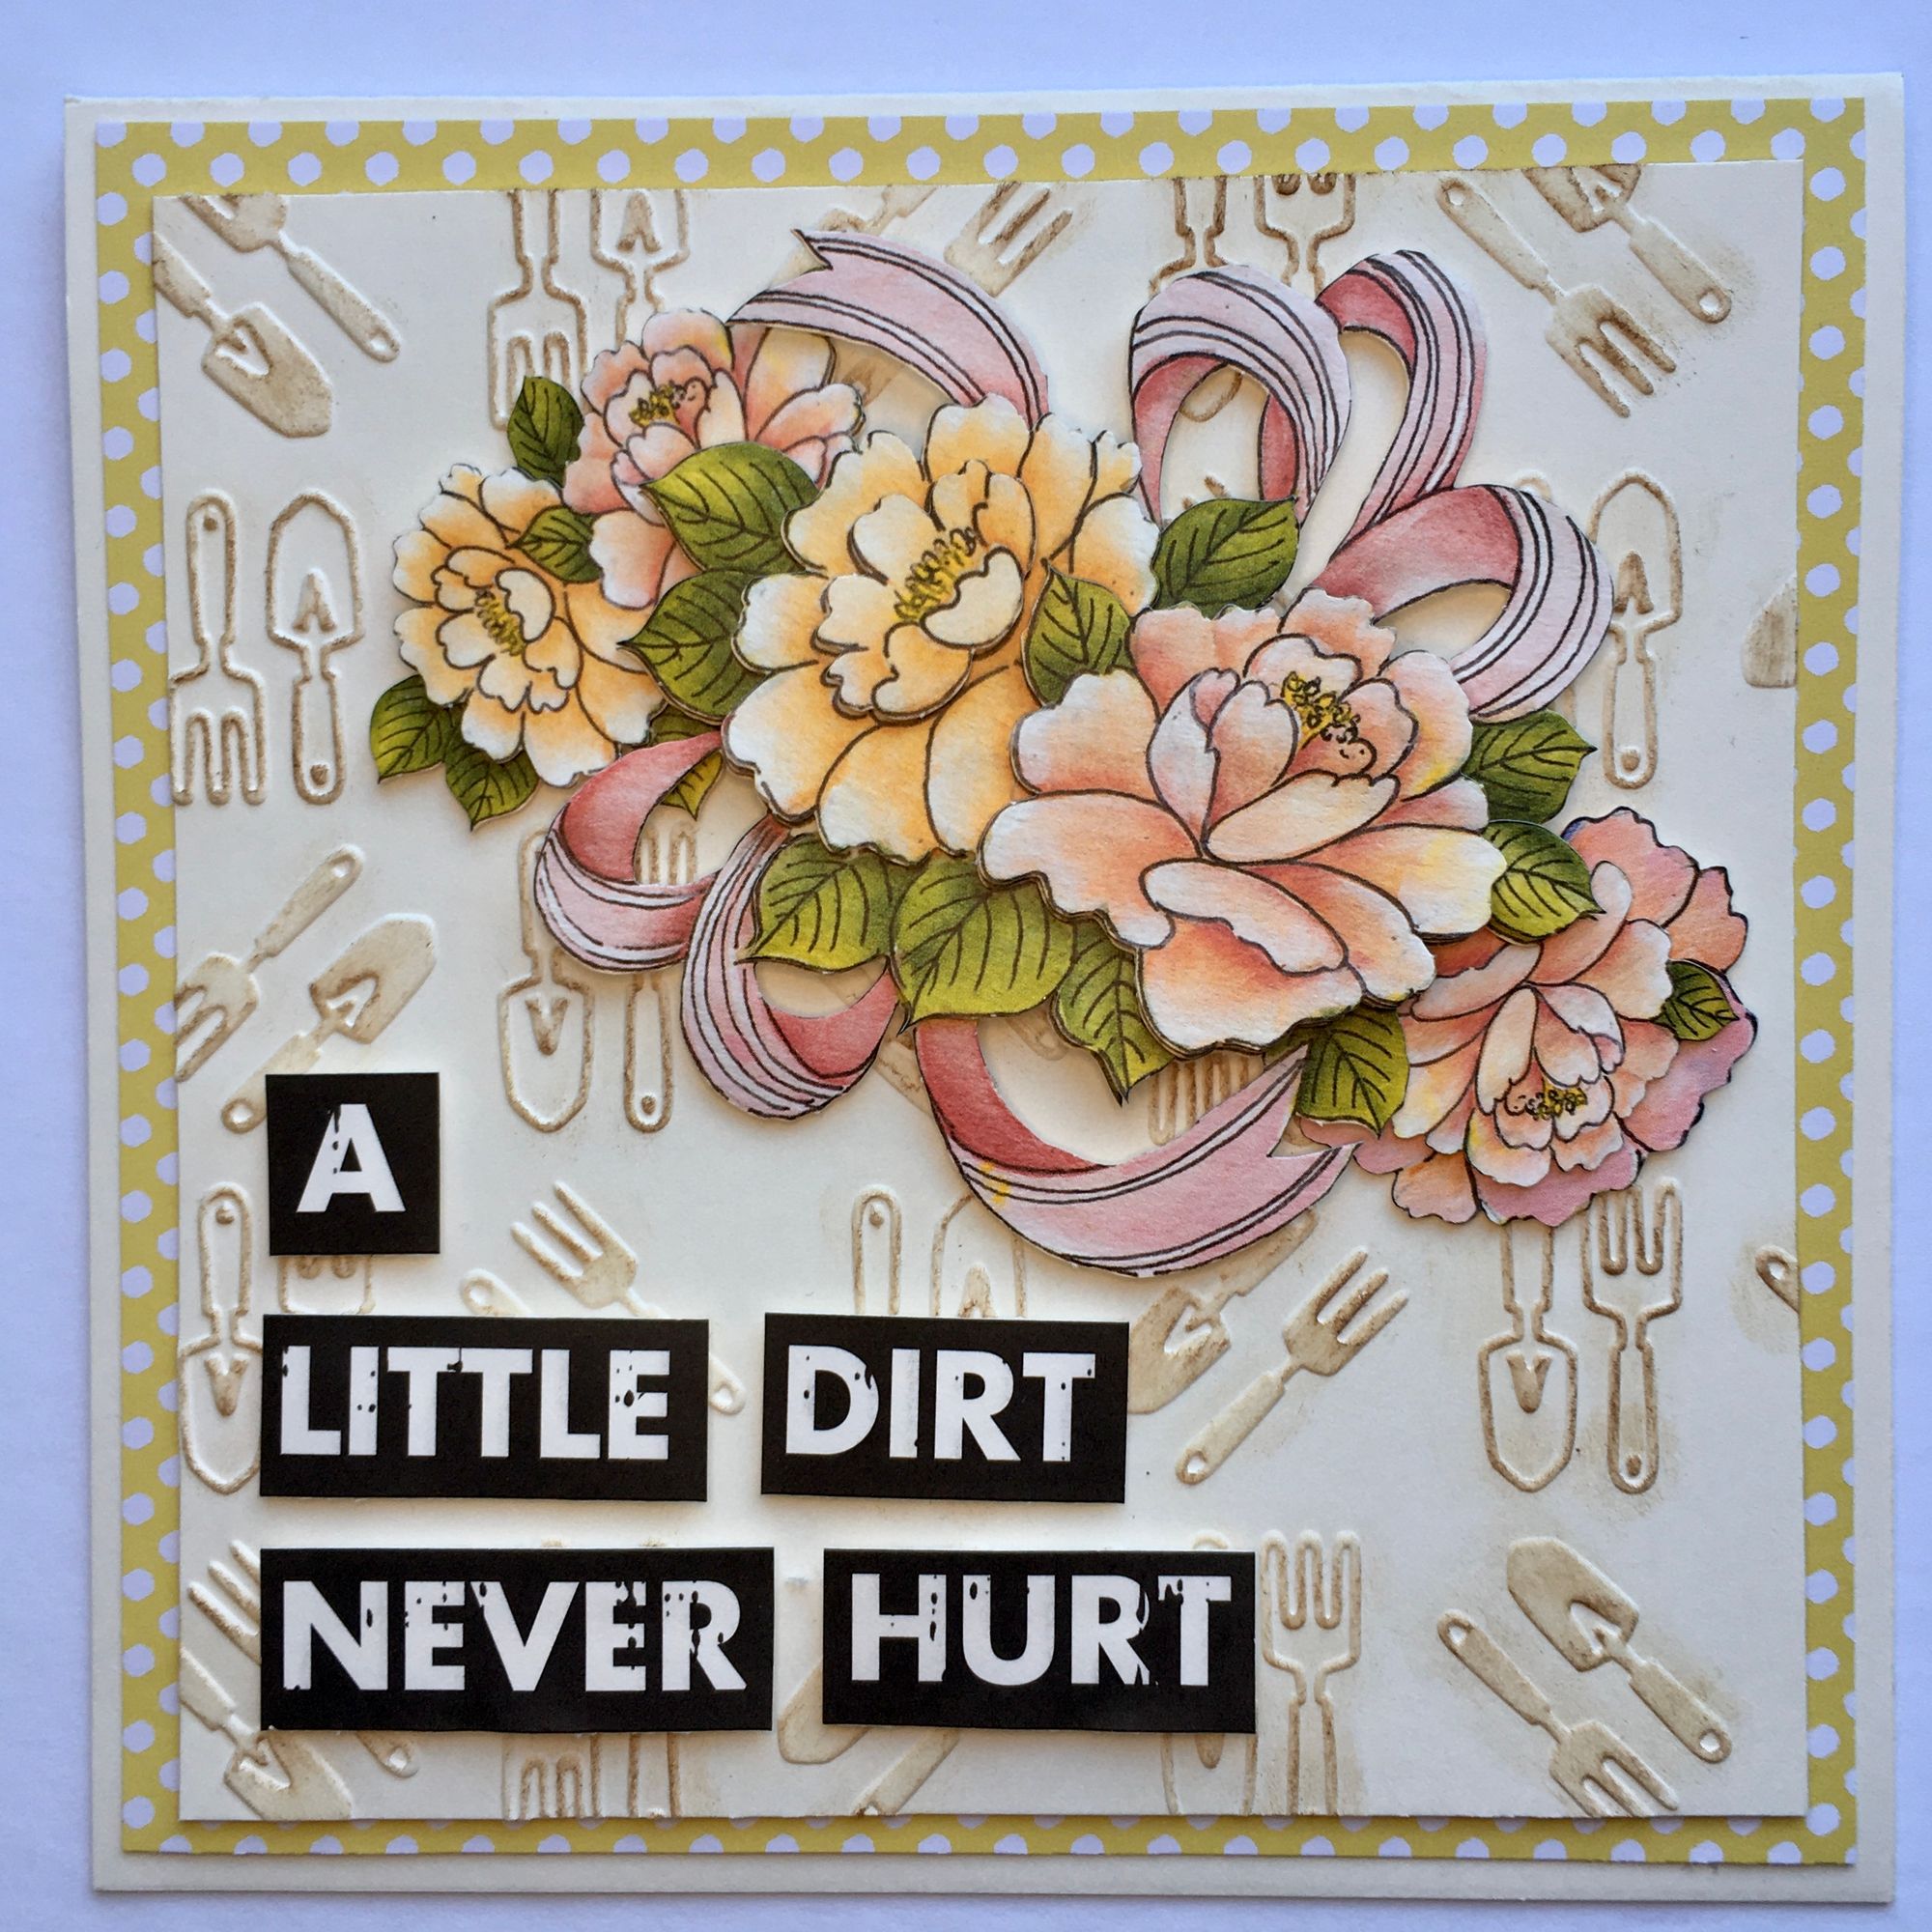
Garden Greetings
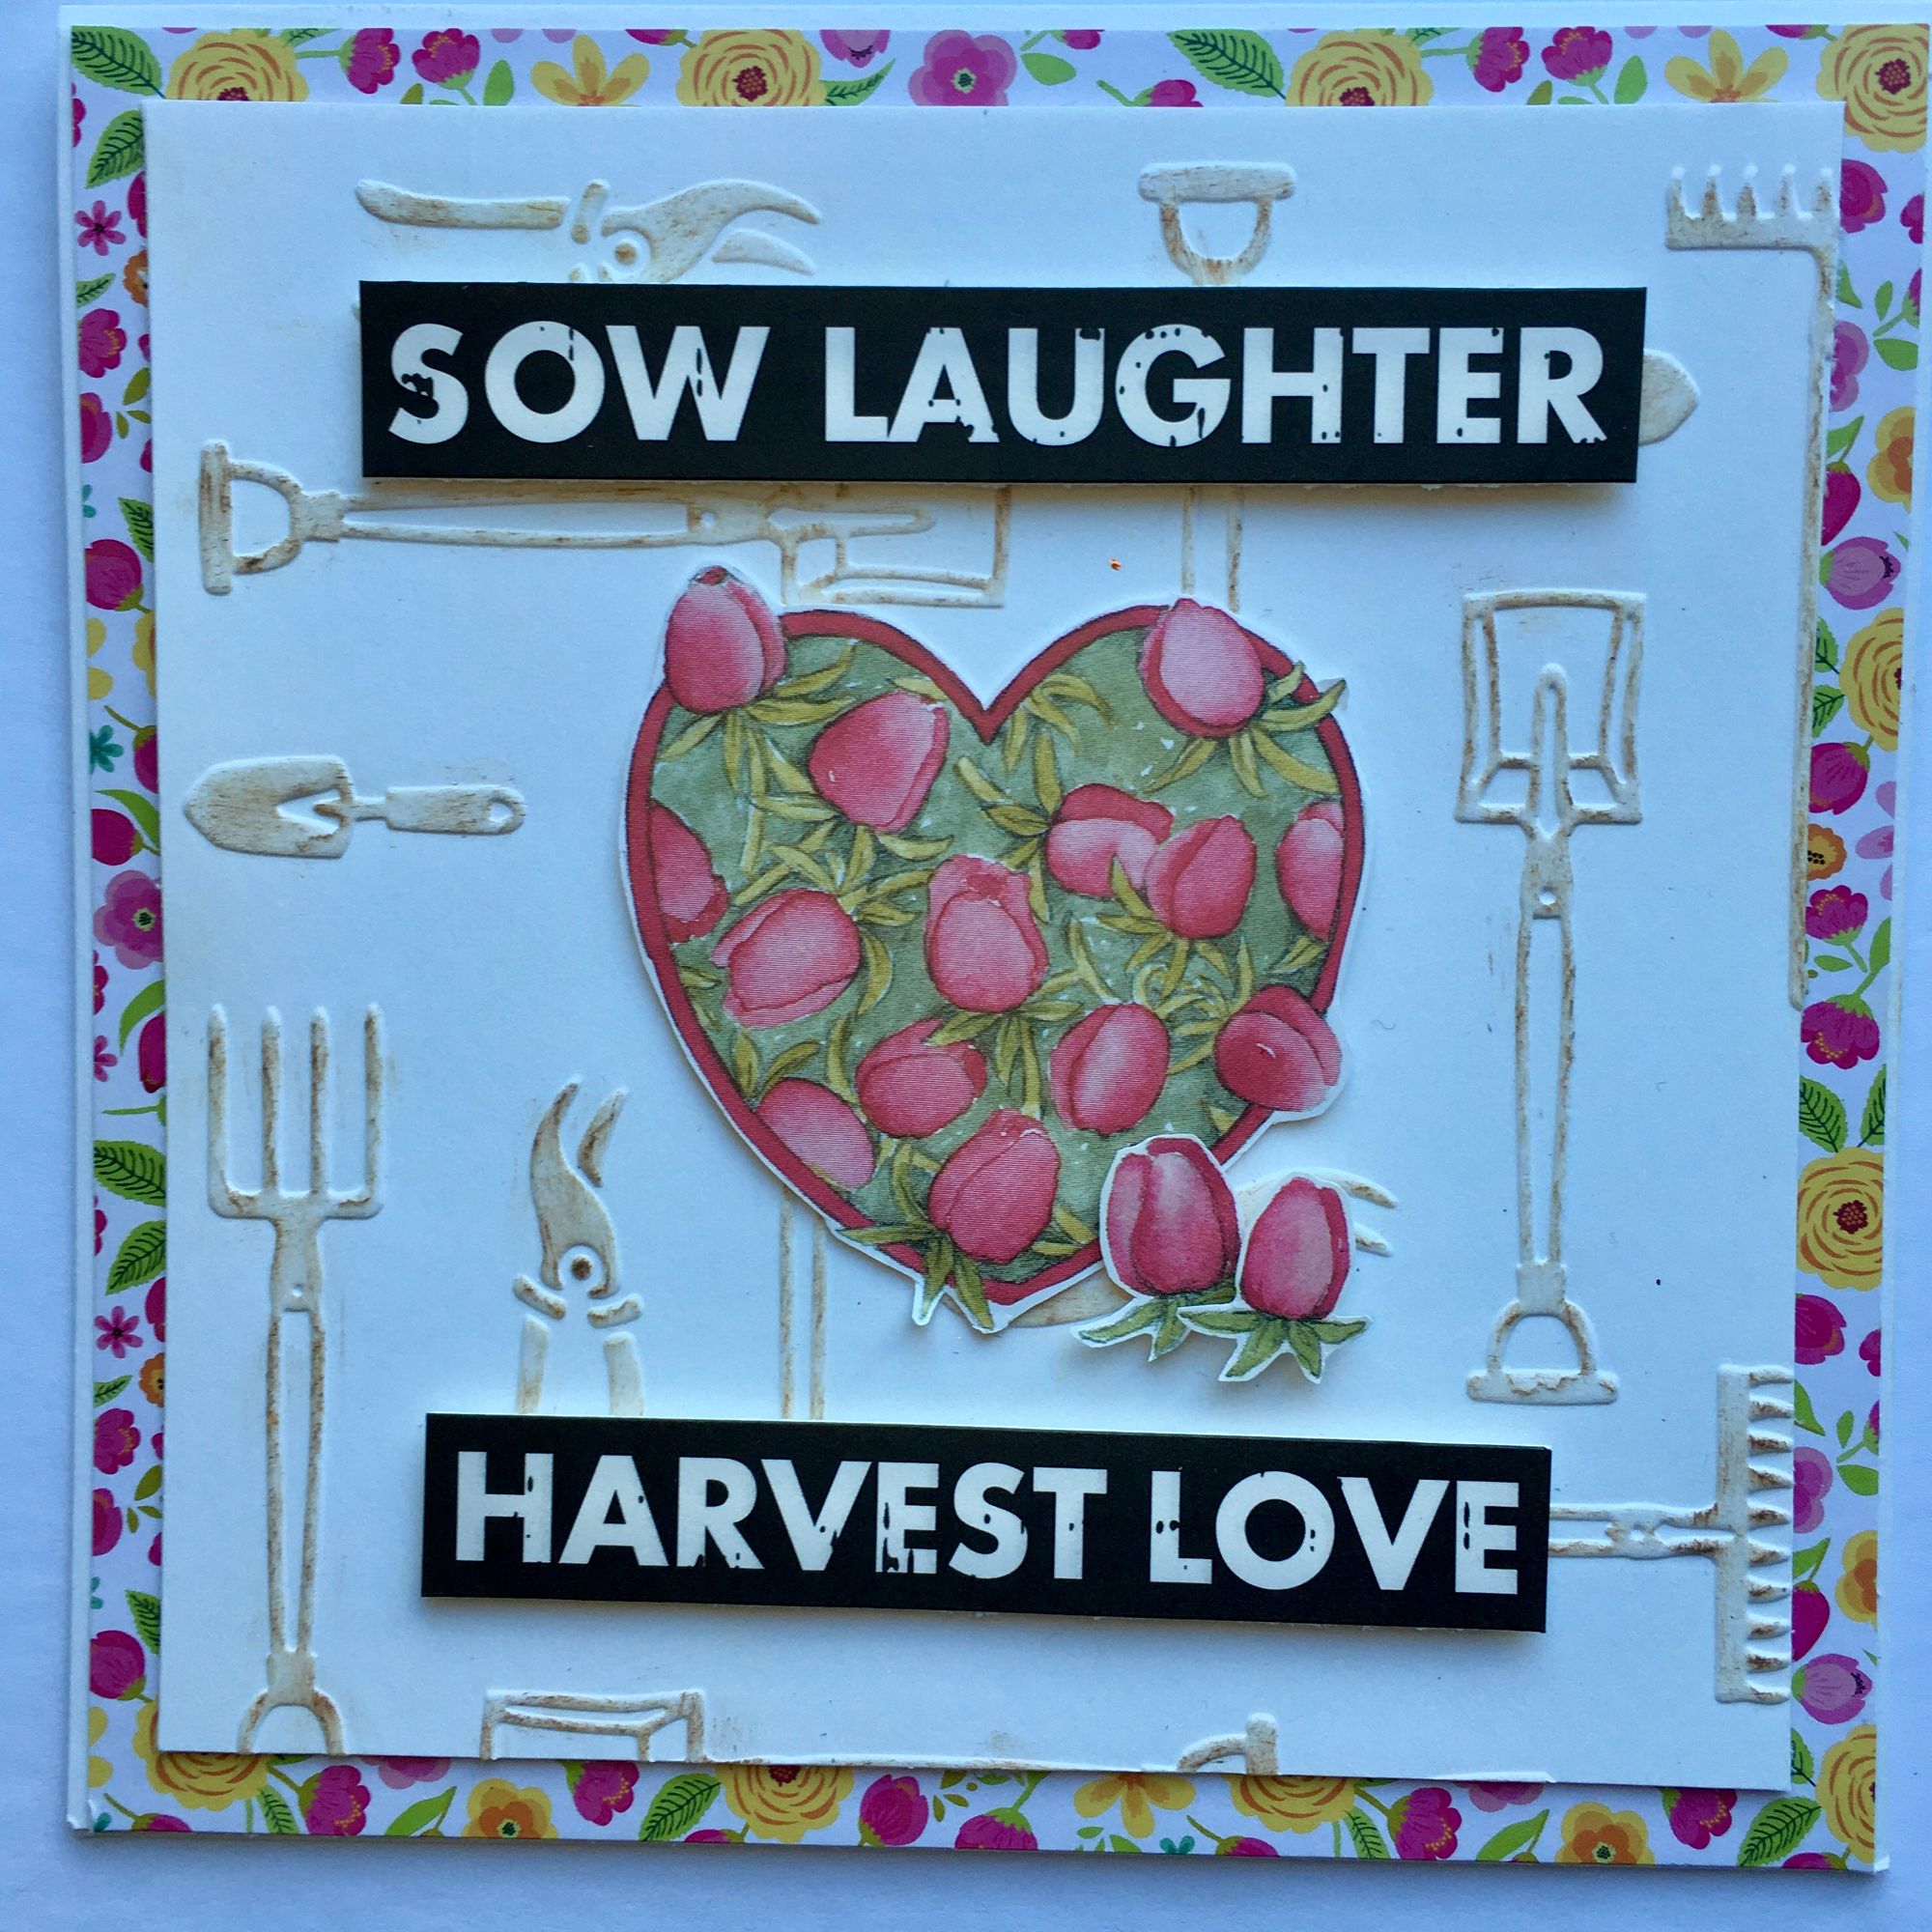
Step-By-Step Instructions
- Begin with a 5 7/8" x 5 7/8" card base in coconut white card stock
- Cut a background paper to 5 5/8" x 5 5/8" and attach to the card base using double-sided tape
- Emboss a 5 1/4" x 5 1/4" sheet of coconut white card stock with a garden tool embossing folder. We used 350225
- Using a fingertip dauber, apply a brown/rust colour ink to the embossed images to highlight
- Select and cut out a sentiment and attach to the card using foam tape
- Punch out the layers for the 3D flower and attach together using foam tabs. Layer the images on top of the matching image.
Products Used
41051 - Creative Expressions Foundation Card Coconut White
350225 - Lea-abilities Embossing Folder - Garden Tools Small
TDO56317 - Tim Holtz Distress Oxide Ink Pad - Vintage Photo
BC7 - Be Creative Tape - 7mm
65000022 - Joy! Crafts 3D Craft Foam Tape
65000011 - Joy! Crafts 3D Foam Pads
Thanks for following along with us! Be sure to share your garden themed cards with us in our Facebook Group, Crafting with Ecstasy.
Happy Crafting!