Craft Open House Make & Takes
Thanks to everyone who came out and made our Fall Open House Spectacular. We really hope that everyone had a great time and are looking forward to the other events we'll be having in the store for you soon.
Our talented designer really hit it out of the park this time with six great make and take card ideas for the open house. For those who couldn't make it out, and those who want to make more of these cards, we decided to write this blog so you can have fun creating these cards at home.
Our first card was designed using our new Christmas 3D Embossing folder, some Delecata Ink in golden glitz, mini sentiment - Merry Christmas and some hollies from a Marianne design die.
Merry Christmas Card
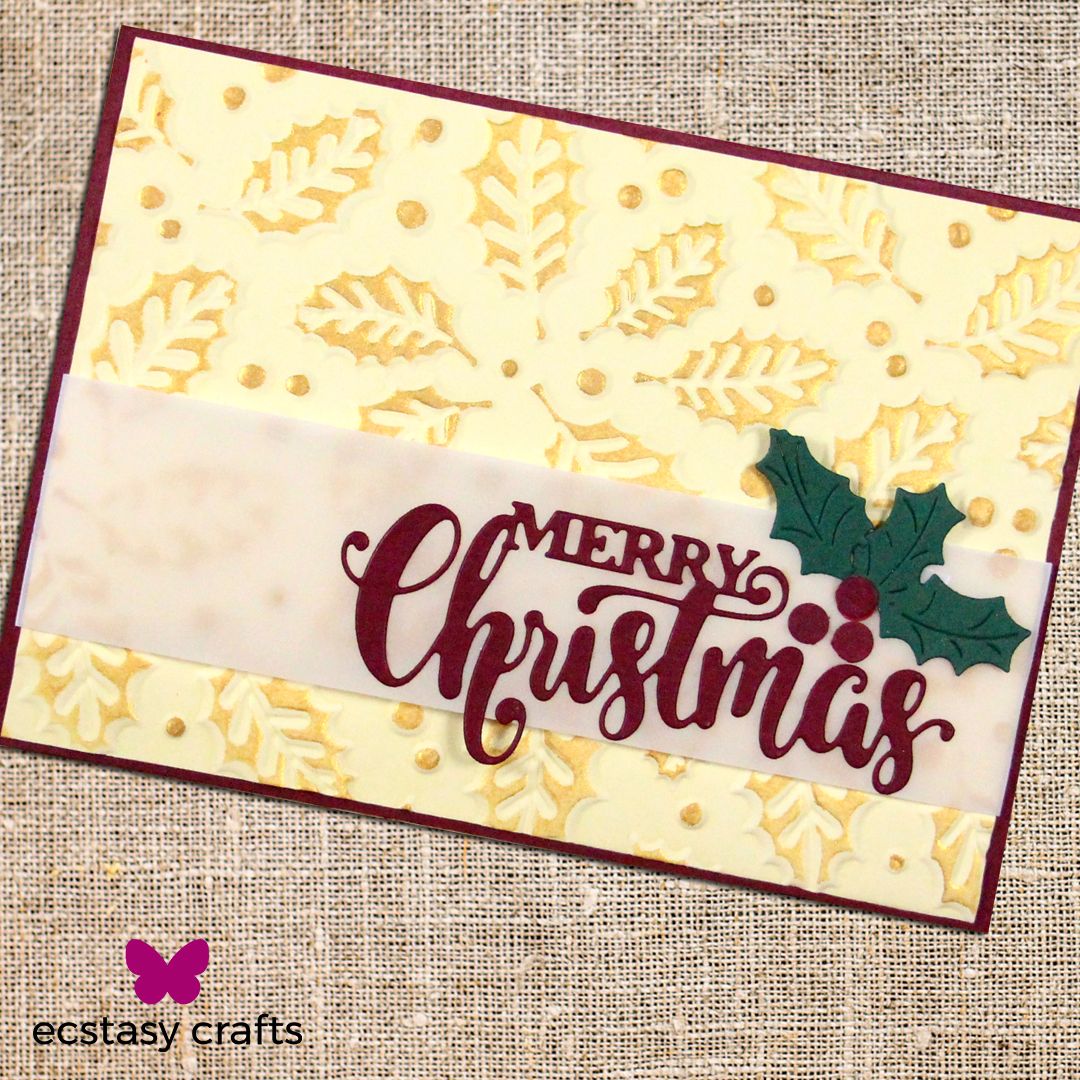
Here are the instructions :
1. Spray the back and front of your card piece that you are going to emboss. Run thru the machine three to four times to get all the detail.
2. Allow to dry and then run your ink pad lightly over the surface to transfer color to the raised parts of the embossed piece of paper.
3. Cut your Merry Christmas sentiment and holly’s out, as well as a stripe of parchment cut to 2”. Mount the sentiment and holly onto the parchment.
4. Assemble your card, mount onto card base.
Products Used:
3D Embossing folder - Holly and Berries - EF3D0013
Delecata ink -DE191 golden glitz
Mini Sentiment Merry Christmas - CEDME014
The next design was these cute and simple vintage snowman tags.
Vintage Snowman Tags
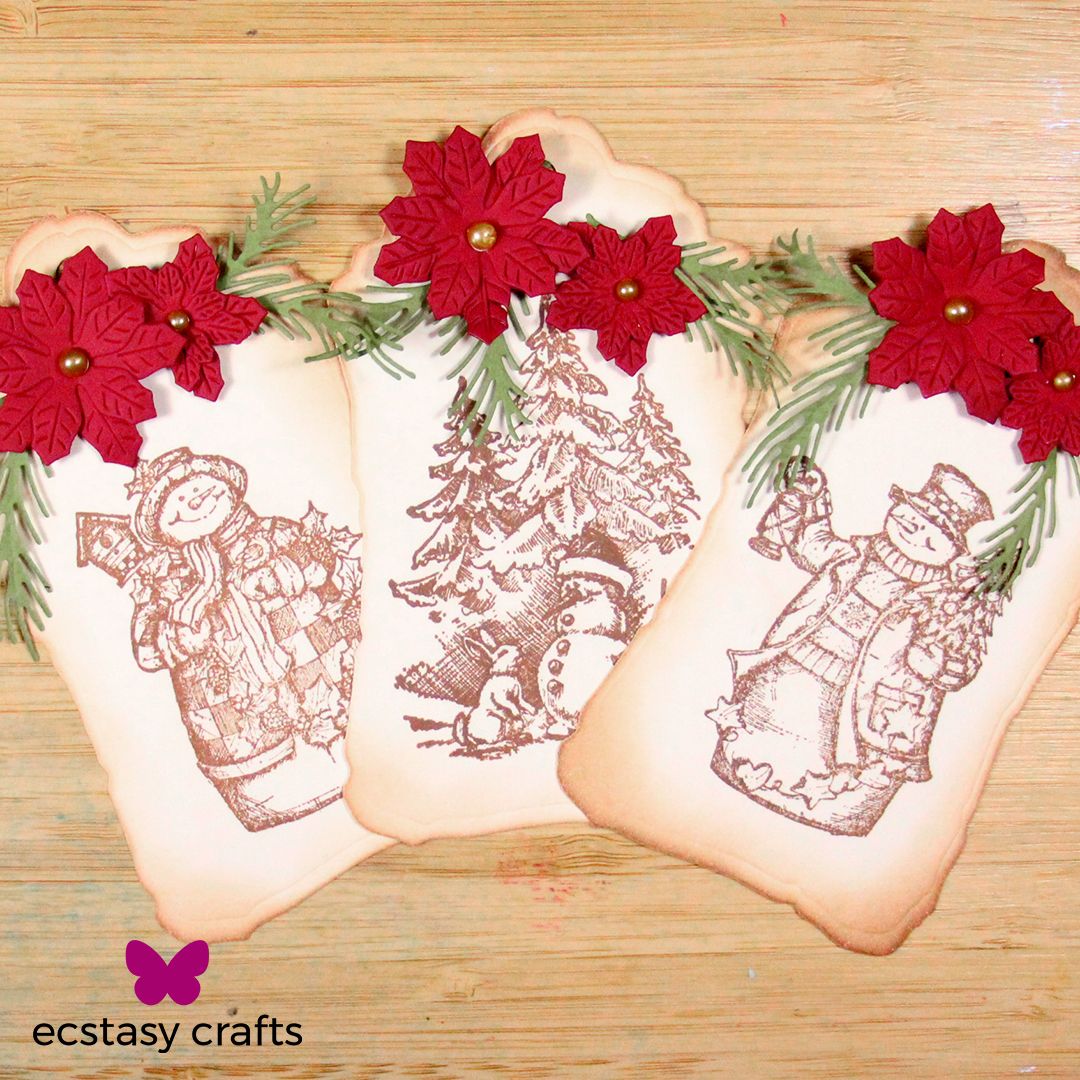
These tags were made using the following products:
Snowman Stamp form Nellie's Choice
Instructions:
1. Cut out tags using beige paper ( not white)
2. Stamp your snowman image using versafine ink in vintage sepia
3. Using a smoothie add some color to the edges of the tags and the same vintage sepia ink
4. Cut out and assemble your poinsettias and leafs and attach to the card.
For the Fairy lovers out there we designed this simple Lavinia card.
Lavinia Card

Because there are so many fairy stamps to choose form we had a few choices out for the open house. For this card we used the following products:
Aladine IZINK dye ink any color combo
To make this card simple:
1. Cut two pieces of paper one of them ¼“smaller than the other.
2. Smoosh you ink pad onto your work surface, sprits some water over the ink
3. Using the smaller paper place over the ink on your surface, life and place down again. Dry and repeat with another color.
4. When dry stamp your fairy and any other elements you want with versafine black ink.
5. Using the darker of the colors you used in the background and your smoothie add color to the edges of your fairy stamped piece of paper.
6. Using a piece of scrap cut into an appropriate moon size and the lighter of the colors, place the circle where you want your moon and using your smoothie add color from the center of the circle outward.
7. Add sparkle using your favorite sparkle medium.
Winter Wishes Card
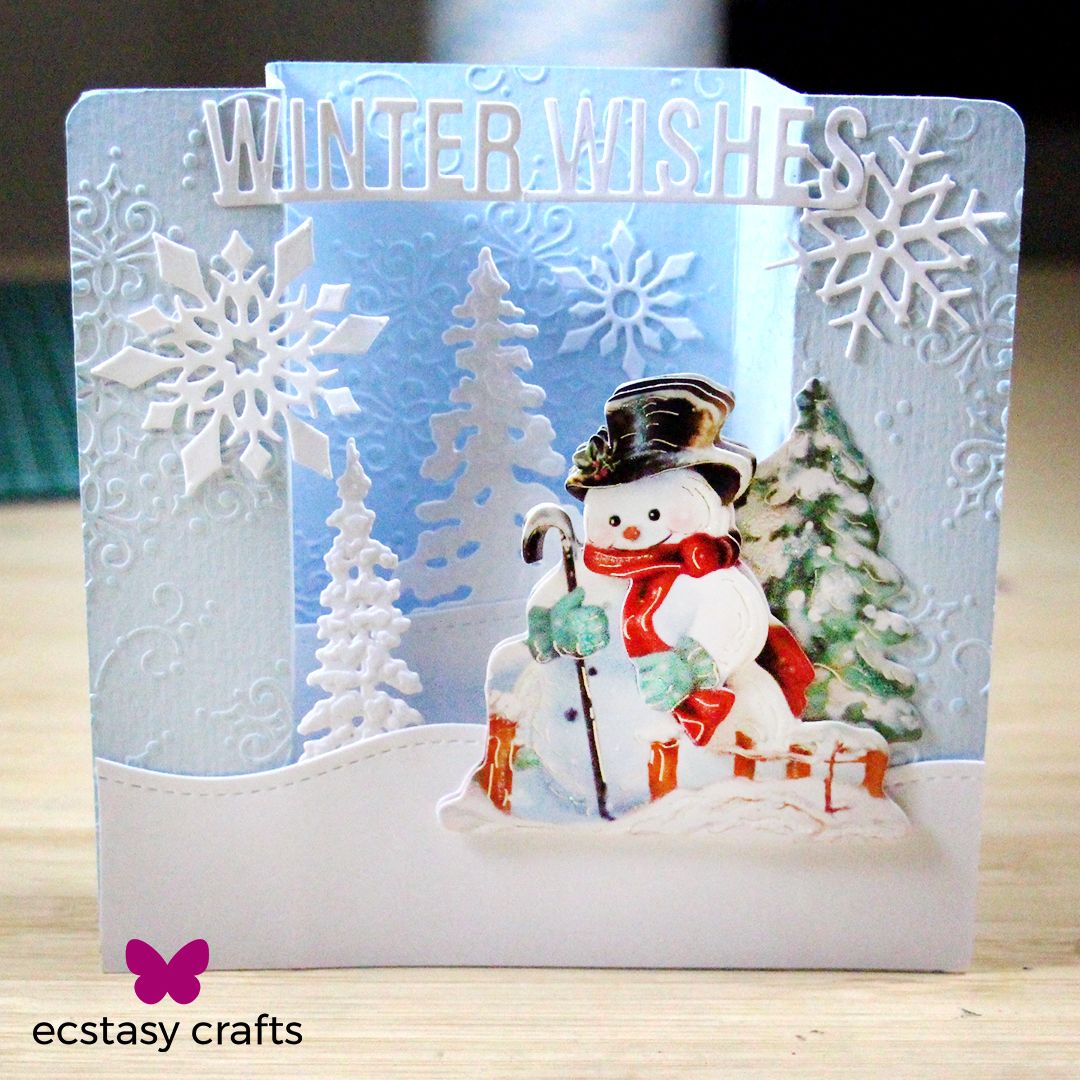
This cute Winter Wishes Bridge fold card was actually one of our classes and since it was such a huge hit we decided to make it one of our free make and takes.
Products used for this card include:
For the assemble of the card:
1. Cut your paper to 5 ¼ x 7 ¾
2. Score at each end at 1 ¼ and 2 ½
3. Run thru with your embossing folder
4. Cut out the trees, snow hill, sentiment, extra snowflakes and assemble the HC topper
5. When gluing on the snow hill have one side of the card folded and the other side flat, then attach the hill and the rest of the elements of the card.
The dimensions for this card are to fit into at 5 ½ x 5 ½ envelope
The HC topper we carry really make this card idea versitile in what occasion you can make it for from birthday's to Christmas to Easter to whatever you can imagine!
Let it Snow Edger Card
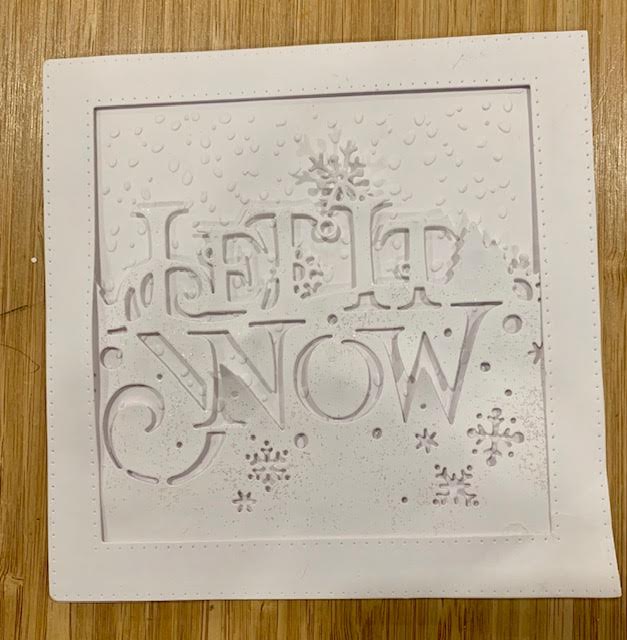
Our next card design does not photgraph well because it's white on white and we used some glitter kiss as well as some opal polish. Products include:
Lewt it snow edger - CEDPC1084
Snowflake Embossing folder - DF3419
To make this card:
- Cut your Let it snow edger out of white card stock and cover with glitter kiss.
- Emboss a piece of whit paper and cover with Lustre polish.
- Allow both to dry.
- Cut out your frame also in white as well as a card base at 6x6
- Layer the embossed piece then your let it snoe edger and then the frame. Attach the let it snow and the frame suing foam tabs of faom strips to give some dimention.
Tropical shaker card theme was our next free make and take. For this card we used one of the new paper kits from Paper Boutique. It includes the sentiment square or circle and co-ordinating patterned paper. We also used Nellie's Choice Multi Frame Dies Photo Frames Squares and Circles
Tropical Dreams Shaker Card
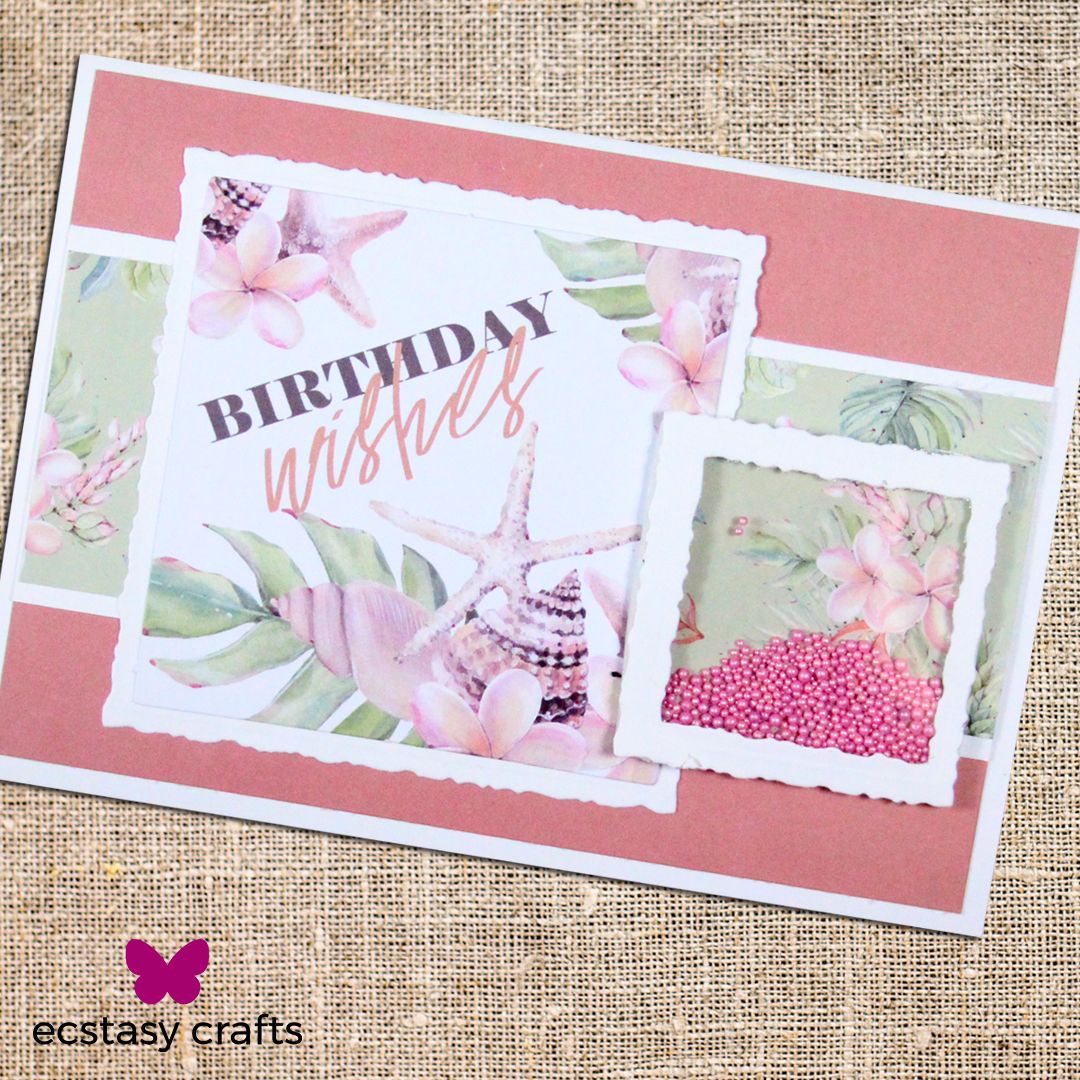
Paper Boutique - Tropical Dreams
Nellie's Choice Multi Frame Dies Photo Frames Squares - MFD124
Nellie's Choice Multi Frame Dies Photo Frames Circles - MFD123
To make this card simply:
- Cut a solid for the background 1/4 inch smaller than your card base, cut out a square or circle for behind the sentiment. A 2" strip for behind the patterned strip, cut to 1 3/4 ", as well and a solid base and a window using the square die set for the shaker and a piece of acetate for the window.
- Attach the solid piece to your card base, layer the sentiment to the solid white you cut out as well as the patterned paper strip to the solid white background. Attach this all to your card base.
- To assemble your shaker piece use some scrap of patterned paper and attach to the back of the shaker window, tape the acetate to the window and then using foam strip around the window as well. Fill with pearls and attach the backing. Attach this to your card .
The paper comes in so many different patterns that this card design also lends itself well to other occasions.
Thanks to everyone who came out to celebrate our open house. WE really hope you enjoyed our free make and takes and hope you give some of these cards a try.
Until next time
Katarina