Convex Carousel Cardmaking
The simple technique used to create the convex card frame really draws the eye towards the main show!
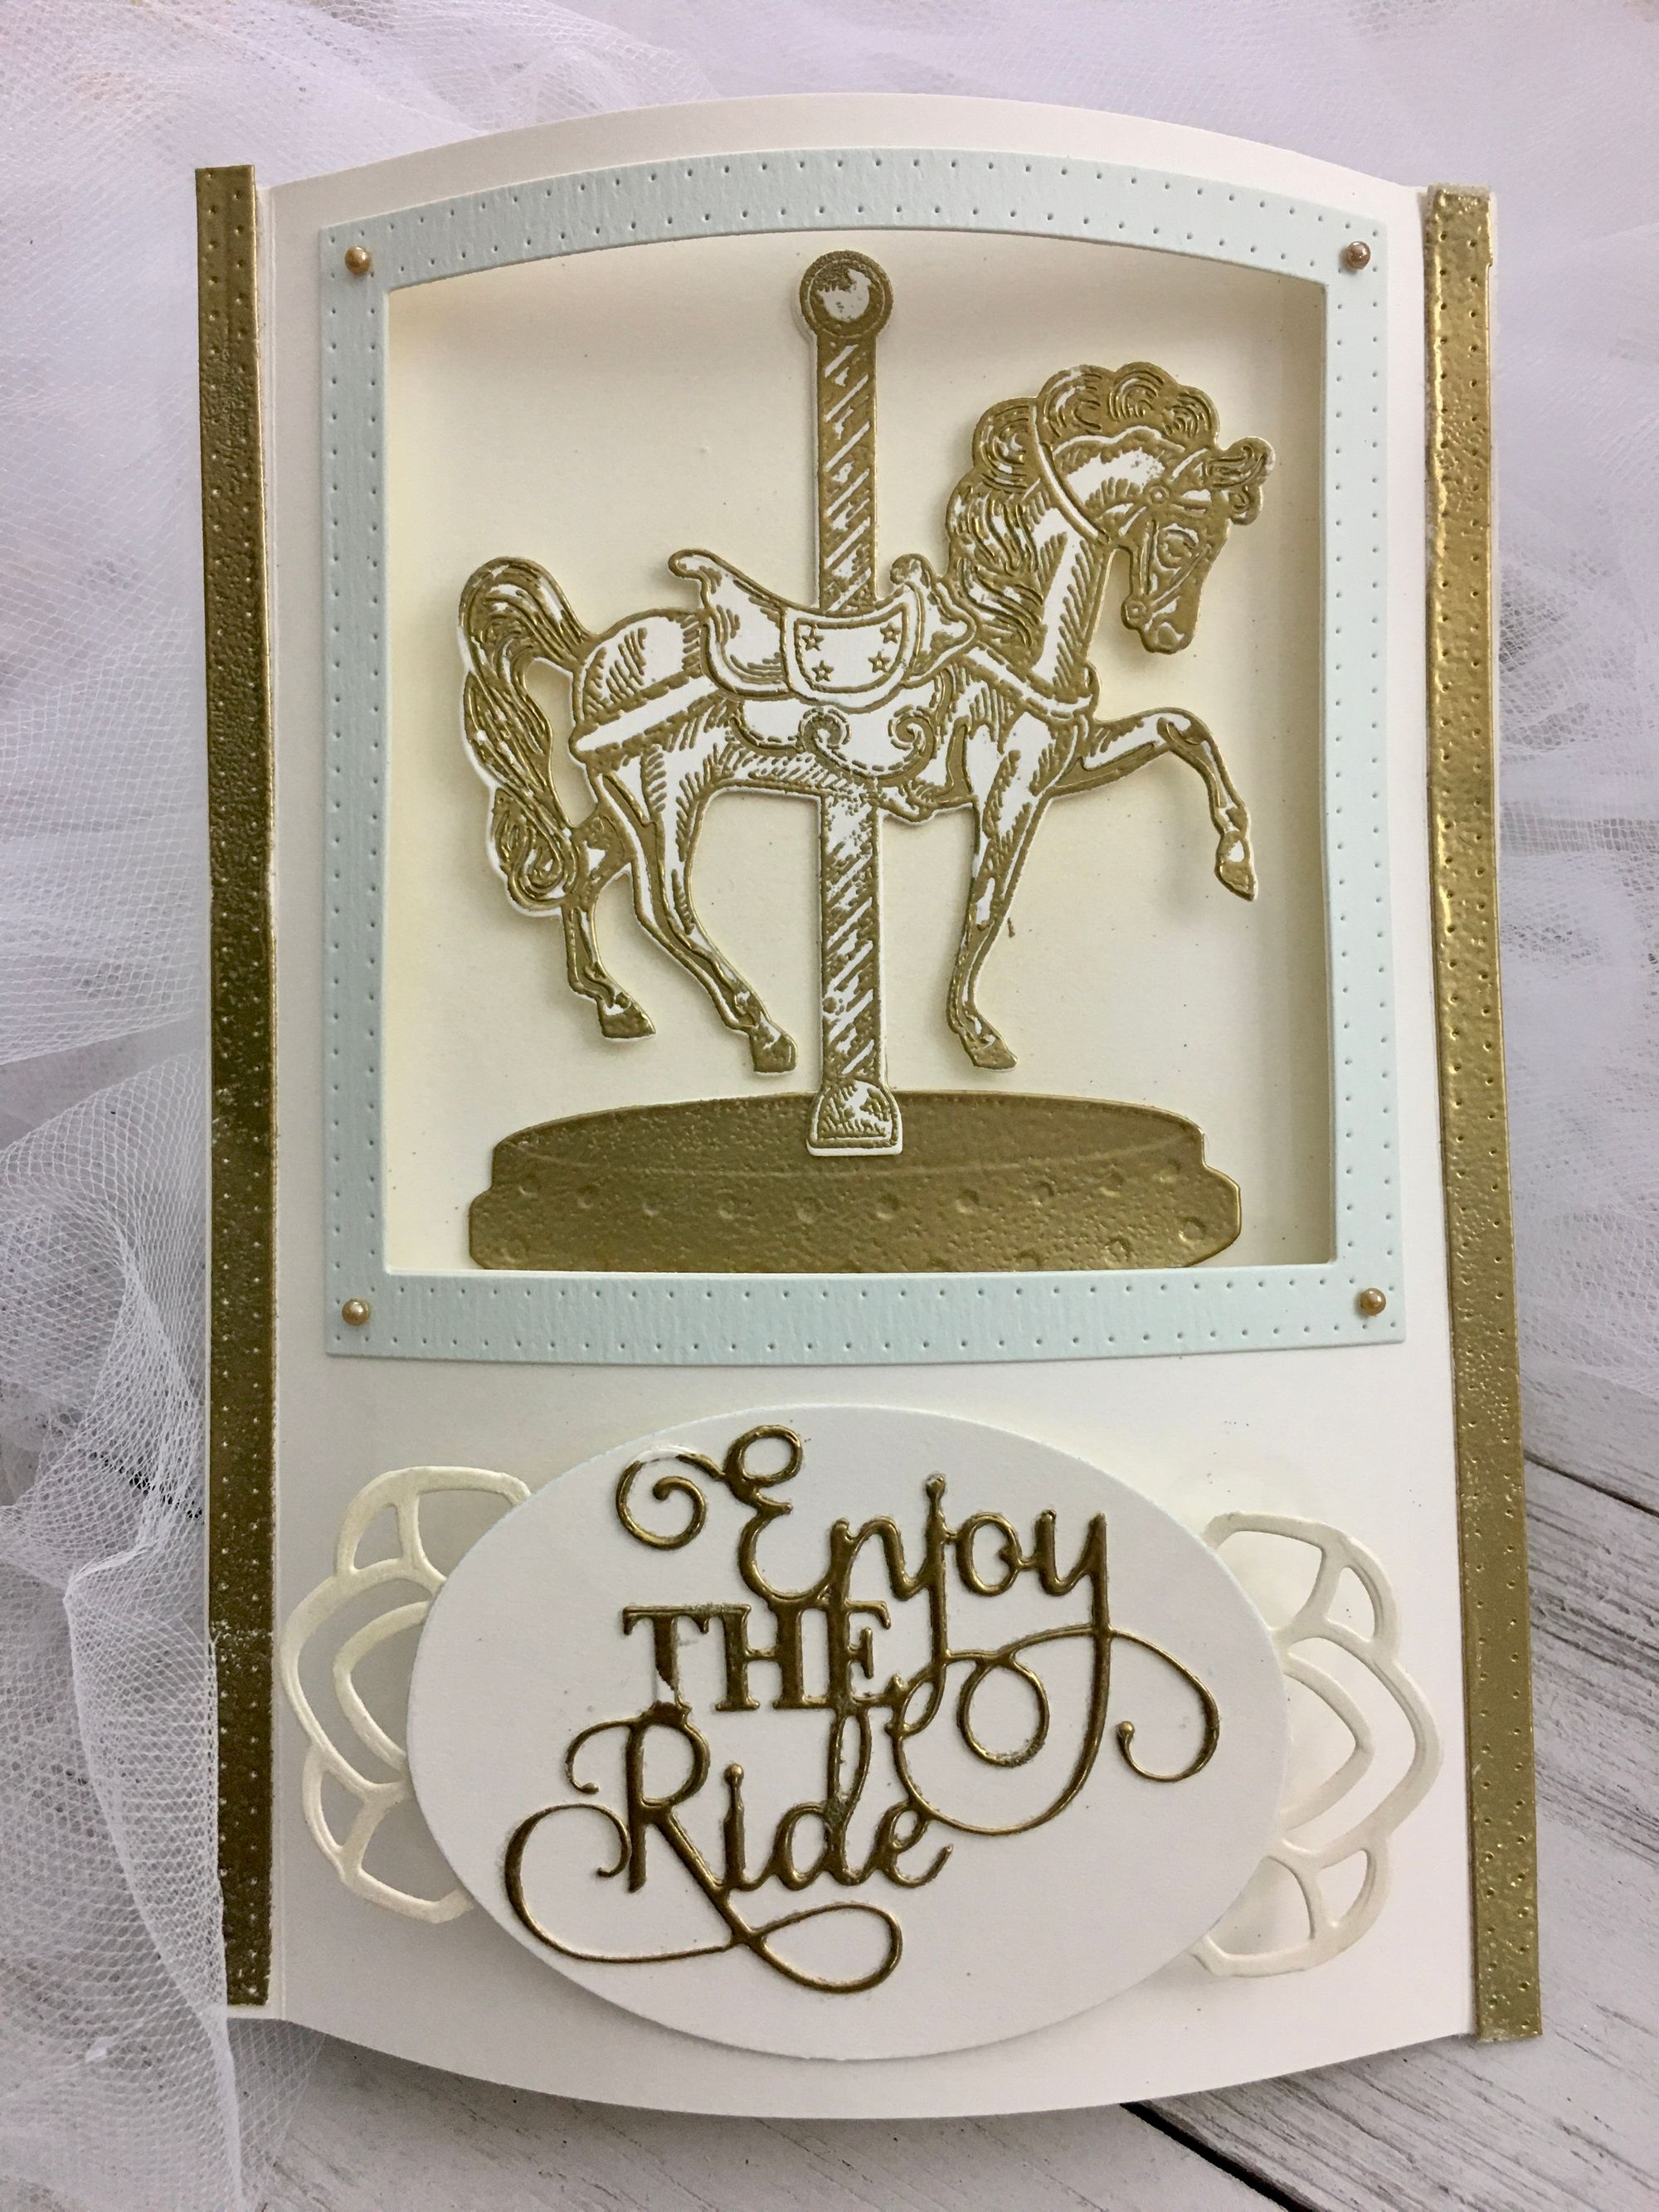
I created this card with the idea of sending it to a friend of mine for their bridal shower. It's all about the idea of celebrating and "Enjoying the Ride" towards the couples new love! I could definitely see this theme being used for a baby shower as well, changing the colour of the frame to suit the gender of the baby. So cute!
I used the new Carnival Collection corresponding stamps and dies to create this specific card, but the Convex Cardmaking technique could be applied to create a frame for any card!
Follow along with our video and written instructions as we turn this card into a gold embossed carnival!
- We begin with a 5"x 7" card base. Here we used an off-white card stock, and added a little Delicata Ink in Champagne using our Ergonomic Blending Brush as a backdrop to our carousel.
- We then cut a 5 1/4" x 7" piece of the off-white card stock which will become the convex front. On this piece, we score 1/4" from both 7" sides.
- Next, we use a square die to cut a 3 5/8" square into the convex front piece. This will become our carousel stage. We then cut a square frame (outer edge: 4 1/4" x 4 1/4" and inner edge: 3 5/8" x 3 5/8") out of a light blue card stock and attached it to our convex front.
- To create the actual convex card, we secure the scored 1/4" sides of the convex front piece to the front edges of the card base. We used double sided tape to do this. This should pop your convex front out from the card base.
- We then cut and embossed 1/4 strips to sit on top of the 1/4" sides of the card.
We heat embossed with Bright Gold Detail Embossing Powder. - We used the Carousel Die to cut out the Carousel base and then heat embossed the bottom using the same technique.
- Next, we stamped the Carousel horse using Versamark and heat embossed with the Bright Gold embossing powder again. Then we used the Carousel horse die to cut out our stamped image.
- The Carousel base is secured to the card base using double sided tape. The Carousel horse is lined up on top of the Carousel base and attached with double sided tape or 3D foam tabs.
- The sentiment was cut using the Carousel Animal dies, then coated in Versamark and embossed. It was then attached to an piece of oval card stock with embellishments using Sticky Specks.
- Add gold pearls to add a finishing touch and your Convex Carousel Card is complete!
Products Used:
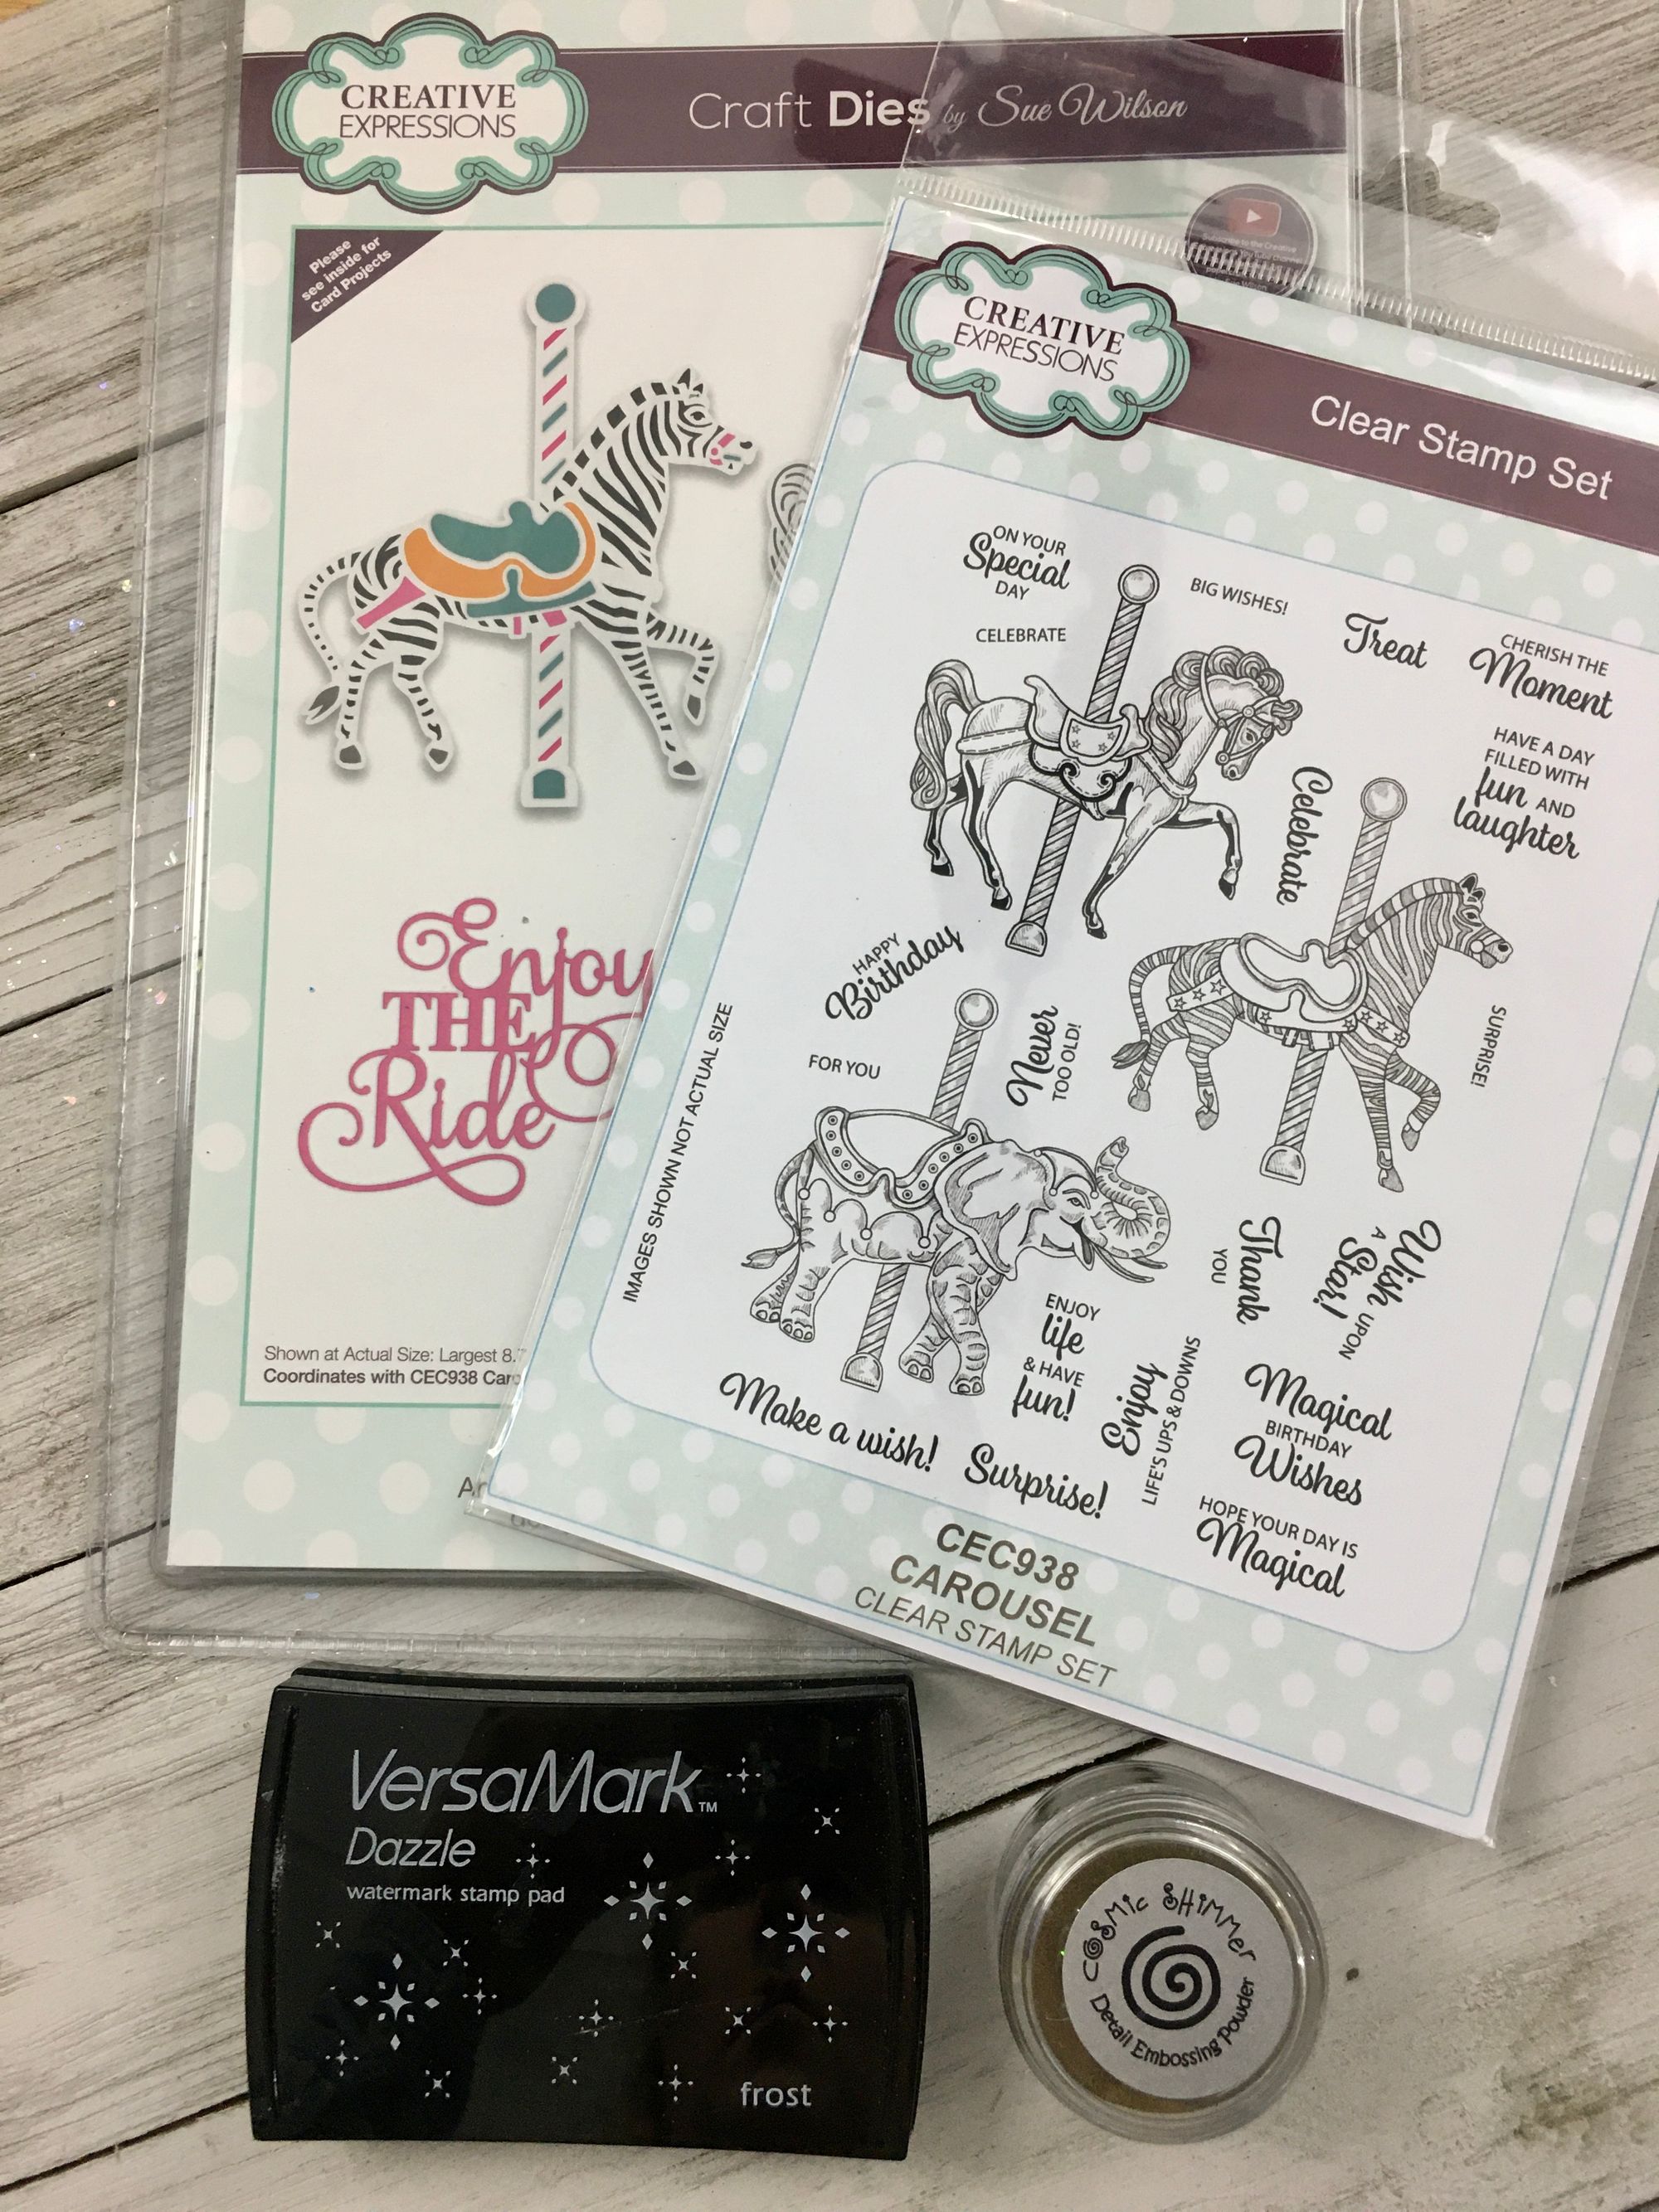
CREATIVE EXPRESSIONS Carousel Die: CED23041
CREATIVE EXPRESSIONS Carousel Animals Die: CED23042
CREATIVE EXPRESSIONS Carousel Clear Stamps: CEC938
COSMIC SHIMMER Detail Embossing Powder in Bright Gold: CSEP02
Versamark Ink Pad: VMP001
Thanks for following along with us! Be sure to share your Convex Creations with us on our Facebook Group, Crafting with Ecstasy.
Happy Crafting!