Christmas Cardmaking with Ecstasy Crafts
We hope these cards inspire you to get into the holiday spirit!
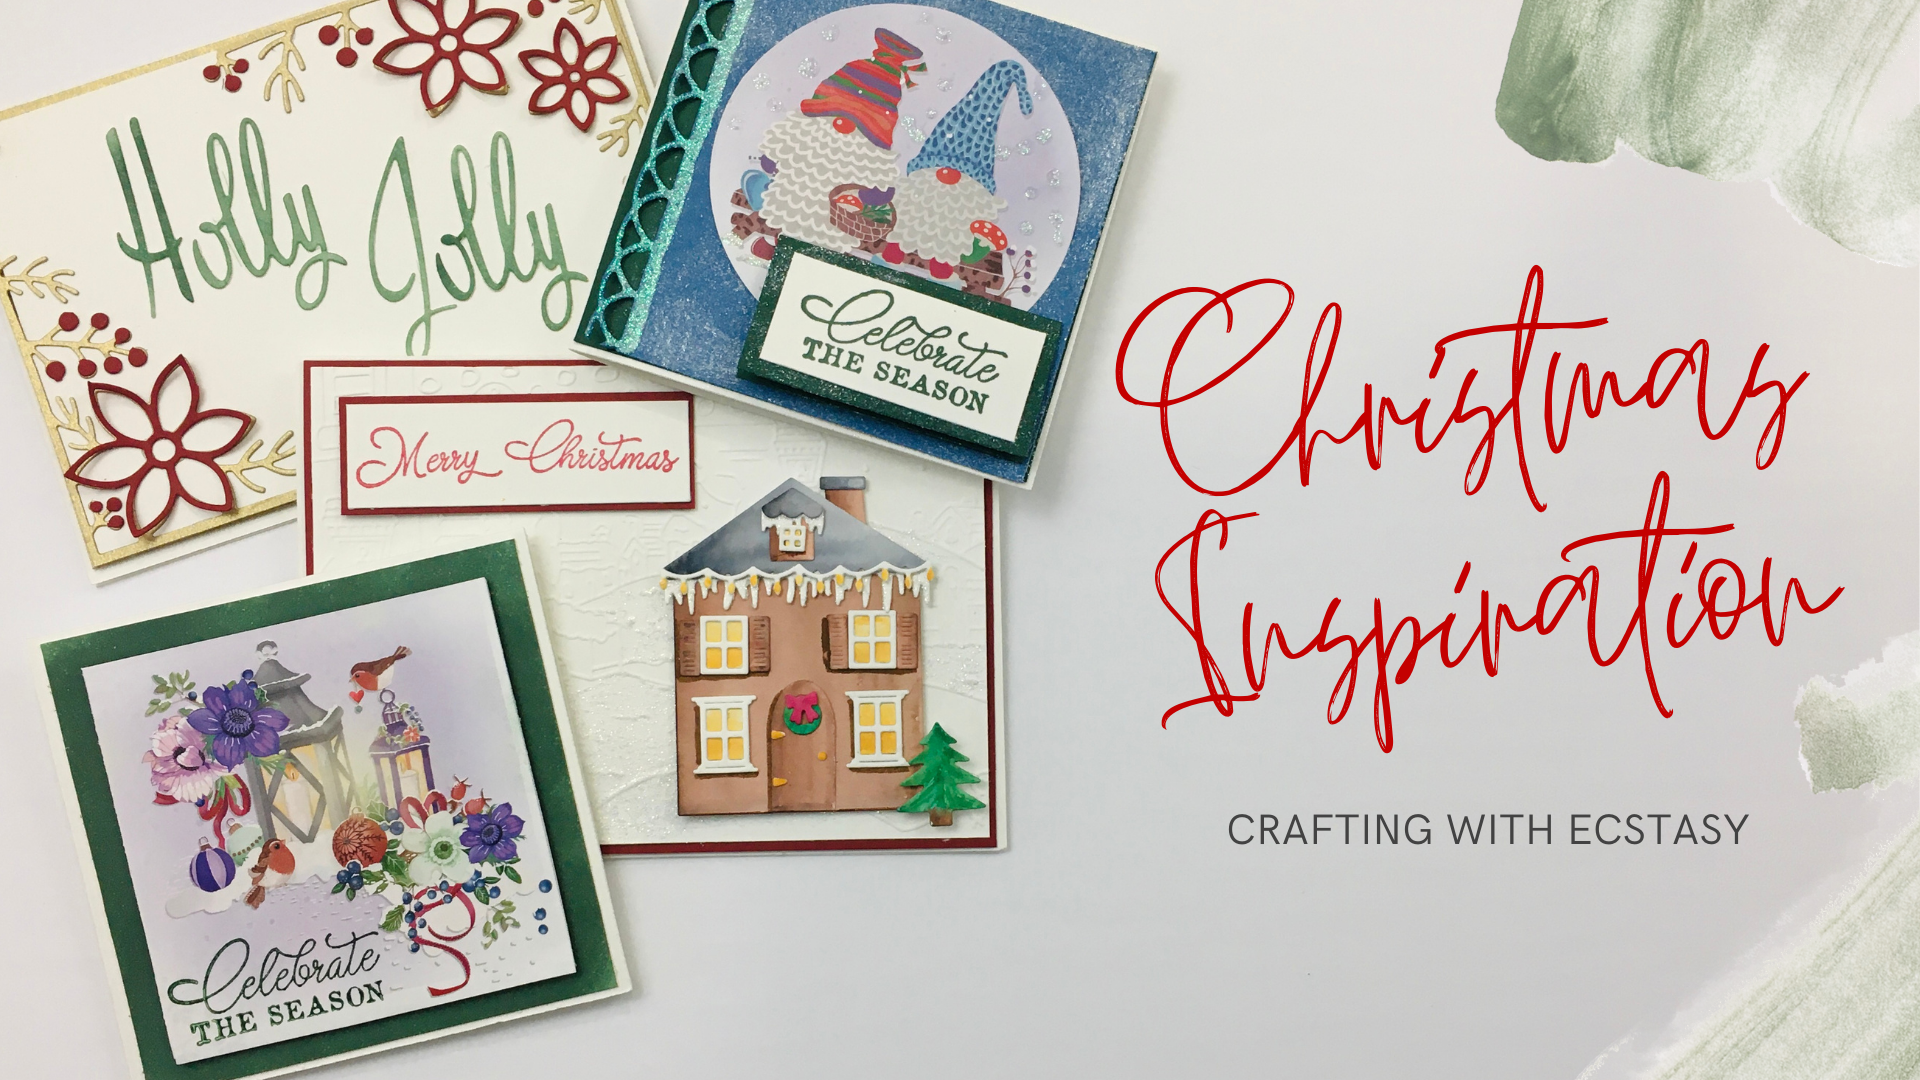
These cards are all made from elements that were in our Mega Christmas Sampler Bundle for our Black Friday Sale. Following along with our video and the step-by-step instructions. If you weren't able to grab a Bundle, you can find the individual products at the bottom of the instructions for each card. Either way, we hope these cards inspire you to get into the holiday spirit!
Holly Jolly Frame

Step-by-step Instructions:
- Cut Coconut cardstock 8 ⅜” x 6” and score down the center
- Cut Antique Gold cardstock 5 ⅝” x 4” and attach to the front of the card base.
- Cut Coconut cardstock 5 ⅜” x 3 ⅞” and attach to the center of the Antique Gold base.
- Die cut CED3188 frame from Antique Gold cardstock and again from the Rich Red cardstock using only the inner flower frame die.
- Trim the outside straight edges of the gold frame using a paper cutter so that you are left with approximately 1/16” of trim around the frame. Clip off the right lower corner and the top left corner so that you are cutting away 2 or 3 branches from each corner and you have 2 separate pieces of frame.
- Attach these gold frame pieces, using Sticky Specks, to the top right corner and the lower left corner, lining the edge with the Antique Gold frame on your card.
- Clip off pieces of the red berries and the flower from your red die cut piece and attach on top of the Antique Gold flower frame.
- Die cut IME243 words from Coconut cardstock coloured with green ink or Prism Craft Markers. Attach to the center of your card with Sticky Specks or craft glue.
- Add gold pearls to the corners.
Products Used:
IME243 - Dee's Distinctively Dies - Holly Jolly Joy
CED3188 - Festive Collection Pretty Poinsettia Frame Craft Die
PC009 - Foundation A4 Pearl Cardstock 230gsm pk 20 - Antique Gold
41007 - Foundation Cardstock 25 sheets 220 gsm - Rich Red
41051 - Creative Expressions Foundation Card Coconut White A4 315gsm Pk20
PCM09 - Prism Craft Markers Set 9 - Greens x 6 Pens
ECSSA5 - Sticky Specks A5 size
Celebrate The Season Toppers
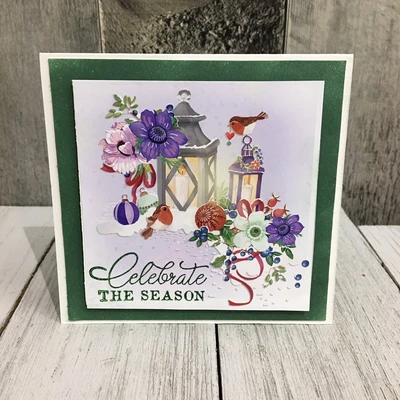
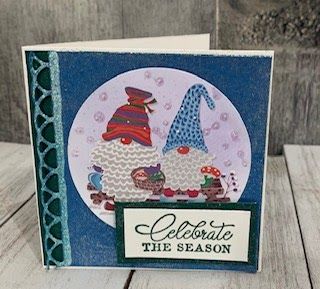
Step-by-step Instructions:
- Cut out the toppers from EWK1279
- Cut two base cards from Coconut White cardstock 8 ¼” x 4 ⅛”. Score down the center
- Cut 2 x green cardstock 4” x 4” and attach to fronts of card base using foam tape.
- Using ‘Celebrate the Season’ stamp from STAMPWC489, stamp directly onto the topper or make a tag: stamp onto a 2 ¼” x 1” piece from coconut paper framed with a 2 ½” x 1 ¼” green frame.
- Add toppers directly onto the green card base using foam pads to raise it up for dimension or add it to a blue cardstock with the edge cut using Configurations die edger. Add some sparkle by applying a thin coat of Gilding Polish to the blue cardstock and then attach on top of the green card base.
- Attach stamped tag with foam pads or foam tape.
Products Used:
EWK1279 - Christmas Wishes Gnomes A4 Cutting Sheet
41051 - Creative Expressions Foundation Card Coconut White A4 315gsm Pk20
STAMPWC489 - SL Clear Stamp Winter Charm 105x148mm nr.489
CSMGP08 - Cosmic Shimmer Gilding Polish in Pearl Lustre
Cosmic Shimmer Luna Paste or Glitter Kiss - CSLPMPEARL-Moonlight Pearl, CSGK16-Frosty Sparkle
CED6413 - Configurations Linear Elegance Edger Die
65000003 - 3D Foam Pads - 5mm square (2mm thick)
Forest Green Cardstock
Medium Blue Cardstock
Christmas House Scene

Step-by-step Instructions:
- Cut Coconut cardstock 8 ⅜” x 6” and score down the center
- Cut Rich Red cardstock 5 ⅝” x 4” and attach to the front of the card base.
- Cut Coconut cardstock 5 ⅜” x 3 ⅞” . Emboss this piece with your die and emboss machine using PIF004. Add a thin layer of Glitter Kiss or Luna Paste to the embossed image only where it looks like there should be snow such as on the bottom of the snowy scene. Attach to the center of the Rich Red cardstock.
- Die cut all pieces from coconut cardstock using FRA10320
- Colour the pieces of your house shading darker on the left outside edges and lighter in the center to add depth. Attach the pieces of your house with craft glue.
- Using the ‘Merry Christmas’ stamp from STAMPWC489, stamp onto a 2 ¼” x 1” piece from coconut paper framed with a 2 ½” x 1 ¼” rich red frame. Attach to the front of your card with the foam tabs.
Products Used:
FRA10320 Frantic Stamper Precision Die - Christmas House
41051 - Creative Expressions Foundation Card Coconut White A4 315gsm Pk20
PIF004 - Embossing Folders - Snowy Stairs and Bow
Cosmic Shimmer Luna Paste or Glitter Kiss - CSLPMPEARL-Moonlight Pearl, CSGK16-Frosty Sparkle
65000003 - 3D Foam Pads - 5mm square (2mm thick)
41007 - Foundation Cardstock 25 sheets 220 gsm - RichRed
Prism Craft Markers - PCM14, PCM08, PCM11, PCM07
HM427 - Helmar 450 Quick Dry Adhesive
STAMPWC489 - SL Clear Stamp Winter Charm 105x148mm nr.489
Thanks for following along with us! Be sure to share your Christmas Card creations with us in our Facebook Group, Crafting with Ecstasy.
Happy Christmas and Happy Crafting!