3 Cards Using Cosmic Shimmer Gilding Flakes

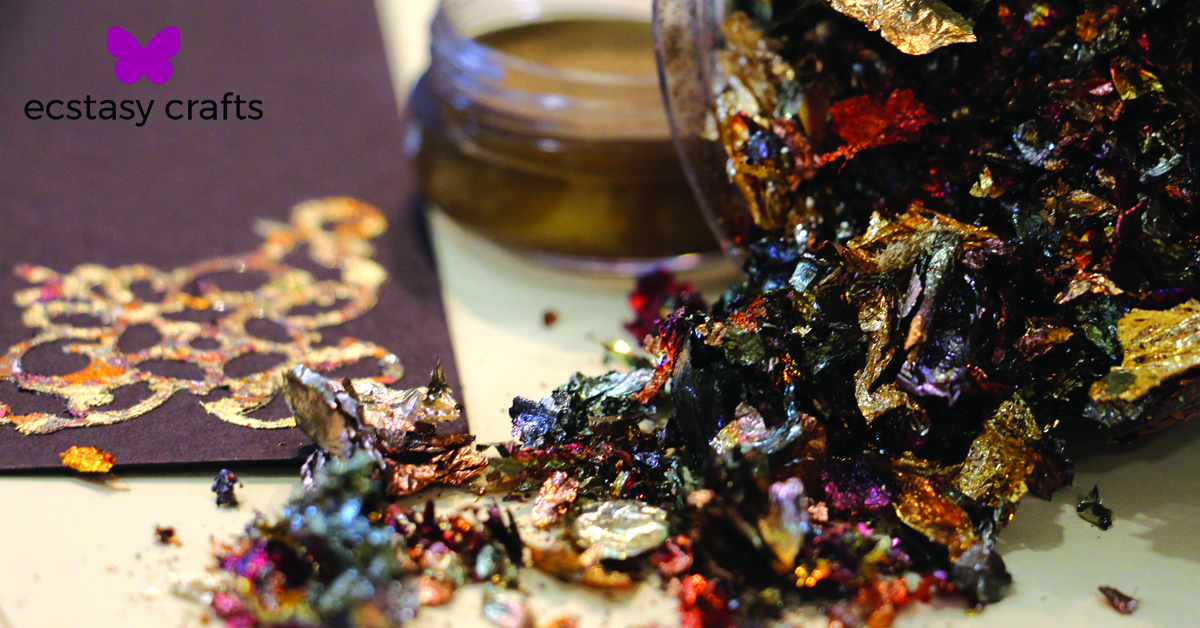
Cosmic Shimmer Gilding Flakes
This product has been around for a while, but it is especially popular right now and for good reason. Nothing screams Fall like the metallic shine of Gilding Flakes. Try them with double-sided tape, glue, or double-sided stickers for designs that are so beautiful no one will ever guess how easy it was to create them.
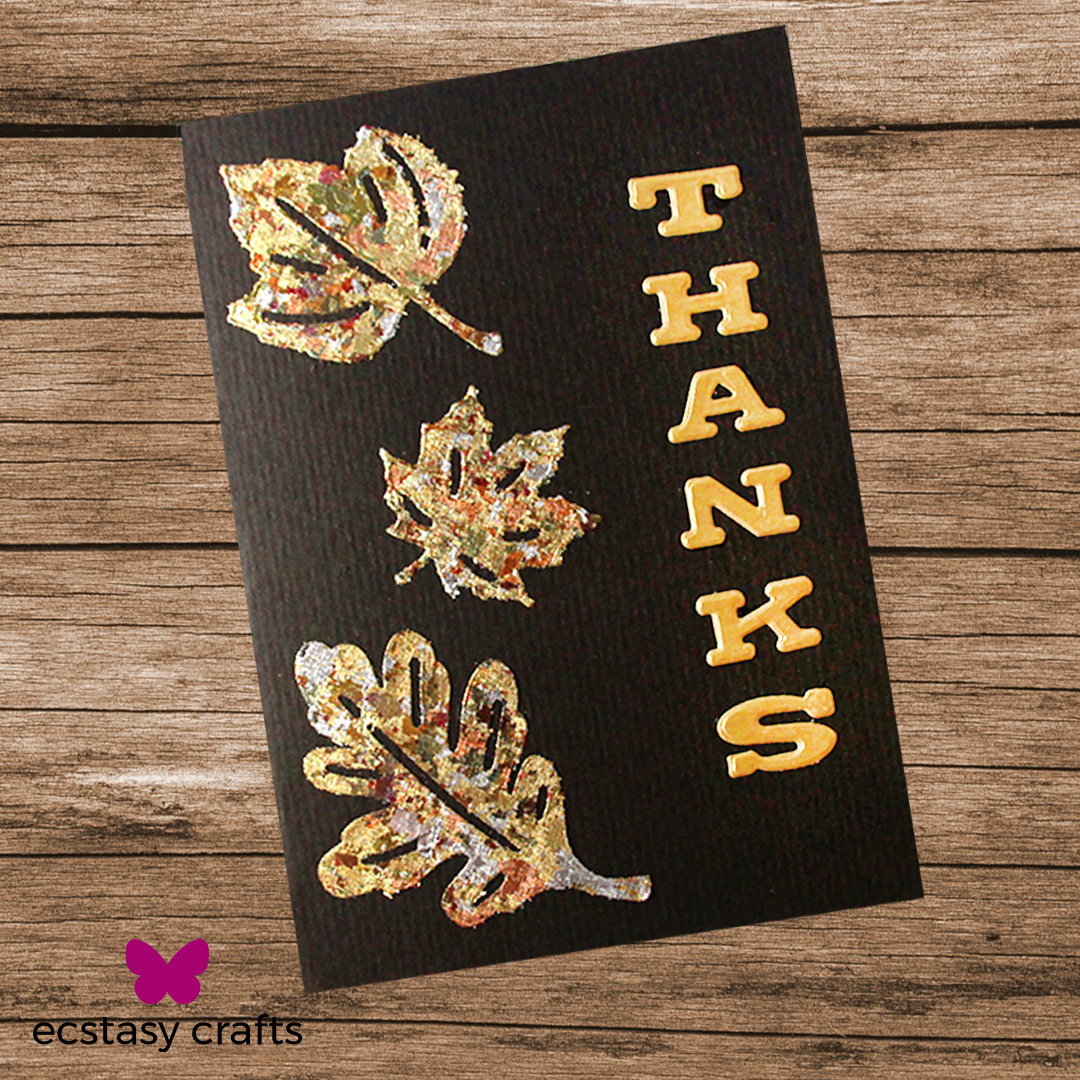
We've been having some fun playing with the Gilding Flakes this week to design a quick and easy fall card as a make and take project for our upcoming Open House. Here's what we came up with:
We even created a quick video to show you how it works:
Try it yourself:
Supplies
*Packaged cards with Envelopes 4x6 in Brown K4098-30
*Tweezers
*Double-Sided Sticky Sticker - Leaves 2951DS.
*Cosmic Shimmer Gilding Flakes in Egyptian Gold CSGF (or choose your favourite shade).
*Joy! Crafts Rubber Stamp Cleaning Pad 62000038 (or tool of your choice to spread the Flakes).
*Antique Gold A4 cardstock PC009 (or cardstock in your favourite Fall colour).
*Creative Expressions Thanks Die CED5408.
*Cosmic Shimmer Specialist Acrylic Glue CSF02 (or any clear drying glue)
Instructions
- Using tweezers, carefully remove your double-sided sticker from it’s backing and apply it to the corner of your card.
- Sprinkle the leaf with Cosmic Shimmer Gilding Flakes in the colour of your choice. If you are uncertain how much to use, we recommend starting with a pinch of flakes, and building up as needed.
- Use your tool of choice to spread the flakes over your sticker. We prefer using a stamp cleaning pad cut into smaller squares, but you can experiment with other tools such as brushes or even a soft bristle toothbrush. Be sure to brush gently so that flakes are spread across the sticky surface, without any scratches showing in the finished product.
- Once you are happy with your sticker, repeat steps 1-3 with two more stickers, laying them out in alternating patterns and keeping them to ⅔ of the card.
- Once all of your leaves have been applied. cut out the letters you will use to form your sentiment using the Creative Expressions Thanks Die (CED5408) and some high quality gold cardstock (we recommend Creative Expressions A4 Cardstock in Antique Gold PC009, but you can choose your favourite colour to match your leaves).
- Apply the letters to your card using your tweezers and a clear-drying glue such as Cosmic Shimmer Specialist Acrylic Glue (CSF02).
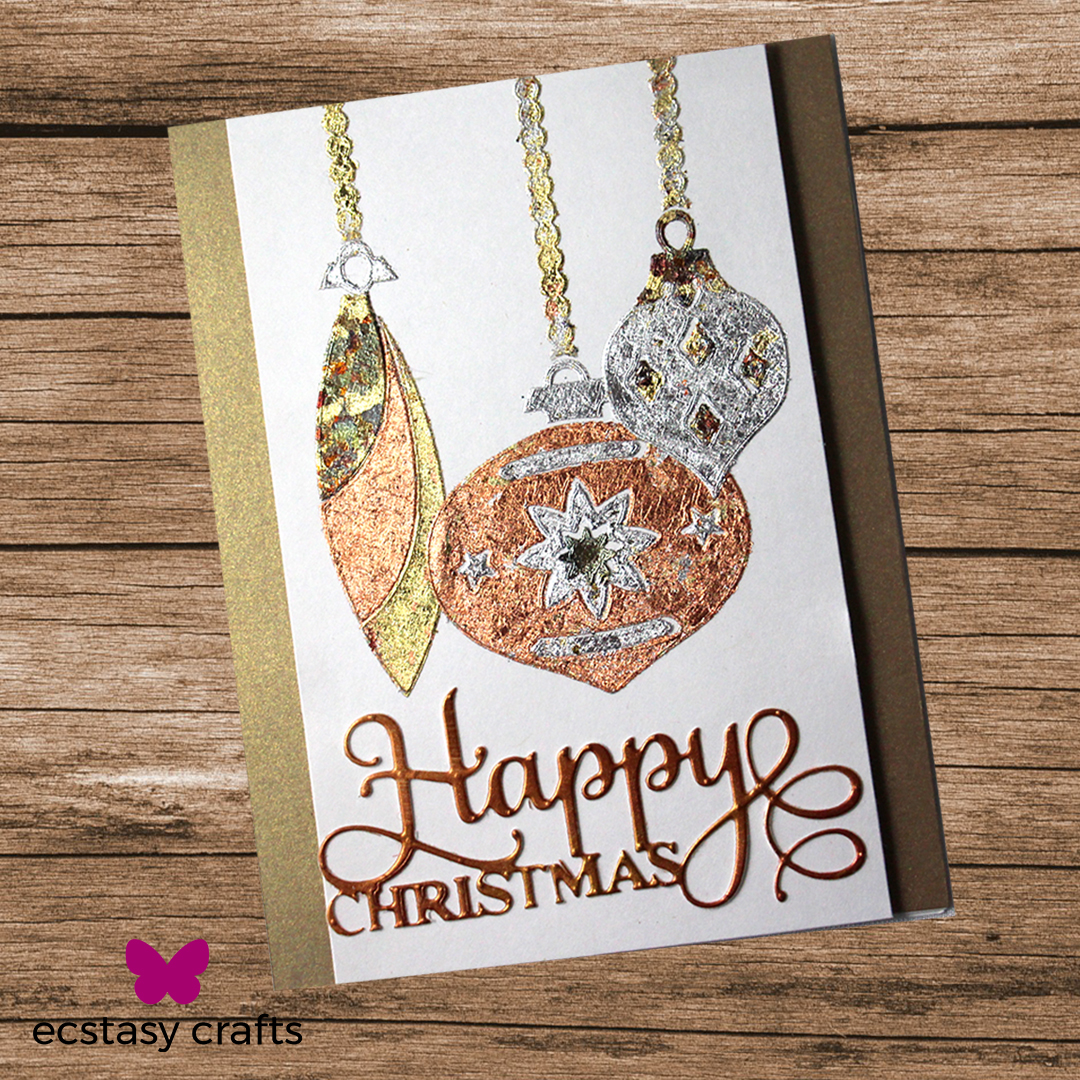
We used the same technique of using Gilding Flakes with double-sided stickers to make a more advanced card (which you can also see in the video). It turned out beautifully.
Supplies:
- Gilding Flakes - CSGF
- Joy! Rubber Stamp Cleaning Pad - 62000038
- Foam tape 2 mm - 65000023
- Double-Sided Sticky Sticker - Christmas Balls 2954DS
- Antique Gold Paper - PC009
- Antique Copper Paper - PC008
- Mini Expressions Collection Stacked Happy Christmas – CEDME015
Instructions
- Select the images you would like to add to your card. Add them one section at a time and using the Joy! Rubber stamp cleaning pad spread the flakes all around with a gentle hand and then again when it is covered fully with a slightly heavier hand to remove all the excess flakes.
- Repeat to all the sections of the stickers you want added to your project.
- Trim your image to 3.5” x 5.5” and mount with Foam tape onto a 4 ¼” x 5.5” card base cut form the Antique Gold paper.
- Cut the sentiment and adhere to the bottom of the Christmas Balls Card.
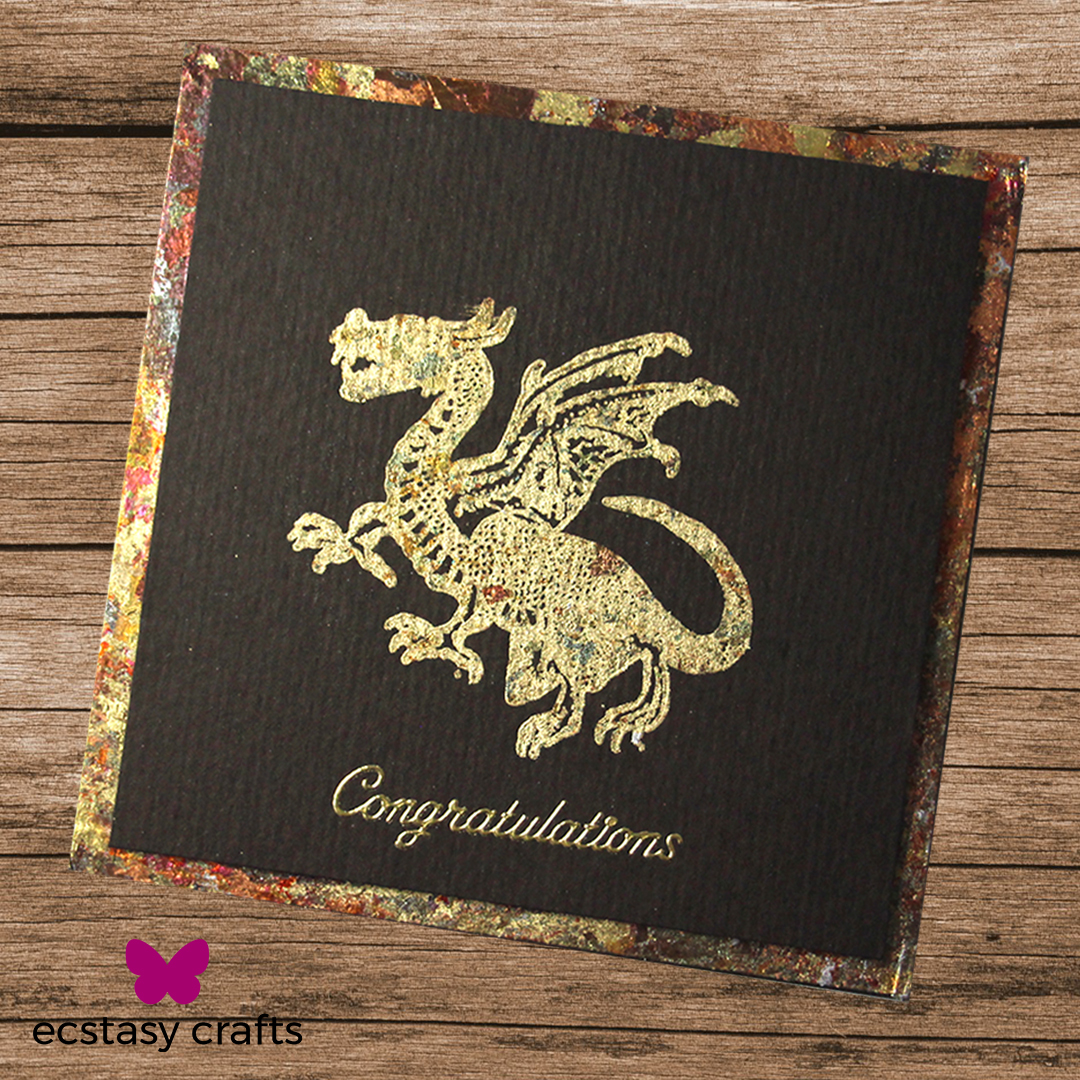
Finally, we tried out a different technique using the Gilding Flakes. Instead of using double-sided stickers, we designed this card with a stamp and Flake and Glitter Glue.
Supplies
- Gilding Flakes - CSGF
- Joy! Rubber Stamp Cleaning Pad - 62000038
- Cosmic Shimmer Flake and Glitter Glue
- Be Creative Double-Sided Tape 12mm - BC12
- Foam tape 2 mm - 65000023
- Frog's Whiskers Rubber Stamp Dragon – CH3033
- Congratulations Sticker Sheet in Gold - 301G
Instructions
- Using Joy! Rubber stamp cleaning pad spread the Flake and Glitter Glue with the smooth side of the pad.
- Stamp onto your paper and allow to dry a few minutes until tacky. Clean your stamp while this dries.
- Apply gilding Flakes loosely on top of the stamped image.
- Using the Cleaning Pad spread the flakes all around with a gentle hand and then again when it is covered fully with a slightly heavier hand to remove all the excess flakes.
- Trim stamped image to 4.5” to 4.5”.
- Trim dark brown cards stock to 10” x 5”. Apply double-sided tape to the edge of your card base and apply Gilding Flakes and rub in with the cleaning pad.
- Bump up the Dragon image with 3D tape and adhere it to the face of your prepared card base.
- Finish the card with the Congratulations sticker, or a sentiment of your choice.